
Most of the time, WordPress will be able to handle any file you want to upload to your website without breaking a sweat. However, in some cases, you might need to upload a file so large it can make WordPress stop in its tracks and hit you with a ‘413 Request Entity Too Large’ error.
This particular message can pop up when you’re trying to upload any type of file, be it an image, a plugin, or a theme. There are ways to work around it, but the smart thing to do is to configure your website to handle large uploads in the future without the error constantly popping up.
In this article, we’re going to talk about what the Error 413 Request Entity Too Large is, what causes it, then show you three ways to fix it. Let’s get to work!
What the Error 413 Request Entity Too Large Is (And What Causes It)

This particular error pops up when you try to upload a file that’s too large for WordPress to handle.
The 413 Request Entity Too Large error pops up when you try to upload a file so large WordPress can’t handle it through your dashboard. How high your limit is will largely depend on which hosting provider you’re using. For example, free website hosting users can upload files of up to 32 MB through our control panel, and you have no limits if you use File Transfer Protocol (beyond your available storage space). We’ll talk more about what FTP is and how to use it in a minute, since it’s essential to the rest of this tutorial.
In any case, the fix is simple in this situation: Tell WordPress to accept files with larger sizes. The reason why some web hosts cap these filesize limits in the first place is so users can’t abuse them. However, these days, a lot of WordPress plugins and themes pack so many features and add-ons, they tend to be rather hefty. Most reasonable web hosts have adapted to this change by increasing filesize limits. If yours hasn’t, and it doesn’t enable you to change them manually, it might be time to look for greener pastures.
What File Transfer Protocol Is (And How to Use It to Access Your Website)
FTP is a protocol that enables you to transfer files back and forth from your server. When it comes to practical applications, you can use it to access and edit your WordPress files without having to go to your dashboard. This makes it our preferred method of troubleshooting errors, and it’s also a fantastic way to upload files directly to your website.
We’re going to use FTP extensively throughout the rest of this tutorial, so let’s take a minute to take you through the process of connecting to your website using it. First off, you’ll need an FTP client, such as FileZilla, which is our favorite open-source option:

Next up, you’ll need a set of FTP-specific credentials, which is not the same as your WordPress username and password. If you’re a 000Webhost user, you can find your FTP credentials by logging into your hosting dashboard, then navigating to the Settings > General tab. Inside, there’s an FTP details section:
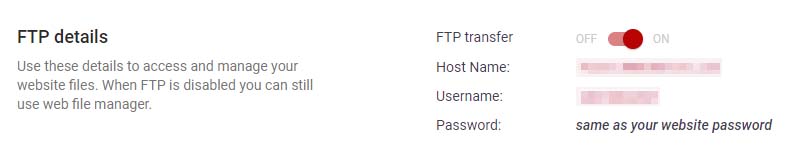
Within, you’ll find your Host Name, Port, and Username. Take note of them and run your FTP client. If you’re using FileZilla, you’ll find several empty fields near the top of the screen where you can enter your FTP credentials. As for your password, it should be the same as the one you use to access your 000Webhost dashboard:

After typing your credentials, click on the Quickconnect button to the right and wait. When the client establishes a connection, several folders should appear in the lower-right side of your screen. One of them is called public_html and it contains all your WordPress files. Throughout the next few sections, we’ll navigate to that folder to fix the 413 Request Entity Too Large error. Let’s get to it!
How to Fix the ‘414 Request Entity Too Large’ Error in WordPress (3 Ways)
Two of the fixes we’ll explore below involve tweaking your WordPress core files. These enable WordPress to run in the first place, so you should backup your website before proceeding.
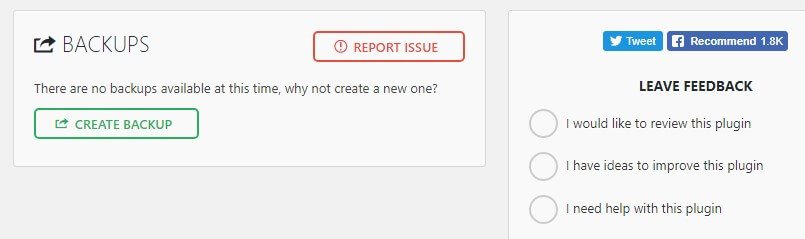
If you’re a 000Webhost user, you already have access to the All-In-One WP Migration plugin as soon as you create a WordPress website. You can use the plugin to set up new backups by going to the All-in-One WP Migration > Backups tab and clicking on the Create Backup button:
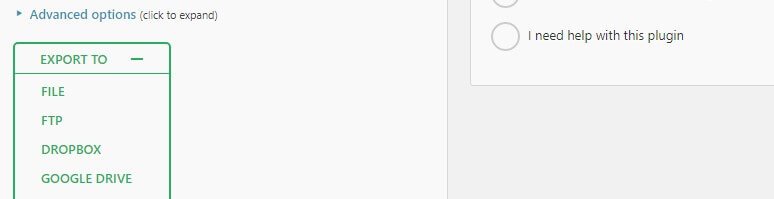
On the next screen, click on EXPORT TO and choose the FILE option to save your backup as a local file:
Now, wait while the plugin creates your backup file. When it’s ready, a download link will appear and you can save the backup file anywhere you want. Moreover, the plugin will also save a copy of your backup online, so you can return to the All-in-One WP Migration > Backups tab and find a list of existing restore points:

If you want to return your website to a previous point, just click on the RESTORE button next to the backup you chose. With that out of the way, let’s get back to talking about how to fix the Error 413 Request Entity Too Large error.
1. Upload Your Files via FTP
As we mentioned earlier, 000Webhost users can upload files of any size to their websites via FTP. In other words, it represents the perfect way to avoid the 413 Request Entity Too Large error. To be fair, using FTP is a workaround, but it makes sense if you only need to upload large files every once in a while. Plus, this way, you can avoid having to tweak your WordPress core files altogether.
We already explained how to use FTP in a previous section, so let’s get right to the specifics. When it comes to uploading files to WordPress, they usually fall into one of three categories: plugins, themes, and media files. With media files, you may need to work with dozens of images, for example. FTP enables you to queue multiple uploads and downloads without any issues, pause them at will, and resume them when necessary.
To upload plugins and themes to WordPress via FTP, you’ll need to navigate to your public_html/wp-content directory. There are multiple directories inside, but we only care about the ones called plugins and themes. If you open either of them, you’ll notice there are individual folders for each plugin and theme installed on your website:

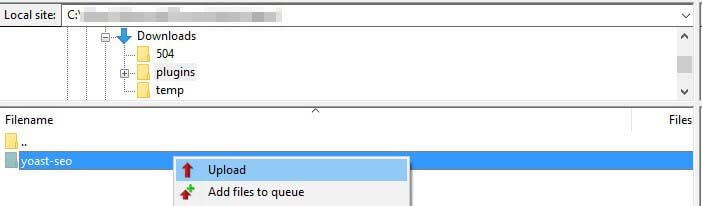
Right now, you should have a zipped file for a plugin or theme waiting to be uploaded. Unzip its contents locally, which should give you a single folder in either case. To upload it, you need to navigate to its local location within your FTP client, using the section to the left of your website’s folders:

Once you locate the folder you want to upload, navigate to either the plugins or themes directory within your wp-content folder to the right. Now, you can drag and drop the folder you want to upload to the folder where it should go, or right-click on it and choose the Upload option. Either approach works and FileZilla will now begin to transfer those files:
The upload process might take a while, depending on your internet speed and the size of the files. Just be patient and remember not to close the FTP client until there are no items left under the Queued Files tab at the bottom of the screen.
Moving on, we still have to talk about how to upload media files to WordPress. The platform stores all your images, videos, and other types of media files under the wp-content/uploads directory. If you open it, you’ll also notice there are folders named after years inside. WordPress automatically organizes your content according to the year and month you uploaded it. This way, you can find the files you want more easily:
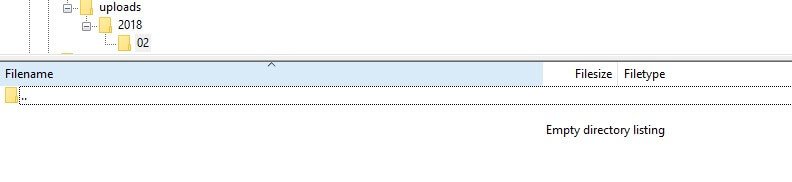 To upload media files via FTP, simply navigate to the current year and month within your uploads directory. Then, upload the files similarly to your chosen theme or plugin, and wait until the transfer is complete. Now, you can access your dashboard, and whichever files you uploaded should be ready for you to use.
2. Tweak Your .htaccess File
If you want a more permanent solution for your 413 Request Entity Too Large problem, you’ll need to get your hands dirty under WordPress’ hood. In this case, it means making a few changes to .htaccess, which is one of your WordPress core files. This governs the way your website interacts with its server. For example, we configure each .htaccess file for 000Webhost users to leverage browser caching, which is not something you’d usually see on brand new WordPress installations. Here’s how one of our .htaccess files looks:
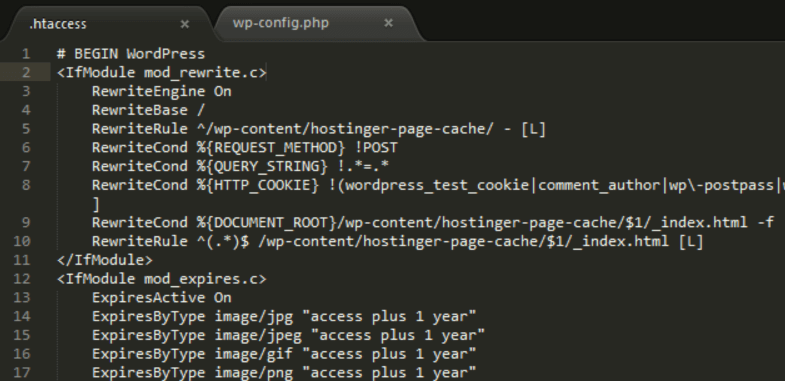
If you’re not used to dealing with code, it can be intimidating, but don’t worry – you just need to add a couple of lines to fix this problem. First off, you’ll need to locate your .htaccess file by navigating to your public_html folder via FTP. Once you see it, right-click on it and choose the View/Edit option. This will open the file using your default local text editor, enabling you to make changes to it. Look for the line that reads # END WordPress at the end of the file, and paste the following code after it:
php_value upload_max_filesize 64M
php_value post_max_size 64M
php_value max_execution_time 600
php_value max_input_time 600
This code simply tells WordPress it should support uploads of up to 64 MB. Plus, it gives you 600 seconds to process those uploads before they time out and you have to start over. For slow internet speeds, you might want to lengthen those times. As for the filesize limit we set, 64 MB should be more than enough for the vast majority of WordPress plugins and themes.
Now save the changes to .htaccess and close your editor. FileZilla will ask you if you want to update the version of the file in your server, to which you should answer “Yes”. Go ahead now and try to upload your file once more and see if the error is gone.
3. Modify Your functions.php File
This method is very similar to the previous one. In fact, we’re going to modify the same WordPress values, but we’re going to do it through a different file, called functions.php. This file enables you to define ‘classes’ and ‘actions’, and add other fun features to your WordPress website. Another way of putting it is this file has a much broader set of customizations than .htaccess, and in some cases, you can use either of them accomplish the same goal.
In any case, your WordPress installation contains several functions.php files. The best approach is to use the one assigned to your active theme, which should always load. To find it, go into the wp-content/themes directory and look for your active theme’s folder. Open it, and the functions.php file should be right inside:
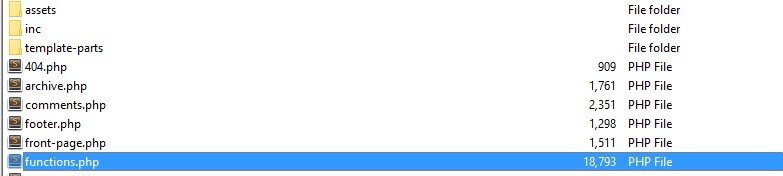
Now right click the file and choose the View/Edit option. As usual, don’t touch any code snippets you’re not familiar with to avoid affecting your site’s functionality. Scroll down to the bottom of the file until you find the /* That’s all, stop editing! Happy blogging. */ message and paste following code before that line:
@ini_set( 'upload_max_size' , '64M' );
@ini_set( 'post_max_size', '64M');
@ini_set( 'max_execution_time', '600' );
We already covered what this code does in the previous section, so paste it in, save the changes to functions.php file, and close it. When FileZilla asks you if you want to update the file on your server, say “Yes” and return to your website. Try uploading the file that gave you problems earlier and check if the Error 413 Request Entity Too Large message re-appears.
Conclusion
Uploading files through your WordPress dashboard is simple. You simply locate them, hit the Upload button, then let the platform take care of everything else. In most cases, uploads go through without a hitch, but sometimes, you may need to transfer a file so large WordPress can’t handle it. That’s when 413 Request Entity Too Large error will rear its ugly head.
Fortunately, taking care of the Error 413 Request Entity Too Large is rather straightforward. Here are three ways to deal with it:
- Upload your files via FTP while you fix the root problem.
- Tweak your .htaccess file so WordPress supports larger file sizes for uploads.
- Modify your functions.php file.
Do you have any questions about how to deal with error 413 in WordPress? Ask away in the comments section below!