Do you often find yourself daydreaming about quitting your day job, journeying to exotic lands, and earning money by writing about your adventures? With a well-written and properly monetized travel blog, you can bring this dream to life.
If you’ve been bitten by the travel bug, setting up a free WordPress travel blog is a great place to get started. By complementing your site with a reliable hosting provider, an inspiring theme, and a unique angle, you’ll be much closer to achieving your dream and making money from it.
And it’s really simple, you just need to follow these 10 steps to start a travel blog:
- Choose your niche and blog name.
- Select a quality hosting provider.
- Register your domain name and install WordPress.
- Learn the basics of WordPress.
- Choose a free WordPress travel blog theme.
- Set up your travel blog website.
- Download some essential plugins.
- Write your first post (and pay attention to reader feedback).
- Create a blogging schedule (and stick to it).
- Monetize your WordPress travel blog.
We’ll also provide some invaluable monetization tips for making your wanderlust lucrative. Let’s get trekking!
What to Keep in Mind Before Starting a Travel Blog
Typically, people decide to start a travel blog because they want to chronicle their adventures and share them with the world. Some are also interesting in making money while doing their adventuring. This is usually done by incorporating affiliate marketing, sponsored posts, product advertising, and other monetization strategies within the blog.
If you’re serious about learning how to start a travel blog, the first thing to note is that it takes hard work and commitment. Sadly, it’s not a case of spending your days relaxing on far-flung beaches, tapping out a few words between piña coladas. If you’re looking to monetize your travel blog, and even make it a full-time occupation, you’ll need to fully commit to the endeavor.
Before starting your travel blog, you should ask yourself a few important questions:
- Do I have the time to invest in getting a blog off the ground?
- Will I have the monetary resources to travel regularly? If not, do I have a sufficient amount of past adventures I can blog about until my next trip?
- Can I take constructive criticism about my writing?
- Do I have a passion for travel that will extend to multiple locations or topics, so I can cater to a wide audience?
If you answered yes to all of the above, congratulations! You’re in an excellent position to learn how to start a travel blog in WordPress.
You may notice that we’ve made multiple references to WordPress at this point. That’s because it’s the perfect platform to create your travel blog on. WordPress is the world’s most popular Content Management System (CMS), and with good reason. It enables you to get your blog off the ground without paying a cent, and with no technical experience required. What’s more, by choosing a reliable free hosting provider such as 000webhost, you can ensure that your travel blog runs smoothly and safely over the long term.
Now that we’ve addressed the initial considerations, let’s walk through how to start a travel blog using WordPress and 000webhost!
How to Start a Travel Blog For Free in 10 Steps (And Make Money With It!)
There’s no one definitive method for how to start a travel blog. However, the steps below outline an effective and beginner-friendly strategy you can try. By following along, you’ll lay the foundations of a blog that can keep you jet-setting for a long time.
Step 1: Choose Your Niche and Blog Name

It’s worth while taking some time to choose a strong niche and title, before writing posts for your blog.
Before you start blogging, it’s important to keep your target audience in mind. In order to stand out from the thousands of travel blogs online, you’ll have to figure out a specific niche to focus on. Your chosen niche should be informed both by what you are passionate about, and by what is likely to attract a dedicated audience. For example, if you complement your travel blog with exotic recipes from around the world, you’ll be targeting two major readerships (those interested in travel, and recipe enthusiasts).
Although you don’t want to rehash ground that has been obsessively covered by hundreds of travel blogs already, such as spotlighting top beaches or pointing out the best hotels, you also don’t want your focus to be so obscure that you minimize your audience. The trick is striking the optimal balance between being unique and staying relatable. There are plenty of guides out there to help you find the optimal travel blog niche, one that is marketable while still relevant to your interests. You’ll just need to invest some research time when first approaching the question of how to start a travel blog.
Once you’ve chosen your niche, you’ll be in a much better position to name your WordPress travel blog. When selecting a name, you should be careful to avoid cliches. In addition, you’ll want to avoid making it sound as though your focus is too limited. Ideally, your blog’s name should be both descriptive and memorable. It’s well worth spending at least a few days mulling over the possibilities, and testing the SEO potential of your favorites.
Step 2: Select a Quality Hosting Provider

000Webhost is a fast and reliable hosting service that can benefit your travel blog.
Choosing a reliable hosting provider is essential for any website. After all, your site won’t succeed if it suffers from slow loading times, compromised security, and regularly-malfunctioning pages. For a travel blog this step is particularly vital, since you’ll be updating your site from various locations and (hopefully) attracting an audience from all around the world.
Therefore, you’ll need to conduct some research into what kind of hosting plan and provider will best meet your blog’s needs. If you’re looking to start off with something small-scale and affordable, shared hosting may be a viable option. By choosing a free provider such as 000webhost, you can avoid common hosting pitfalls and reap major benefits.
For example, 000webhost offers an array of growth-oriented features. This means that as your site grows in popularity, you won’t need to worry about it slowing down. What’s more, 000webhost’s premium plans offer limitless disc space and bandwidth for a low cost. That way, you can keep uploading your travel images and videos without having to worry about running out of space.
Another major perk of choosing a quality hosting provider is that it enables you to set up your WordPress blog quickly and easily. For example, 000webhost lets you complete your WordPress installation in just a few clicks (more on this below).
Step 3: Register Your Domain Name and Install WordPress
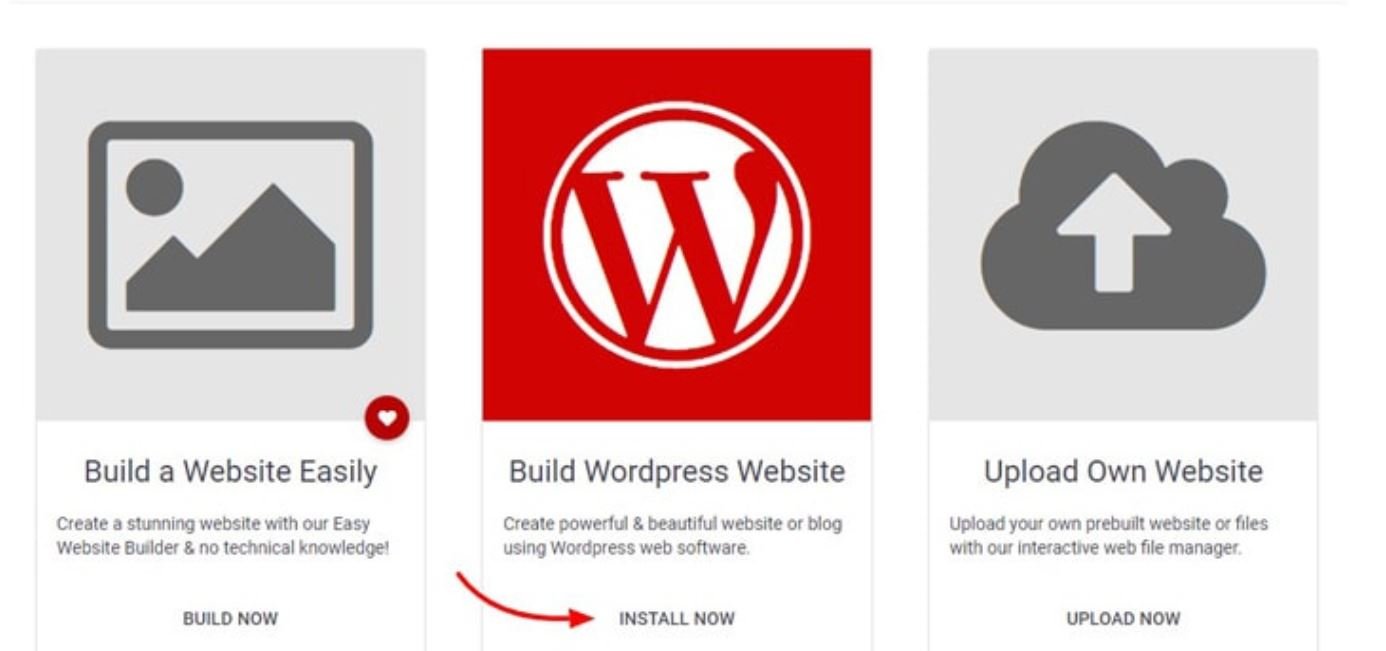
Although you can install WordPress manually, selecting a quality web host speeds up the process.
To ensure that your website is easy to find, it will need a domain name (such as wordpress.org). A strong domain name should be short and easy to remember, and should incorporate the name of your website (or key search terms related to it ). You’ll also want to avoid using numbers and hyphens, as those elements make it harder for searchers to get your domain right.
The right domain name helps you establish credibility for your site, and therefore makes it much more attractive to potential advertisers. After choosing a domain for your site, you’ll need to register it and make sure it’s connected to your web host.
After that, you just need to install your WordPress blog. Fortunately, the 000webhost auto installer makes installing WordPress simple. You just need to selecting Build Website after signing up for a plan, and choose Install Now for the Build WordPress Website option. To learn more, check out our comprehensive guide for installing WordPress.
Step 4: Learn the Basics of WordPress
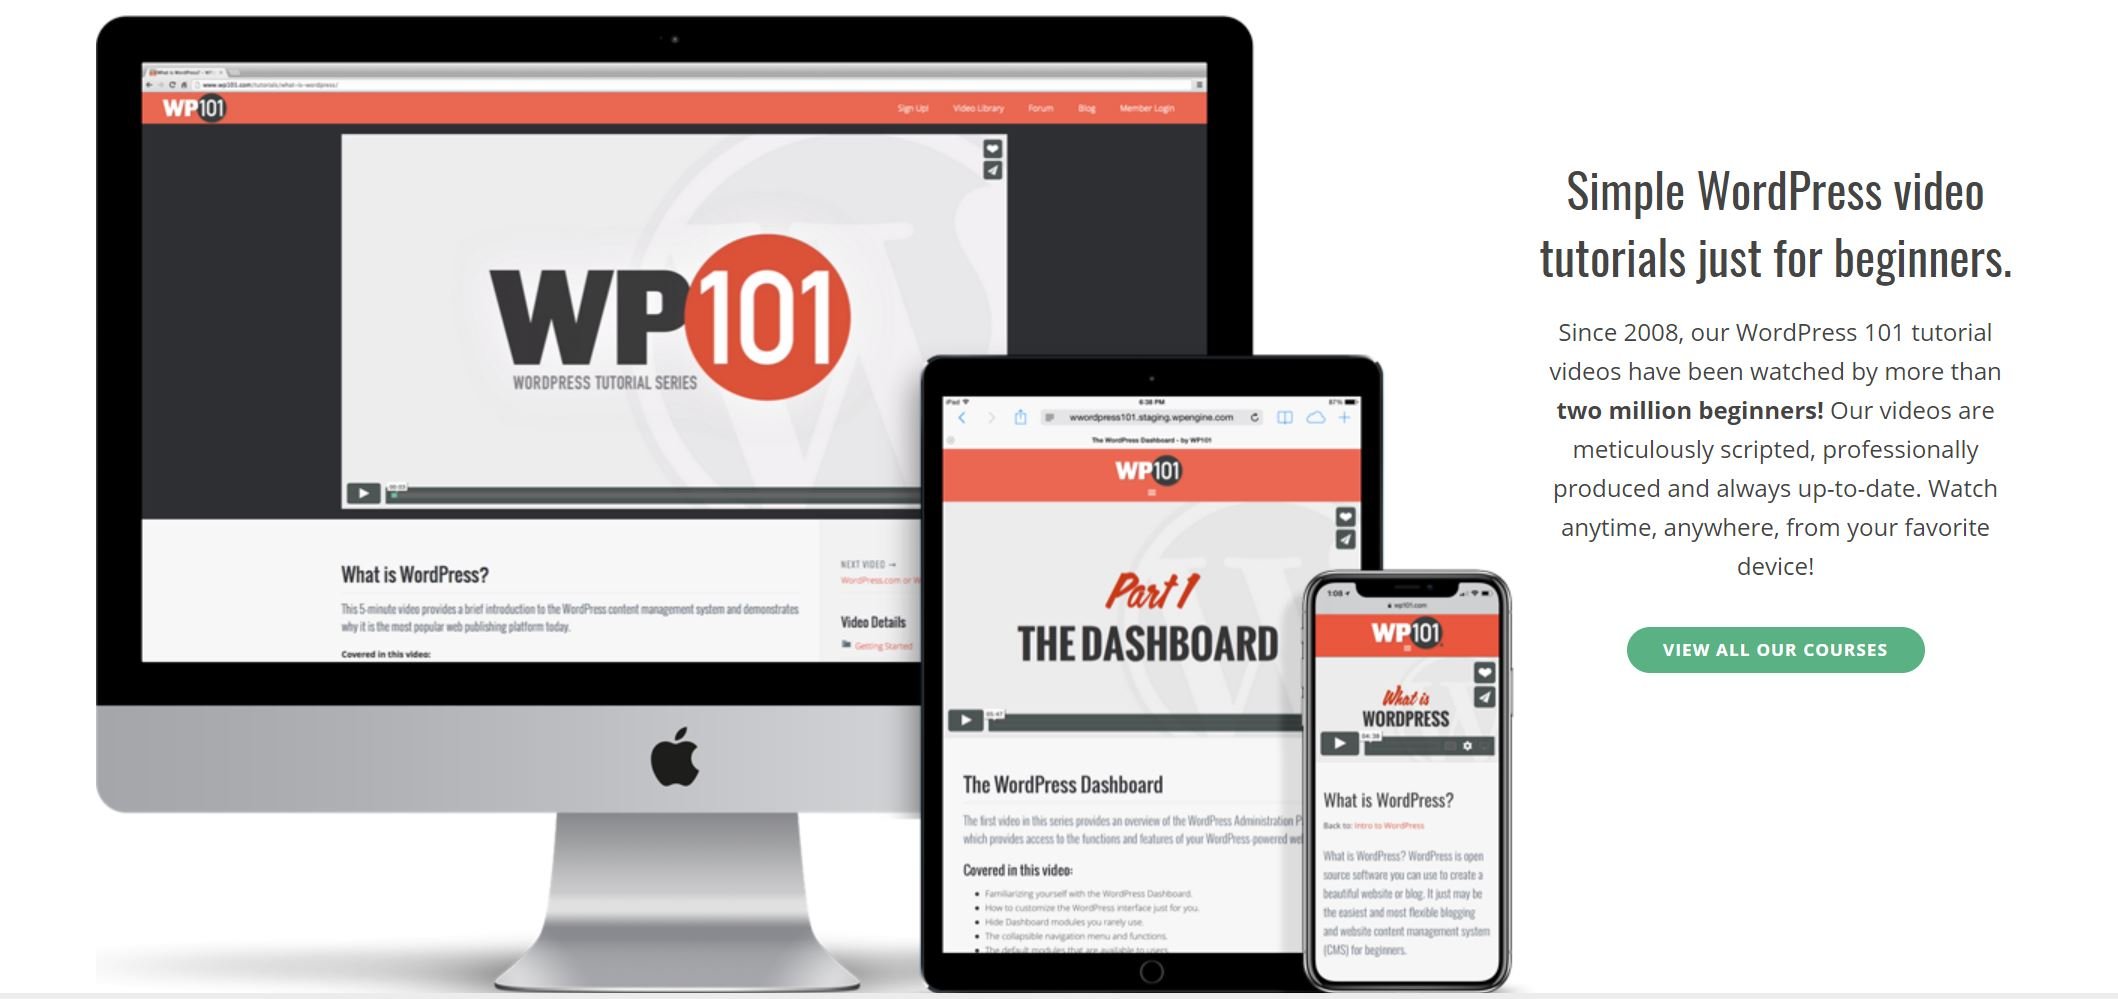
Online courses, such as those offered by WordPress 101, are useful for learning about the platform.
Part of learning how to start a travel blog is understanding the platform you’re using thoroughly. As we touched on earlier, WordPress is extremely user-friendly. The first tasks you’ll want to master are building pages (the static sections of your site with content that rarely changes, like your About Me page or Contact details) and creating posts (your regularly-updated blog entries).
This will require mastering the visual editor, which is what you’ll be using to write your travel blog entries. The editor is an intuitive tool that’s designed for beginners to pick up quickly. You’ll also want to become very familiar with the Add Media feature, which you’ll use to complement your blog with images, videos, and other media.
Of course, these are just the basics of using WordPress. You don’t have to learn the platform inside and out to ensure that your travel blog is successful. However, it helps to absorb as much as possible. The good news is that there are plenty of useful tutorials out there to make this process easy.
One excellent resource is WordPress 101, which covers the fundamentals of the platform and its most useful plugins, in a series of easy-to-digest videos. The first four videos (which cover the basics of the platform, including the WordPress dashboard) are free, although you’ll need to make a small payment to view the whole course.
If you prefer a completely free approach, you can also work your way through the WordPress Lessons offered by the official Codex. Once you’ve mastered the basics, you’ll have a much better idea of how to start a travel blog.
Step 5: Choose a Free WordPress Travel Blog Theme
Your travel blog will need to be both visually stunning and easy to navigate.
To inspire your readers to start planning their own itineraries, and to keep them coming back to your site, you’re going to need a stunning layout. That’s where a WordPress theme comes into play. Your site’s theme is a collection of files that controls its appearance and layout. Most of the time, you can customize your theme to meet your precise requirements.
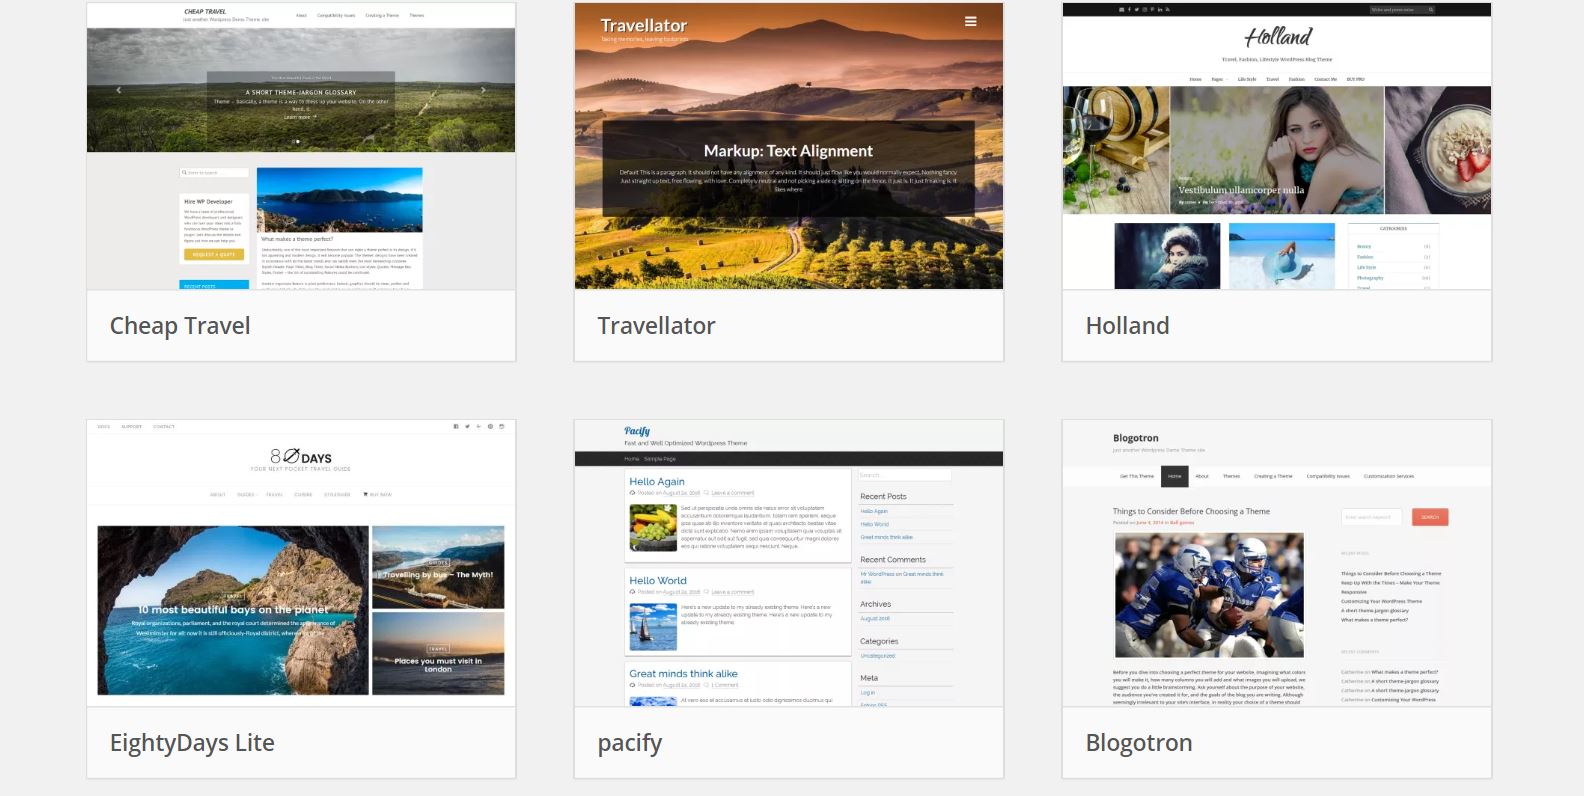
You’ll be pleased to note that when it comes to choosing a WordPress travel blog theme, there are plenty of free options to pick from. All you have to do is make your selection, download it in your WordPress dashboard, and tweak its appearance in the Customizer section.
You should feel free to select whatever theme you like. However, there are several elements that every truly great travel blog theme should possess. These are:
- Plenty of space for adding your best travel photos.
- A menu that’s easy to navigate.
- Visually-striking homepage modules that showcase your latest posts.
- A responsive design, so your site looks just as good on a mobile device as it does on a computer.
- Social media integration features.
The free theme Travel Notes epitomizes these qualities, for example. This theme is versatile and highly-customizable. Plus, it makes it easy to link your travel blog to Instagram, enabling you to broaden your reach.
Step 6: Set Up Your Travel Blog Website
WordPress makes it easy to set up the various pages, posts, and media for your travel blog.
Once you’ve installed and tweaked your theme, you’ll have all the building blocks in place to actually start putting your website together. The best way to start is by creating the various pages that will make up your site. For a travel blog, this might include Home, About Me, My Blog, Latest Destination, Gallery, Travel Advice, etc.
Creating pages in WordPress is very simple. You’ll need to navigate to Pages > Add New in the dashboard to get started:
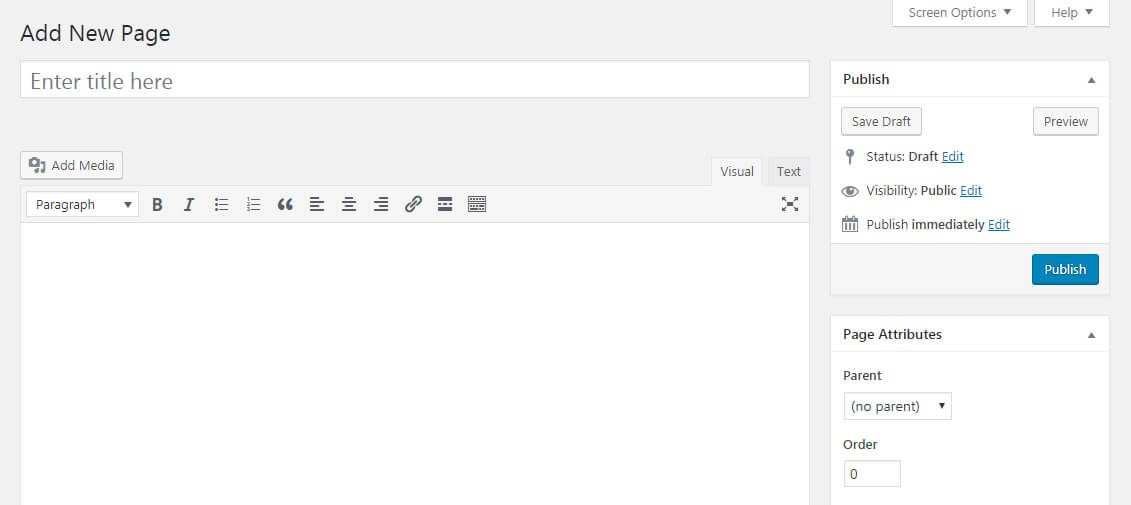
Here, you can create your content using the visual editor and the other tools available. Select Publish when you want to make the page live, or choose Save Draft if you still have work you want to complete before publishing the page.
With your pages set up, you can start creating posts – the entries for your travel blog. The interface for putting together posts is very similar to the one for creating pages. You’ll simply go to Posts > Add New in the dashboard, create your content, and select either Publish or Save Draft when you’re done. We’ll discuss what to keep in mind when writing your travel blog posts in more detail later on.
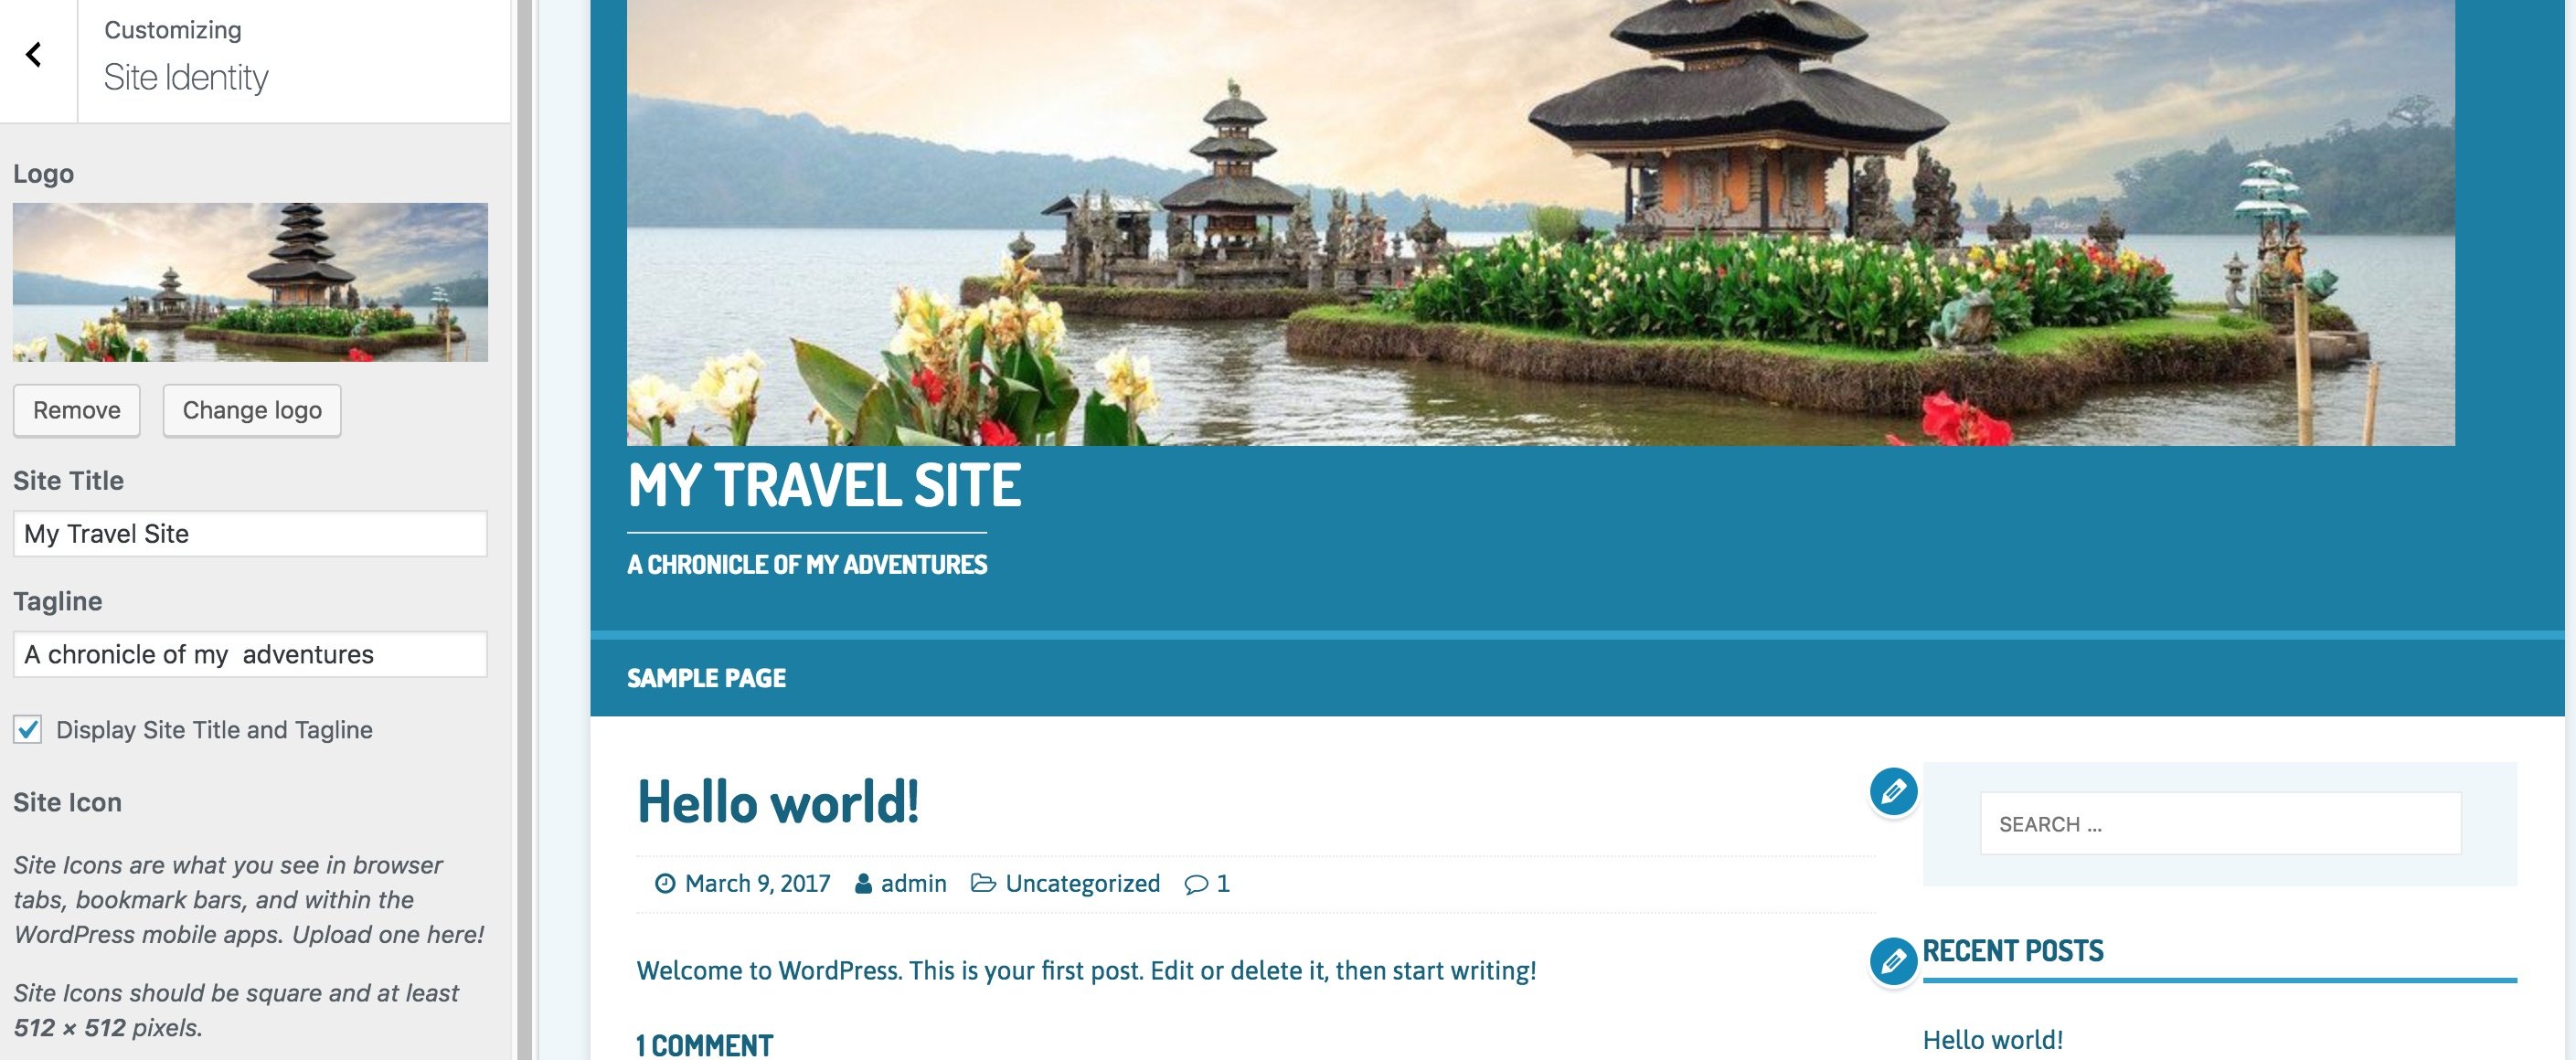
It’s worth noting that you can configure your home page to feature your latest blog posts (which is typically recommended for a travel blog) or to remain static. To do this, go to Appearance > Customize in your dashboard:
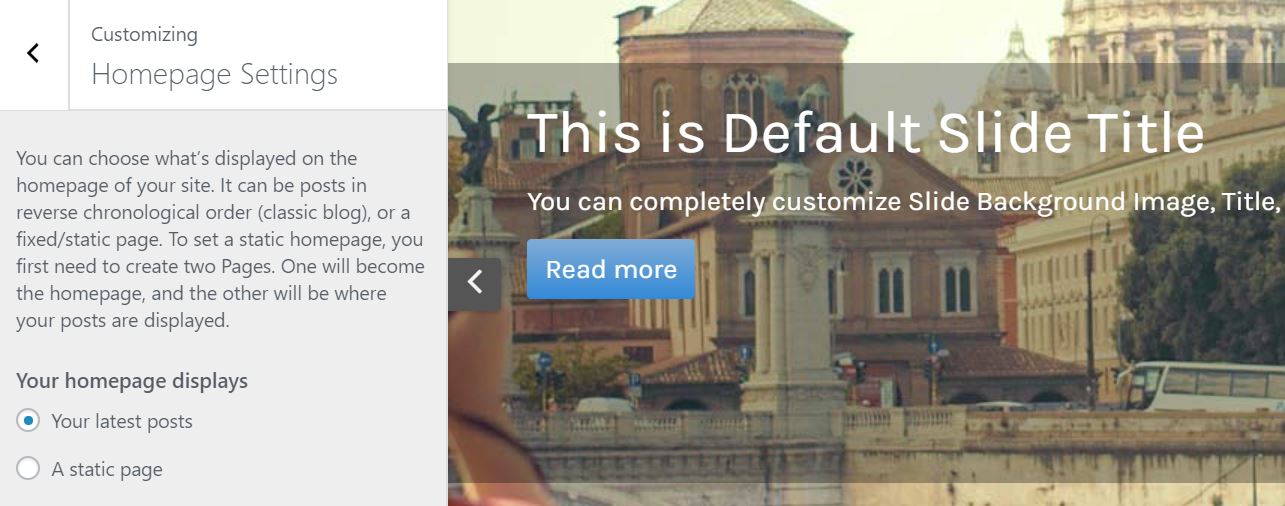
Once there, navigate to Homepage Settings, and select one of the two radio button options under Your homepage displays. Then, click on Publish to save your changes.
Step 7: Download Some Essential Plugins

By using WordPress plugins, such as Geo Mashup, you can extend the functionality of your travel blog.
If you want to learn how to start a travel blog using WordPress, you’re probably going to need some plugins. Although WordPress offers a lot of features already, plugins – software that extends the functionality of the platform – can help you improve your blog on both the front and back ends.
You can start by installing some of the most popular free plugins, which are useful for virtually all kinds of sites. Search Engine Optimization (SEO) will be critical to your blog, for example, as you’ll want to rank as highly as possible on search engine results. Therefore, we strongly recommend downloading the Yoast SEO plugin to help you optimize your site.
Since speed and security are also vital to your site, it makes sense to download plugins that will enhance these elements. Wordfence Security is useful for protecting your site from malicious intruders, while W3 Total Cache can help you boost performance. Akismet Anti-Spam is another essential plugin that does just what the name implies. Then there’s Jetpack – a multifaceted plugin that enables you to track website analytics, enhance security, and speed up your media content delivery.
What’s more, there are some free plugins that are particularly well suited to travel blogs in particular. Geo Mashup, for example, enables you to save location information for posts and pages and present it in the form of interactive maps. Another excellent option is Shareaholic – a plugin that can help you expand your reach on social media, and streamline the monetization of your site.
Step 8: Write Your First Post (And Pay Attention to Reader Feedback)

If you want to make it as a travel blogger, it’s vital to hone your skills through practice and feedback.
As we mentioned earlier, there is no one perfect method for how to write a travel blog. However, when writing your first post, there are some key techniques that are well worth bearing in mind.
For example, you’ll want to make sure you speak to your audience using language that is casual, fun, and informative. Your writing should transport your readers to the destinations you’ve visited, so don’t be afraid to be descriptive and honest. It’s also a smart idea to avoid cliches whenever possible (“sun-kissed beaches” and “island paradise” come to mind). After all, if your blog posts are packed with trite language and don’t contain plenty of specific details, they run the risk of sounding like stale advertisements.
Once you’ve written your first post, it’s best to share it with a few good friends and family members first. The feedback they provide will help you further hone your craft, and will prepare you for the responses you’ll receive from your audience once the post is live. In addition to improving your writing via constructive criticism, you may also want to peruse online articles regularly, and pick up a few tips and tricks on travel writing from the pros.
Step 9: Create a Blogging Schedule (And Stick to It)
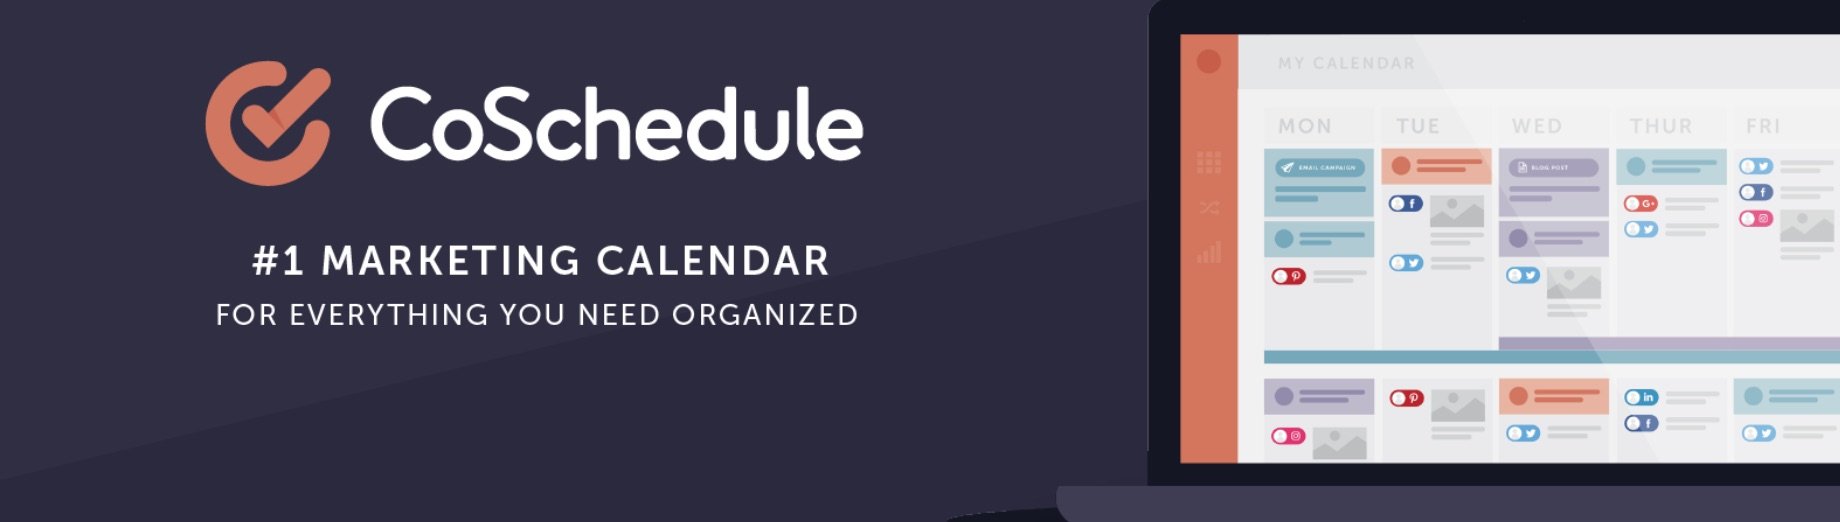
WordPress plugins like CoSchedule can help you develop and adhere to a schedule.
Learning how to start a travel blog involves figuring out how to stick to a rigorous blogging schedule. Your audience is likely to be fickle, especially during the early stages of your blog’s life cycle. If they don’t receive quality content from you on a regular basis, they’ll look for it elsewhere instead. By creating a schedule, and planning out your articles ahead of time, you can eliminate stress and cultivate a consistent readership
Naturally, you’ll need to create a blogging schedule that matches your personal circumstances. When first starting out, a good rule of thumb is to limit your output to no more than three posts per week. This will enable you to prevent burnout, invest more time into each post to ensure its quality, and better assess your metrics and feedback. You can even go down to one post a week, although less than that can make it harder to build an audience.
As for the actual tools you’ll use to maintain your schedule, there are plenty of free options to choose from. CoSchedule, for example, enables you to effortlessly create a blogging calendar. You can then color-code and organize it to be as clear and useful as possible.
Step 10: Monetize Your WordPress Travel Blog
Selling e-books is an excellent way to monetize your travel blog.
After completing the preceding steps, you’ll be ready to start priming your blog for monetization. This is a broad topic that warrants a good deal of research, and you’ll naturally need to develop a regular readership base before you can start earning significant revenue. However, let’s run through a few of the main techniques to consider when learning how to start a travel blog and make money from it.
Affiliate marketing, for example, is a comparatively simple and efficient monetization method. It involves signing up to an affiliate program, and then inserting links to that company’s products or services into your content. Every time one of your readers clicks an affiliate link and makes a purchase as a result, you will receive a commission. This monetization method is relatively easy to learn, and is a great way to make a little income without expending much effort.
Banner ads present another smart way to monetize your travel blog. You can place a visual advertisement for a particular company either in the header or footer of your WordPress site, promoting travel-related items. In a similar vein, you might consider reaching out to related businesses, and offering to write paid reviews for a specific destination or product.
Finally, you can also pair your blog with an additional product that can be monetized. This could be anything from an e-book you’ve written, sellable items you’ve produced (clothing, home wares, handicrafts, etc), or even your travel photographs (providing that they are of sufficient quality). You can market these products by featuring them prominently on your blog, and giving your readers an easy means of purchasing them. If you’re interested in going this route, the WooCommerce plugin will probably come in handy.
Conclusion
We won’t pretend that travel blogging is a quick and easy way to earn money while globe trotting. It requires dedication, consistency, and a willingness to take and apply criticism. However, as we have seen, learning how to start a travel blog is made easy with WordPress, the right hosting plan, and a few key tools and techniques.
Do you have any questions about how to start a travel blog? Let us know in the comments section below!
Image credits: PNG Image.