
When you boil it down, WordPress is a piece of software, which means it requires a server and memory in order to run (among other things). However, in some cases your server won’t provide the platform with enough resources for it to run properly. This can result in the memory exhausted error in WordPress.
The good news is that WordPress is very flexible, and you can tweak your site so that it has more resources to play with. That way, you won’t ever run into the words “fatal error: allowed memory size of 67108864 bytes exhausted” ever again. What’s more, making this change should only take a few minutes.
In this article, we’re going to talk about what the memory exhausted error in WordPress is and what causes it. Then we’ll teach you how to fix the error using two different methods. Let’s get to it!
What Is the Memory Exhausted Error in WordPress?

The memory exhausted error in WordPress looks intimidating, but it’s not difficult to fix.
When we talk about the memory exhausted error in WordPress, we’re referring to this message: “fatal error: allowed memory size of 67108864 bytes exhausted”. The term “fatal error” sounds ominous, but it isn’t quite as bad as it sounds.
WordPress is built using PHP. In that programming language, a fatal error means that your website ran into an issue that stopped it from executing a script. A script is a part of your website’s code that defines how it behaves in response to a particular input or action. If you think of WordPress as your website’s Operating System (OS), scripts would be the equivalent of executable files. For another example, plugins are made up of many scripts working together to fulfill a specific goal.
The memory exhausted error shows up when WordPress tries to execute one of these scripts, and finds out that it can’t because it doesn’t have enough memory. As you might imagine, how much memory WordPress has to play with depends on your web host and plan. For example, here at 000Webhost we allocate 68 MB – 67198864 bytes rounded up – to all WordPress websites, which is often more than enough.
If you require a few more resources to keep your website running properly, however, you can fix the memory exhausted error directly. Let’s talk about how to do that.
How to Fix the Memory Exhausted Error Using FTP (In 3 Steps)
Before we jump in, it’s important to understand that this tutorial will require you to make changes to your WordPress site’s files. It can be intimidating to tweak your files’ code, but we’ll walk you through the entire process.
Also, if you don’t have a recent backup of your website, take a moment to create one now. Every 000Webhost site comes with the All-In-One WP Migration plugin already set up, which is capable of creating full backups in minutes. Check out this article for more information on how to use it. Then, you can move on to the first step.
Step 1: Locate Your wp-config.php File
wp-config.php is one of WordPress’ core files. It packs critical information about your website’s settings, and without it the platform wouldn’t work at all. It’s also the file you’ll need to edit if you want to increase the amount of memory your server allocates to WordPress.
To pull this off, you’ll need to use File Transfer Protocol (FTP), which enables you to send, receive, and edit files from your server using a client. We recommend using FileZilla, since it’s compatible with all major OSs and is a great open-source tool.
Connecting to your website via FTP requires a specific set of credentials. If you’re a 000Webhost user, you can find yours by logging into your dashboard and visiting Settings > General. Then, look for the FTP Details section:
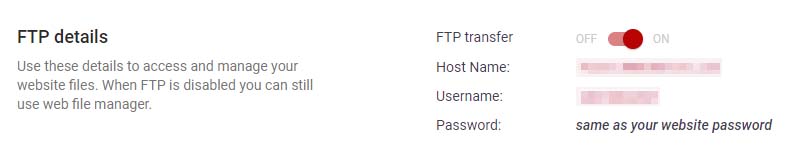
You’ll find three fields labeled Host Name, Username, and Password. Take note of them, and then open FileZilla. You should see three corresponding fields at the top of the screen, where you can type in your FTP details (you can leave the Port field blank). After that, click on the Quickconnect button to the right:

When the client establishes a connection, some folders will show up in the lower-right quadrant of FileZilla. Double-click on the one called public_html. This is your WordPress root folder, where all the platform’s files reside. The wp-config.php file is right inside, so it shouldn’t be difficult to find:
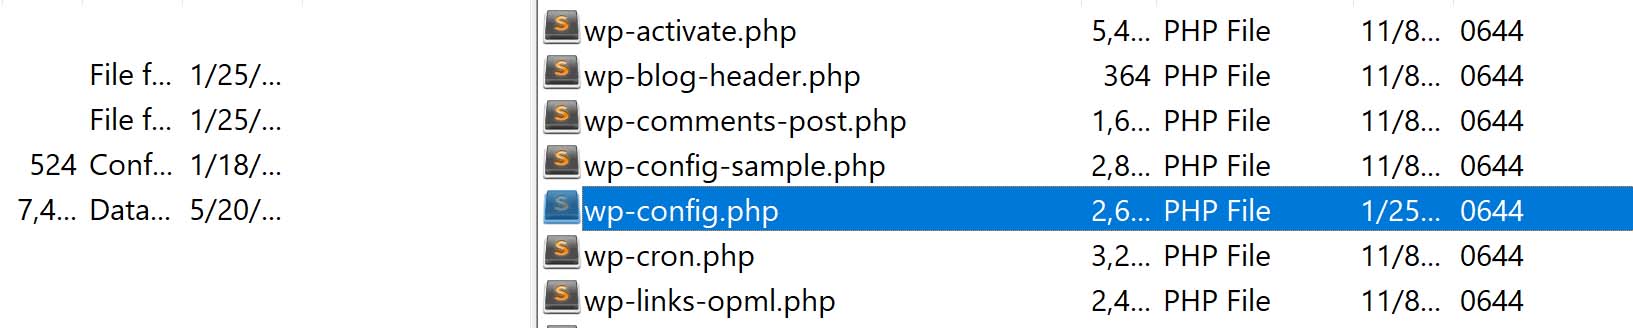
There are hundreds of files and multiple folders within public_html, and you shouldn’t make changes to any of them if you’re not sure what you’re doing. For now, let’s focus on wp-config.php and move on to the next step.
Step 2: Edit Your wp-config.php File
As we mentioned earlier, FTP enables you to make changes to your website’s files. To edit your wp-config.php file, right-click on it and select the View/Edit option. This will download a copy of the file and open it using your local default text editor. Your file should look something like this:
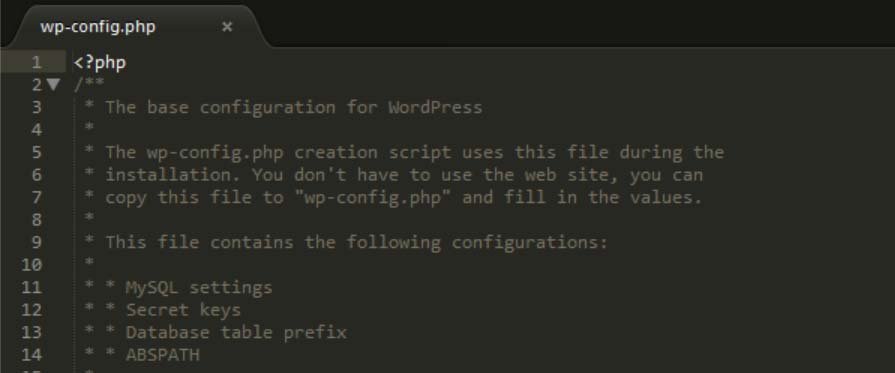
There’s a lot of code inside, but don’t worry – you don’t need to understand what all of it does right now. All you need to do is add a single line of code to your wp-config.php file:
define('WP_MEMORY_LIMIT', '128M');
The code can go anywhere before the line that reads /* That’s all, stop editing! Happy blogging. */ at the end of the file. However, we recommend adding it just before that line, so you can easily find it if you need to increase the memory limit further.
In the example above, we increased our limit from 68 to 128 MB. This is close to double the amount of memory, and should be more than enough for the vast majority of WordPress websites. Some people recommend increasing your limit to 256 or even 500 MB. However, we find that to be overkill and a waste of resources in most cases.
In any case, once you’ve added the line to your wp-config.php file, save the changes and close your editor. Now FileZilla will ask you if you want to replace the version of the file on your server with the one you just edited, to which you should answer yes.
Before we move on, it’s important to know that you can also tell your server to increase the memory it allocates to WordPress via your .htaccess and php.ini files. You can achieve the same result with all three files. However, we find the wp-config.php approach is often the simplest, which is why we decided to showcase it here.
Step 3: Check to See If the Error is Gone
Before you start celebrating, you’ll want to determine if the “fatal error: allowed memory size of 67108864 bytes exhausted” message has actually disappeared. The error should be gone, unless your web host doesn’t enable you to increase your memory limit manually. In that case, you’ll need to contact them directly and ask for help.
If the error persists, but the number within the message reflects the new amount of memory you just allocated, then you need to increase that number even further. This is very rare, however, since 128 MB tends to be enough for most websites.
That’s it – you now know how to fix the memory exhausted error in WordPress! However, there’s one alternative method that also works well, which may be of interest to certain users.
How to Fix the Memory Exhausted Error Using the Command Line
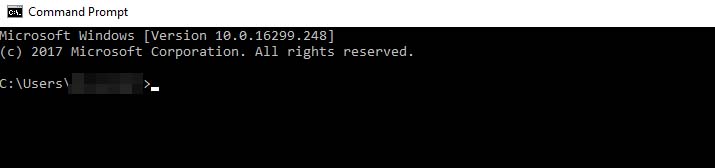
FTP is always a useful option if you want to make changes to your website’s files. However, it’s often not as efficient as using the command line. If you’re not sure what a command line is and you’re a Windows user, click on your Start menu, type cmd, and hit Enter.
The black box that shows up right away is your command line. It enables you to give direct instructions to your computer:
Every OS enables you to make changes to it via the command line, although the commands themselves vary between systems. Similarly, you should be able to access your website and make changes to your wp-config.php file using a series of simple commands. What’s more, the process is usually faster than using FTP.
The only caveat is that most shared hosting plans don’t provide you with Secure Shell Access (SSH), which is the type of connection you’ll need if you want to give your server instructions via the command line. However, if you’re running a Virtual Private Server (VPS) or another type of plan that gives you full access to your server, you’re good to go.
To establish a connection via SSH, you’ll need a client, just as with FTP. If you’re a Windows user, your best bet is PuTTy, which is a lightweight yet robust tool. Once you install and execute the program, it will ask you for a set of credentials to connect to your website:

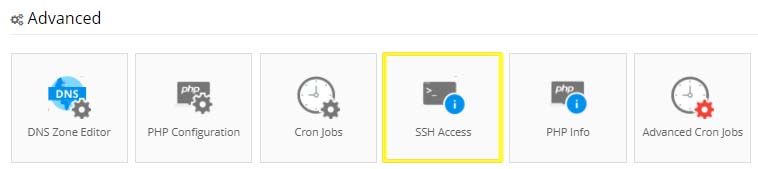
If you’re a free 000Webhost user, you won’t be able to connect to your website via SSH, so you’ll want to stick with the FTP approach. However, Hostinger users have no such limitations, and we support SSH connections even for our shared hosting plans. To find your credentials, just log into your Hostinger control panel and look for the SSH Access tab under the Advanced section:
Inside, find the section called SSH Access Information. Right now, you only need your SSH IP and SSH Port, which you can enter into PuTTy right away. Make sure you select SSH as your connection type, and then hit Enter.
Now, a command line will appear and ask you for your username and password (which can also be found in the SSH Access Information section):

After you enter this information, you’ll have full access to your server via the command line. This means you can get to work!
Since you’re using the command line, you don’t need to jump through hoops to edit the wp-config.php file. All it takes is a single command to locate and open it, assuming you’re already located in your WordPress root directory:
sudo nano wp-config.php
This command will run the wp-config.php file using the Nano editor, which works within the command line. You can navigate inside the editor using your arrow keys, and add text as you would normally. Remember, you want to add the following code…
define('WP_MEMORY_LIMIT', '128M');
…before the /* That’s all, stop editing! Happy blogging. */ line. When you’re done, hit CTRL + X on your keyboard to close the Nano editor. It will ask you if you want to save your changes, so remember to say yes.
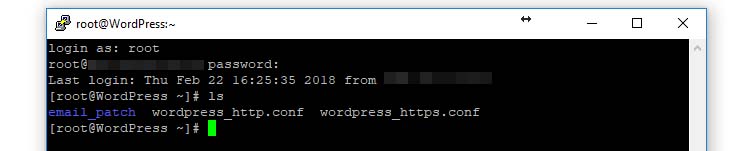
In some cases, opening the command line won’t throw you directly into your WordPress root folder. So you may need to locate and navigate to it on your own. To know if you’re in the root folder, type ls into the command line. You should see a list of WordPress folders, such as wp-admin and wp-content. If not, you’ll need to navigate to the right folder manually.
In our case, we logged into our server’s main folder, which looks like this:
In this example, WordPress is located within the var/www/html directory. To get there, we can use the following command:
cd var/www/html
Keep in mind that this directory structure might change, depending on which host you’re using or where you decided to install WordPress. So you may need to do a little digging on your own, and contact your hosting provider if you have any questions.
In any case, once you’re within the html directory, you should be able to run the command we mentioned earlier to open the wp-config.php file using Nano. After that, you’ll simply want to return to your site and make sure that the memory exhausted error is gone!
Conclusion
Every website needs a web hosting to run, but it also requires plenty of resources if you want it to work properly. WordPress can go a long way even on a modest hosting plan. Still, the more memory you can allocate to your website, the better off you’ll be.
If you ever run into the “fatal error: allowed memory size of 67108864 bytes exhausted” message in WordPress, you can fix it by making a small change to your wp-config.php file. If you have SSH access to your server, you can perform this fix using the command line. Otherwise, you can always rely on FTP to get it done.
Do you have any questions about how to fix the memory exhausted error in WordPress? Ask away in the comments section below!