
Out of the box, WordPress enables you to add sidebars to your website in a matter of minutes. What’s more, you can configure the elements your sidebar should display from a broad selection. However, the platform doesn’t enable you to set up more than one sidebar for use on different pages.
Fortunately, WordPress is highly customizable. There are several ways you can add more sidebars to the platform, such as by using a plugin. However, we’re partial to the manual approach when it comes to this feature, since it’s very easy to set up.
In this article, we’re going to talk about the importance of WordPress sidebars and when it makes sense to use them. We’ll then introduce you to the register_sidebar function and teach you how to use it to add one or more sidebars to your website. Let’s get to it!
Why WordPress Sidebars Are Important (And When to Use Them)

Sidebars are excellent ways to add custom elements to your pages.
Sidebars are incredibly popular elements across all types of websites, not just those built with WordPress. Just like menus and footers, they provide you with a dedicated space that comes in handy in a lot of cases, such as:
- Adding persistent elements across pages. Sidebars are ideal for adding signup forms, social media links, and other similar elements.
- Displaying information that doesn’t fit in with the rest of your page. Sidebars enable you to add elements and information that would break the flow of their parent pages.
If you take a look to the right of this post, you’ll see a sidebar of our own. We use it to lead you towards other posts you might be interested in, as well as to showcase our social media links. It’s the perfect complement to a blog post, but it could look out of place elsewhere, such as on the home page, for example.
With a default WordPress installation, we would be stuck either using the same sidebar across all our pages, or none at all. It’s not a deal-breaker, but still, you’ll be happy to know we can remove this limitation easily.
An Introduction to the register_sidebar Function in WordPress
The register_sidebar function does exactly what its name implies. By default, WordPress sets up a single sidebar for your website, but there’s no limit to the number of similar elements you can add. All you have to do is register those sidebars to your theme.
This function tells WordPress to create a record for one or more new sidebars, including unique identifiers for them. To do so, you need to access your theme’s function.php file and add in a few lines of code. In a nutshell, functions.php is a WordPress core file, which enables themes to set up additional functionality through code.
In a minute, we’ll show you the code you need to add to your functions.php file, and tell you how to edit it. If you’re not knowledgeable on how to do this, don’t worry – we’ll guide you through the entire process.
To be clear – there are other ways you can add new sidebars to WordPress, such as by using plugins. However, the manual approach is much more straightforward in this case, as you’ll realize in the next section. Plus, this way your new sidebars won’t disappear if you run into any issues with a particular plugin down the line. With this in mind, let’s get to work.
How to Use the register_sidebar Function in WordPress (2 Ways)
Before we get to work, it’s essential you create a backup of your website. We’re going to edit one of WordPress core files, so you want to have a recent restoration point in case something goes wrong. Let’s talk about how to do it.
A Quick Guide to Backing Up WordPress
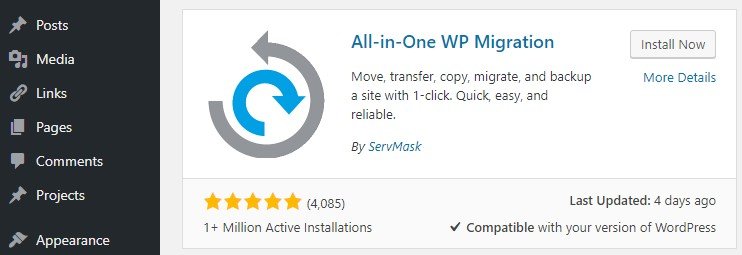
If you’re a 000Webhost user, you should already have access to the All-In-One WP Migration plugin, which we set up for all of our websites. This plugin enables you to backup your site, or migrate it to a new location. However, for those of you using other hosting providers, you can still take advantage of the plugin. To install it, head to the Plugins tab within WordPress, click on Add New, then use the search bar to the right to look for the All-In-One WP Migration plugin. When it shows up among the results, click on the Install Now button next to its name:
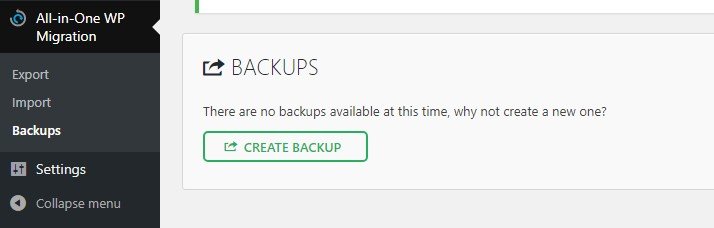
After a few seconds, the button should read Activate. After clicking on it again and waiting for the process to finish, there should be an All-In-One WP Migration tab on your dashboard. From here, click the Backups tab, and look for the Create Backup button on the next page:
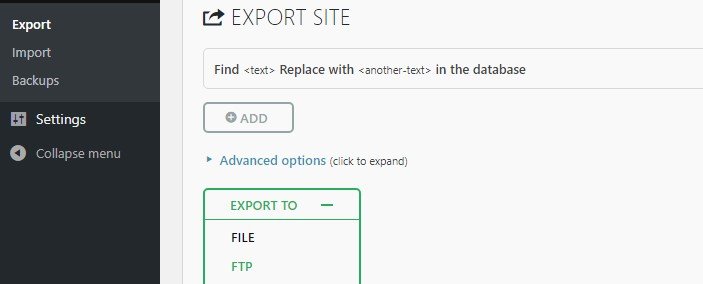
Now, the plugin will ask you to choose where you want to export your backup file to. You can link All-In-One WP Migration to several cloud storage platforms, but for now, choose the File option. This will enable you to download your backup file to your local computer:
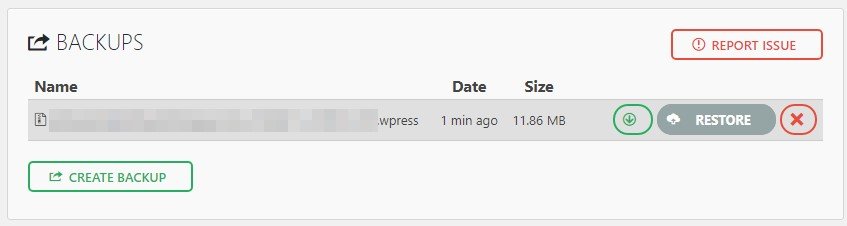
The plugin will create a new backup, and when it’s ready, a download link will show up. Click on it, save your backup file somewhere you can remember, and you’re good to go. If you lose track of the file, you can always return to the All-In-One WP > Backups tab. Inside, you’ll find a list of all your recent backups and you can restore your site to those states by clicking on the Restore button next to your choice:
Remember, you should always have a recent backup of your website – doubly so if you’re going to make any significant changes to it. In most cases, weekly backups should suffice, although sites with a lot of dynamic content will benefit from more frequent backups. With that done, let’s get back to talking about sidebars.
1. Add a Single Sidebar to Your Theme
As we mentioned earlier, you’ll need to access and edit your theme’s functions.php file to add new sidebars to WordPress. To find it, we’re going to use File Transfer Protocol (FTP), which enables us to send data back and forth from your site using a client, such as FileZilla.
To get started, download the client and install it. Now log into your 000Webhost account and go to the Settings > General tab. Inside, you’ll find a section called FTP Details at the top of the screen. You need those credentials to access your website using the FTP client, and they’re not the same as your WordPress username and password:
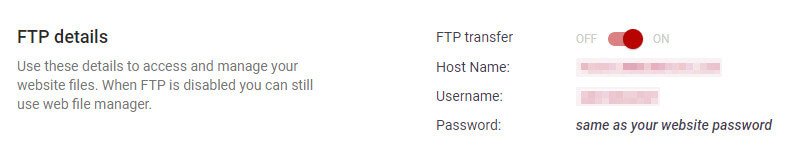
Keep this tab open and launch FileZilla. You’ll notice several empty fields at the top of the client’s window, corresponding to the credentials under the FTP Details section. Type in your Host Name, Username, and 000Webhost Password, then click on Quickconnect:

Your FTP client will establish a connection to your website, and when it succeeds, two new folders will show up on the lower-right side of the window. The first one should be called public_html, and it’s also known as your WordPress root folder, since it contains all the platform’s core files:

Open the folder and navigate to the wp-content/themes directory. Inside, you’ll find individual folders for each theme installed on your website. Look for the one that corresponds to your active theme and open it. You’ll find more folders and files inside, but we’re looking for functions.php in particular:
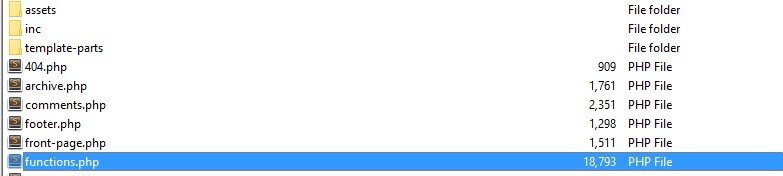
Once you locate the file, right-click on it and choose the View/Edit option. Clicking on it will open the file using your default local text editor, enabling you to make changes to it and save them to your server. Every theme’s functions.php file should be different since they include unique features, and you shouldn’t make any changes to code you don’t recognize to avoid breaking key functionality. For now, scroll down to the bottom of the file until you reach a line reading /* That’s all, stop editing! Happy blogging */. Here, you’ll add the following code snippet right above that line:
add_action( 'widgets_init', 'my_new_sidebar' );
function my_new_sidebar() {
  $args = array(
    'name'          => 'Second Sidebar',
    'id'            => 'second-sidebar',
    'description'   => 'This is your brand new sidebar.',
    'class'         => '',
    'before_widget' => '<li id="%1$s" class="widget %2$s">',
    'after_widget'  => '</li>',
    'before_title'  => '<h2 class="widgettitle">',
    'after_title'   => '</h2>'
  );
  register_sidebar( $args );
}
The code above tells WordPress to register a new sidebar called Second Sidebar. It also sets a new action called my_new_sidebar using the register_sidebar function, which you can spot right at the end of the code.
Aside from registering your new sidebar, the code also sets a description for it, as well as a basic structure, including its title’s format. For now, you can go ahead and replace the following placeholders at your discretion:
- my_new_sidebar
- Second Sidebar
- second_sidebar
- This is your brand new sidebar.
Keep in mind – you should always use IDs and names you can easily recognize later since you’ll need to identify this sidebar on your Widgets tab later on. When you’re done, you can save the changes to your functions.php file and close it. FileZilla will ask you if you want to update your functions.php file, to which you should answer “Yes”, and you’re good to go. Now open your WordPress dashboard and go to the Appearance > Widgets tab. There should be a new sidebar to the right of the page, which you can customize by adding widgets to it.
Now, you’ll be able to choose which sidebar to use for each page or post. If you want to create additional ones for even more functionality, keep on reading since we’ll teach you how to register several of them simultaneously.
2. Register Multiple New Sidebars at a Time
The process for registering multiple sidebars at once works just the same as with a single one. You’ll need to access your functions.php file and add the following code to it, before the line reading /* That’s all, stop editing! Happy blogging */:
add_action( 'widgets_init', ' my_new_sidebars ' );
function  my_new_sidebars() {
  $args = array(
    'name'          => 'New Sidebar %d',
    'id'            => 'new-sidebar',
    'description'   => 'One of my new sidebars.',
    'class'         => '',
    'before_widget' => '<li id="%1$s" class="widget %2$s">',
    'after_widget'  => '</li>',
    'before_title'  => '<h2 class="widgettitle">',
    'after_title'   => '</h2>'
  );
  register_sidebar( 3, $args );
}
If you look closely, you’ll notice the bones of the code remain just the same. The only difference lies in a couple of additions to the description and register_sidebar lines. For the former, we added the %d argument, which sets a number for your sidebar’s name that increases for each new one you add.
As for the register_sidebar function, we’re telling it to set up three sidebars at once in this example. You can change the number to anything you want, and as WordPress registers new sidebars, it’ll use ever increasing numbers for their names. The code above should result in three new sidebars, called New Sidebar 1, New Sidebar 2, and New Sidebar 3, respectively.
Once you add the code, just save it and close the functions.php file. Say “Yes” when FileZilla sks if you want to update the copy of the file on your server, and that’s it. You can now find and use your three new sidebars by going to the Appearance > Widgets tab on your dashboard. Happy editing!
Conclusion
WordPress sidebars are versatile. However, the platform doesn’t enable you to set up more than one sidebar at a time by default. This means you’re stuck using the same one for all of your pages or none at all. You can always use a plugin to tackle the issue, but the easier approach is to use the register_sidebar function instead.
With the register_sidebar function, you can set up one or multiple sidebars at a time with a few lines of code. Simply edit your widgets.php file, which you can do via FTP using a client such as FileZilla.
Do you have any questions about how to use the WordPress register_sidebar function? Let’s talk about them in the comments section below?