
You’ve likely put time into securing some aspects of your website, but there are always steps you can take to protect it further. Considering WordPress’ popularity, using the platform can put a target on your website. After all, there are always attackers waiting to pounce on the latest vulnerability.
There are a lot of things you can do to secure WordPress from attackers, including increasing your login page’s protection and obscuring important files. Even implementing just a few security measures can go a long way towards protecting your website and help you keep user information safe.
In this article, we’re going to talk a bit more about why WordPress security is so important. Then we’ll introduce you to a comprehensive set of steps you can use to secure your WordPress website against attacks. Let’s get to work!
Why Securing WordPress Against Attacks Is Critical
Security is essential for any website that hopes to become (and stay) popular. If your site is an easy target, chances are sooner or later someone else will gain access to it, which is something you want to avoid for multiple reasons:
- Your user’s information can be compromised. Even semi-public information such as email addresses isn’t someone other people should have access to.
- Attackers can infect your site with malware. If your site becomes infected, search engines such as Google might warn people against accessing it, which can ruin your traffic.
These are worst-case scenarios, but that doesn’t mean they can’t happen. Attackers target WordPress websites because they know some of them will be easy pickings and you don’t want to fall into that category.
How to Secure WordPress From Top to Bottom (In 15 Steps)
In this section, we’ll walk you through a comprehensive series of steps to secure your WordPress website. We’re going to skip the basic stuff, such as reminding you to use secure passwords, change your admin username from the default, secure your internet connection with a reliable VPN service, and removing your WordPress version number. Instead, we’ll focus on advanced stuff and if you take the time to go through all the steps, you’ll end up with a website that’s far more secure than most.
Step #1: Backup Your Site Regularly
The single best way to protect your WordPress website against attacks and human error is to create backups for it. If you have a regular schedule in place, there will always be a recent restore point you can jump to in a matter of minutes. Restoring your website to a backup is often easier than troubleshooting it in the first place as well, so it’s a winning proposition.
To help you get started, we automatically set up the All-In-One WP Migration plugin on all new 000Webhost installations. With this plugin, you can create as many backups of your site as you want, whenever you want:

Using the plugin is remarkably simple too, and we cover the process in depth near the beginning of our guide on how to migrate a WordPress website. In any case, there are plenty of other backup tools you can use if you don’t find All-In-One WP Migration to be intuitive. Two top alternatives are UpdraftPlus and BackWPup.
Regardless of which backup plugin you choose, you’ll want to create a backup schedule for your website and stick to it. For most sites, one backup a week is more than enough. However, as your website grows in popularity and complexity, you might want to consider creating daily backups just to be on the safe side.
Step #2: Use a WordPress Security Plugin
If you don’t want to spend hours (or days) patching every vulnerability on your website, your best bet is to use a comprehensive security plugin to do the heavy lifting for you. WordPress security plugins tend to be comprehensive tools that include as many features as possible within a single umbrella. One of our favorites is Sucuri since it tackles practically every security angle you can think of:
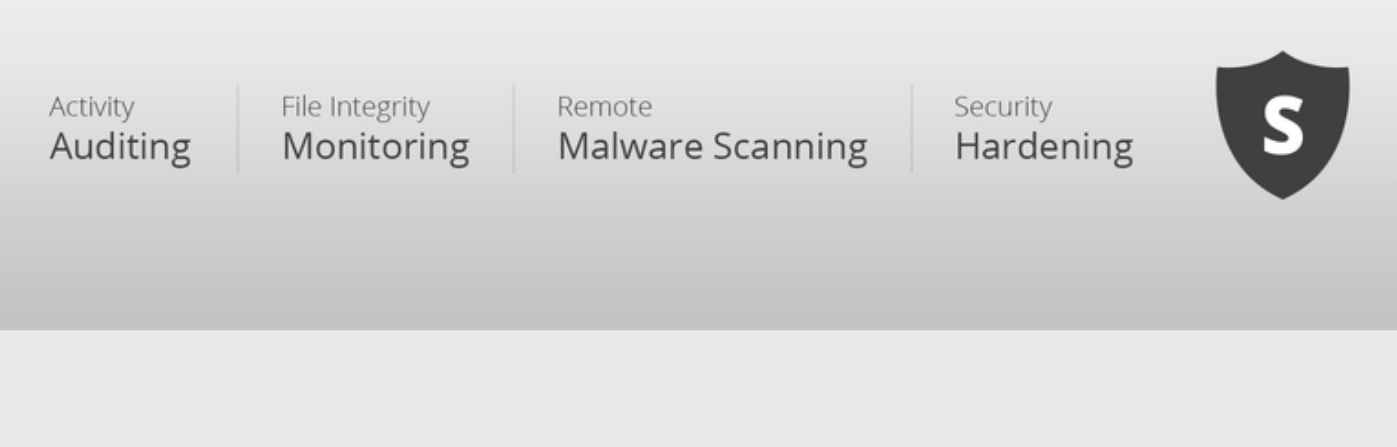
This all-in-one security solution actively monitors your website for vulnerabilities. It also keeps an eye out for attackers who might be trying to access your site, provides you with dozens of ways to tighten security, and it can even help you implement a Website Application Firewall (WAF) on its premium version.
The only downside to using a security plugin such as Sucuri is that you get so many configuration options, you’ll need a guide to tackle all of them. In any case, if Sucuri isn’t to your liking, there are plenty other security plugins to choose from, so feel free to do some research before settling down with one of them.
Step #3: Keep Your WordPress Core Files, Plugins, and Themes Updated
It might seem like common sense, but a lot of people forget to update their WordPress files, including themes and plugins. There are plenty of reasons why keeping your website’s components updated is a good idea, beyond getting access to new features. For one, some updates may patch security vulnerabilities found in past versions of whichever theme, plugin, or WordPress version you’re using. In other words, you’re leaving yourself open to attacks if you don’t take a few minutes now and then to update your website in its entirety.
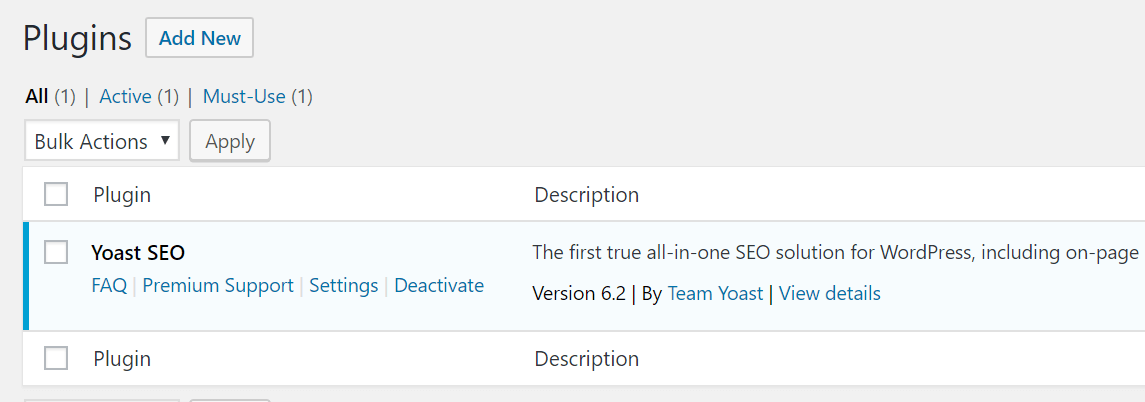
Updating WordPress’ core is simple enough. If there’s a new version available and you’re not using it, you’ll see a notification on your dashboard informing you it’s time to update. You’ll also see notifications when there are new versions of plugins available to install, which you can do from the Plugins tab:
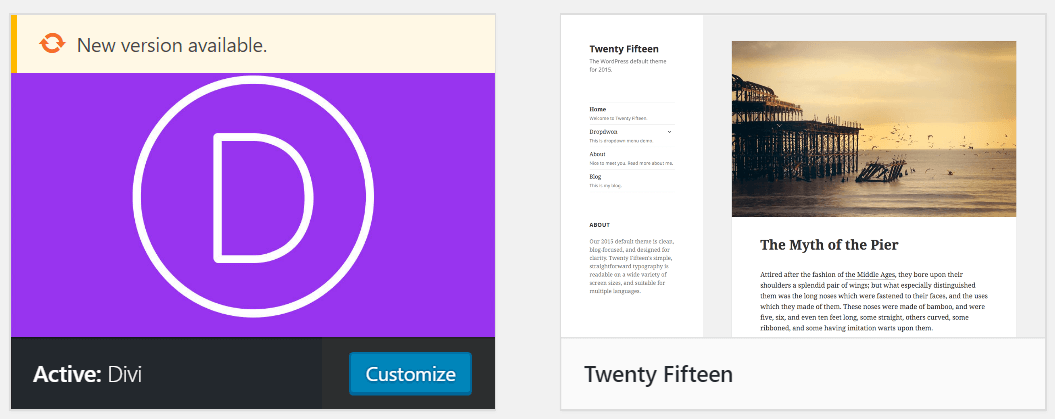
Finally, you can check out if there are updates available for your themes by visiting the Appearance > Themes tab:
Keeping these three sets of elements updated takes minimal effort, and it goes a long way towards protecting your website.
Step #4: Avoid Pirated WordPress Themes and Plugins
Premium WordPress themes and plugins can be expensive – there’s no sugarcoating the fact. As with any other type of software, you can find pirated versions of the most popular WordPress themes and plugins.

Saving money by using pirated WordPress software may seem like a good idea on the surface, but it can cause you a lot of problems. For example, the themes and plugins you install can be full of malware, which can cause problems with your web host. Even if the software itself is clean, you might not be able to update it automatically.
The great thing about WordPress is, you don’t need to use premium plugins or themes if you can’t afford them. WordPress is so popular, you can find hundreds of powerful free themes to choose from, and the same goes for plugins.
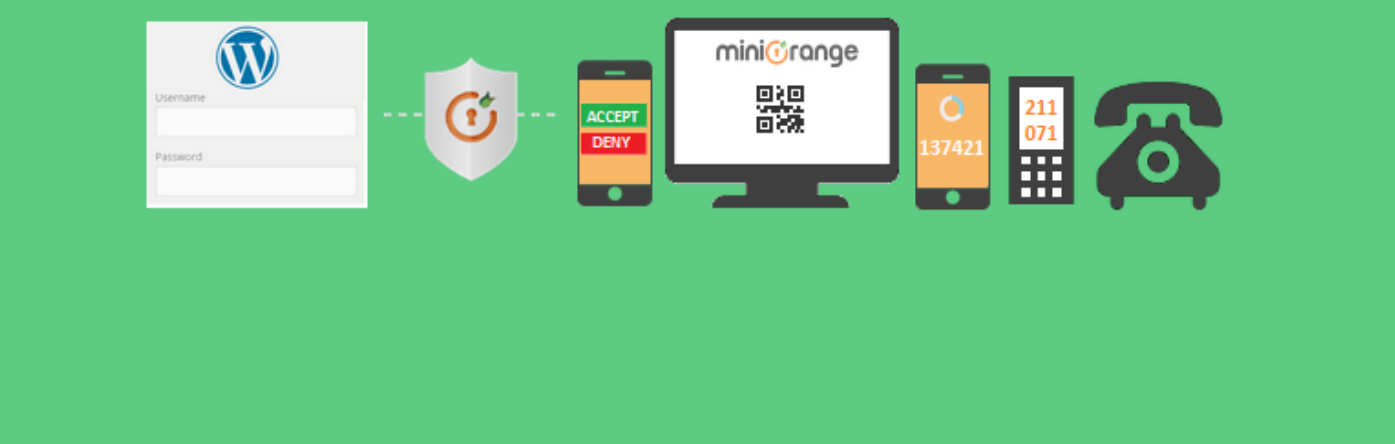
Step #5: Enable Two-Factor Authentication (2FA)
Usually, websites require only one factor of authentication to log you in, which tends to be a password. Enabling 2FA means your site will require an additional credential before you can gain access to it. This way, attackers will have a much harder time breaking into accounts on your website unless they can also get hold of that second factor of authentication.
WordPress doesn’t support 2FA out of the box, but you can add in the feature using a plugin such as Google Authenticator – Two Factor Authentication. Despite its name, this plugin isn’t associated with Google, but it does provide you with a wide array of 2FA methods, including using apps and email codes:
We already covered the process of setting up and configuring the Google Authenticator plugin in a previous article. Check it out, along with alternatives such as UNLOQ Two Factor Authentication (2FA) or Two-Factor.
Step #6: Limit the Number of Potential Login Attempts
By default, WordPress enables you to try and log into your account as many times as you want. The idea is if you forget your credentials, you can keep trying combinations until you remember the correct one. However, in practice, your website can become vulnerable to ‘brute-force’ attacks. This means someone could potentially try out hundreds or thousands of username and password combinations until they find one that works.
Dealing with this vulnerability is straightforward – you simply limit the number of login attempts anyone can make before they’re temporarily locked out of your website. Even adding a five-minute ‘cool down’ is often enough to dissuade brute-force attacks. More importantly, legitimate users can always use WordPress’ built-in password retrieval feature to avoid getting locked out. To implement this functionality, we recommend using the WP Limit Login Attempts plugin, which restricts the number of login attempts someone can make during a specific time:
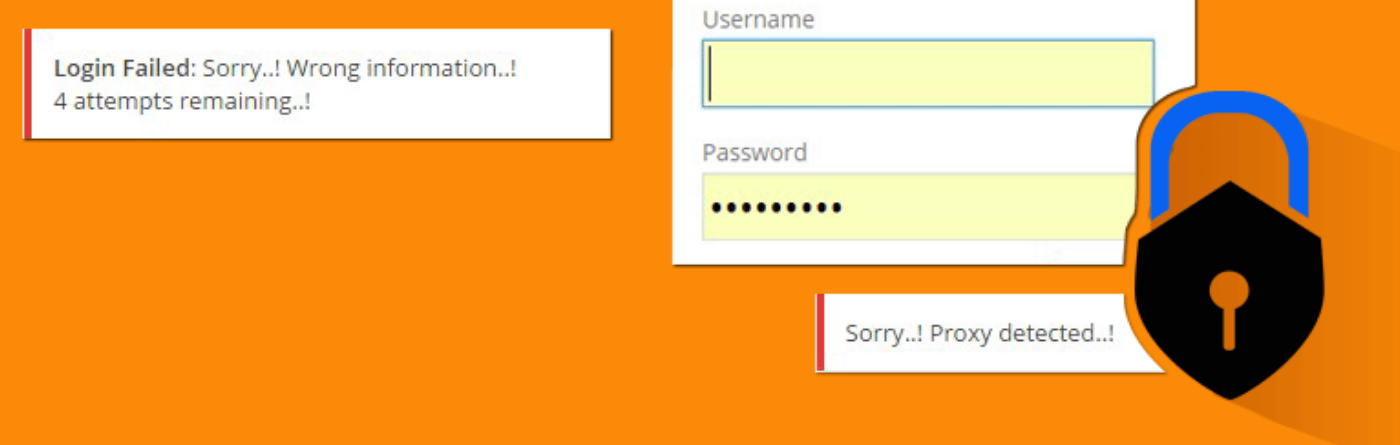
On top of this feature, the plugin can also automatically ban IP addresses when it detects brute-force attacks, and it includes basic CAPTCHA functionality to slow down malicious attempts even further. After installing the plugin, you can configure it by going into the Settings > WP Limit Login page. Finally, if you’re already using a WordPress security plugin, such as Sucuri, chances are it already includes additional login security features, so be sure to check its settings before installing a one-off tool.
Step #7: Change the Default WordPress Login URL
When you install WordPress on a new website, the platform automatically sets up a login page for you, which should be located in yourwebsite.com/wp-login.php. It’s a simple URL that’s easy to remember. However, this means it’s also simple for attackers to find and target.
If you change the URL to something not so easy to guess, it’s much harder for people with evil intentions to try and gain access to your dashboard. As you might imagine, the easiest way to change your login page’s URL is through a plugin. For this scenario, you should look into using WPS Hide Login, which enables you to change your login page’s URL to anything you want:
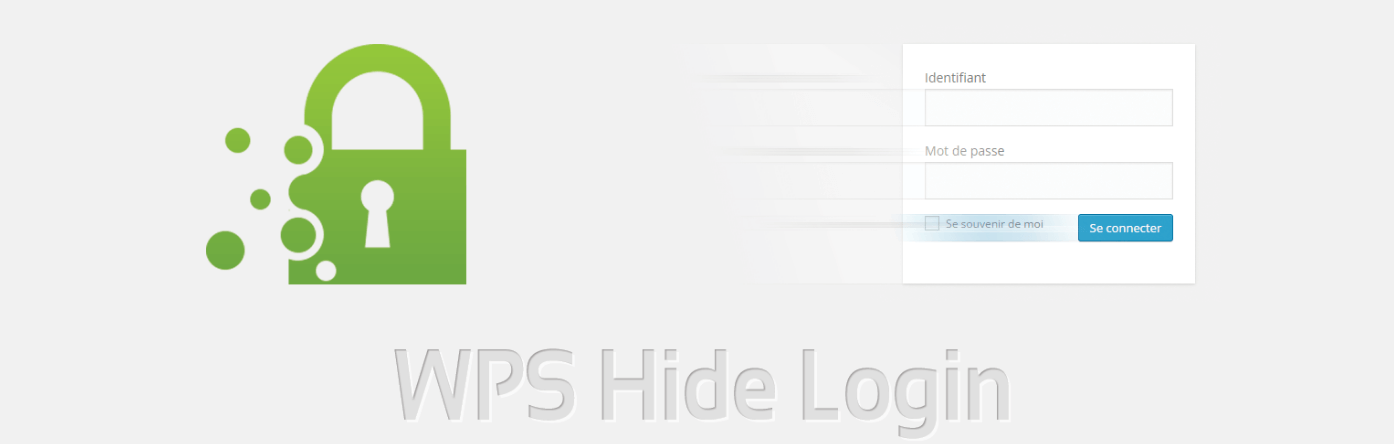
After installing the plugin, follow the instructions in this article to change your login page URL. If you don’t want to use a plugin, there are other ways to achieve the same result manually. For example, you can either create a new login page or add a snippet of code to your .htaccess file.
Step #8: Automatically Log Out Idle Users
In a lot of cases, people gain access to websites they shouldn’t out of sheer luck. For example, if you’re using a shared computer and you forget to log out of your WordPress page, someone else could look through its browsing history and get into your dashboard without breaking a sweat. The easiest way to prevent this from happening is to make it so WordPress automatically logs out users after a while. We can achieve this result by using the Inactive Logout plugin, which detects when a user’s been idle for too long and automatically boots them from the site:

It can be a minor hassle to log back into your account if you need to get up from the computer for five or ten minutes, but it’s a small price to pay in exchange for heightened security. Plus, setting up the plugin is remarkably simple. Simply head to its settings screen and set a logout timer in minutes, as well as a warning message (if you want to).
Step #9: Use a WordPress Logging Plugin
Logging tools enable you to keep tabs of what’s going on in your website through detailed notes for each event. WordPress logging plugins work much the same, except they focus on events specific to the platform. For example, depending on which plugin you use, it might record each time someone attempts to log into your website, edits a post, makes a comment, and more.
From a security perspective, logging plugins are one of the most powerful tools at your disposal. Without one, it’s impossible to keep track of everything that goes on in the background, even for websites without a significant amount of traffic. There are plenty of WordPress logging plugins to choose from, but our favorite is WP Security Audit Log since it tracks nearly every event that happens on your site without the need for any additional configuration:
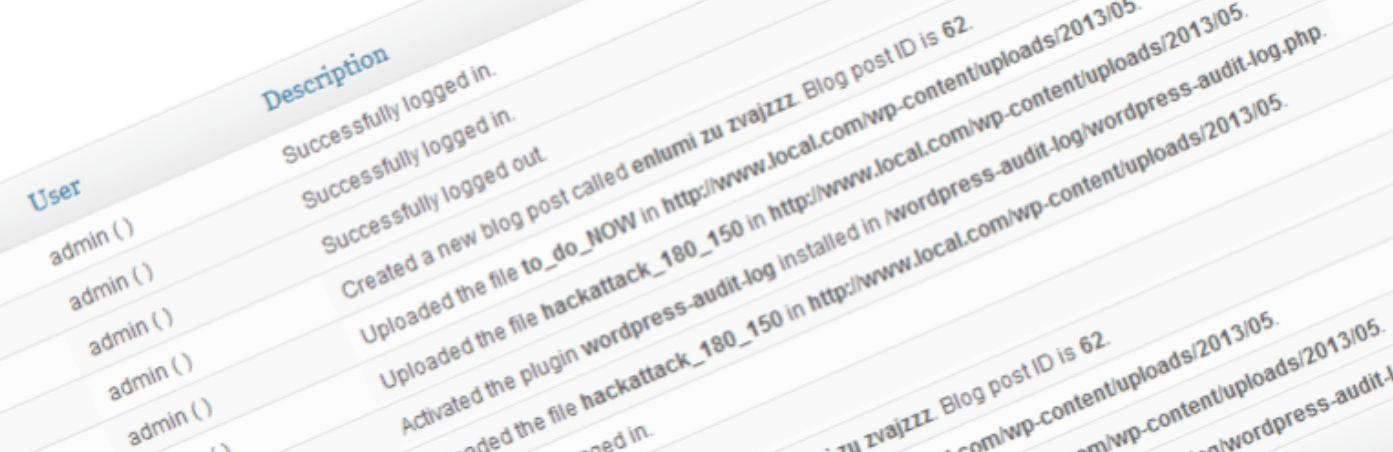
Another plus of using WP Security Audit Log is it classifies events using a simple color-coding system, which enables you to quickly take note of security issues.
Step #10: Monitor Changes to Your Website’s Files
If you’re a frequent reader of the 000Webhost blog, you know there are a lot of features you can implement by making slight changes to your WordPress files. The problem is, if someone with malicious intent gains access to your website’s back end via FTP or through your control panel, they can also do a lot of damage to your site.
Using a WordPress logging plugin is a great first step, but those types of tools usually deal only with events that happen on your website, and not changes to its files. To implement the feature, you’ll need to use another type of tool, such as the WordPress File Monitor plugin:

This plugin informs your website’s administrator (which should be you) when someone makes any changes to your website’s core files. After installing it, follow these instructions to get started using the plugin.
Step #11: Disable Directory File Listing
In a lot of cases, your server may enable people to view the files in a specific folder if they know its URL. For example, the wp-content directory contains a lot of important files, including your site’s themes and plugins. Users may be able to view the contents of that directory in a list format if you don’t disable file listing throughout your server.

To accomplish this, you’ll need to make a small change to your WordPress .htaccess file. We covered the entire process in our introduction to .htaccess and some of the advanced features you can implement by tweaking it, so check out that article before moving on.
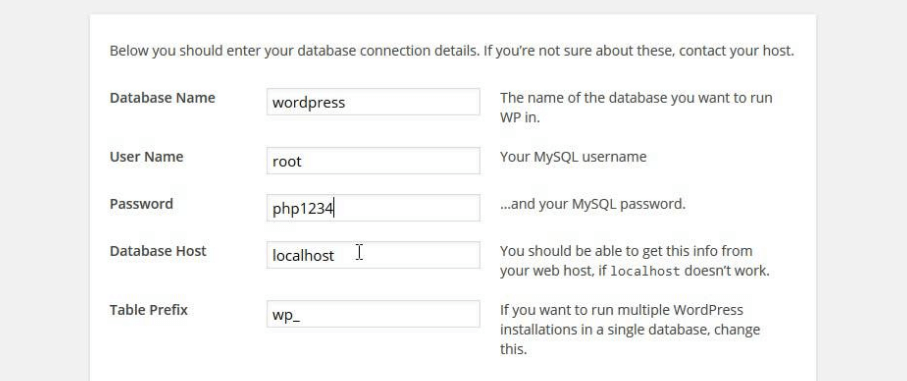
Step #12: Change the Default WordPress Database Table Prefix
When you set up a new WordPress website, the platform also creates a corresponding database, which is where your site’s information is stored. By default, the database’s name starts with the wp_ prefix, which makes it easier for attackers to target it, similarly to the default WordPress login URL.
The good news is if you set up WordPress using its famous five-minute installer, you can choose to use a custom prefix for your database, thus making it more difficult to attack. However, this only works for websites not yet up and running.
If your website already has a database, you’ll need to change its name manually, as well as do the same for all its tables to secure it even further. This process takes a bit of work, but it’s a surefire way to increase your website’s security.
Step #13: Set the Proper Permissions for WordPress’ Files
Your chosen Operating System (OS) enables you to configure who has access to your files and what they can do with them. For example, some users may only be able to read files, while others can edit them. This system should provide you with full access to every file and directory and limit what other users can do depending on their roles.
When it comes to websites, most of them run on UNIX-based OSs, which used numerical codes to determine what level of access users have to the files and folders within. Your WordPress root directory is no exception, and if its files and folders don’t have the right permission settings, it can wreak havoc on your website. Fortunately, you can easily review your permission settings using an FTP client, such as FileZilla:

We tackled the entire process of reviewing your WordPress permission settings in our previous guide to troubleshooting error 403, so check it out before moving on.
Step #14: Force HTTPS Use Throughout Your Website
HyperText Transfer Protocol Secure (HTTPS) is different from HTTP in the sense that it protects the flow of data between you and the website you’re visiting. To enable HTTPS for your site, you need to get an SSL certificate for it, which is something we take care of for every new 000Webhost user.
After you have your certificate set up, you’ll need to tell your server to force HTTPS usage throughout your website, to prevent visitors from accessing it via HTTP. This way, you can protect their data by default and leave nothing to chance.

As with most features, you can take either manual or plugin approach when it comes to implementing it in WordPress. We outlined both methods in an earlier piece that breaks them down step-by-step, so check it out before moving on.
Step #15: Whitelist the IP Addresses That Can Access Your Dashboard
The WordPress dashboard is where all the magic happens, so it’s of the utmost importance that you protect it from unwanted entry. We’ve covered plenty of ways to do this by hardening your login page’s security. However, if you want to take things a step further, you can do this by creating a ‘whitelist’ of approved IP addresses.
This approach is so effective because it blocks all other IPs from entering your dashboard in the first place, so it secures your website even if someone gets through your login page. In this case, there’s only one way to implement the feature, which is by adding a code snippet to your .htaccess file.
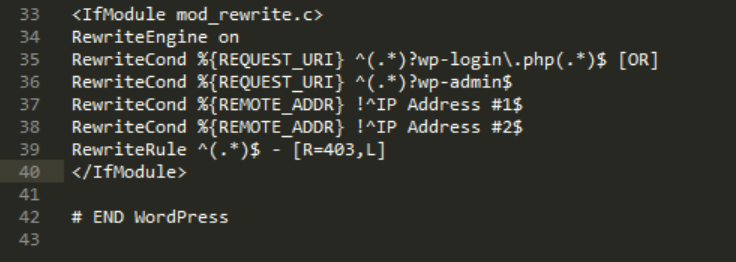
If you haven’t done so already, check out our primer on the WordPress .htaccess file, which contains in-depth instructions on how to implement this particular feature.
Conclusion
WordPress security is something you should take seriously from the get-go. Protecting a new website is, after all, far simpler than recovering from an attack. More importantly, if your user’s information happens to be compromised during such an event, it can be hard to recover their trust.
The good news is there’s no shortage of ways to protect WordPress against attack, and implementing even a few security measures is often enough to put you ahead of the pack. If attackers see you’re not an easy target, they may decide to move on and leave you alone.
Do you have any questions about how to secure WordPress against breaches? Ask away in the comments section below!