
One of the most complicated aspects of running a website is creating pages that don’t take too long to load. The longer your loading times are, the more likely you are to scare visitors away. The problem is compounded when they’re using mobile devices, due to the speed variations that exist based on your provider, and signal strength in your area. However, this is where WordPress AMP comes into play.
The Google AMP project aims to tackle the issue by developing a standard your pages can adhere to. WordPress AMP-compliant pages are (in most cases), much faster overall, and they’re also easier to read thanks to fewer frills.
In this guide, we’ll introduce you to the Google AMP project and talk about how it can help you develop better pages. Then we’ll teach you to create WordPress AMP-compatible pages using two plugins. Let’s get to it!
What Google AMP Is (And Why You Should Care)
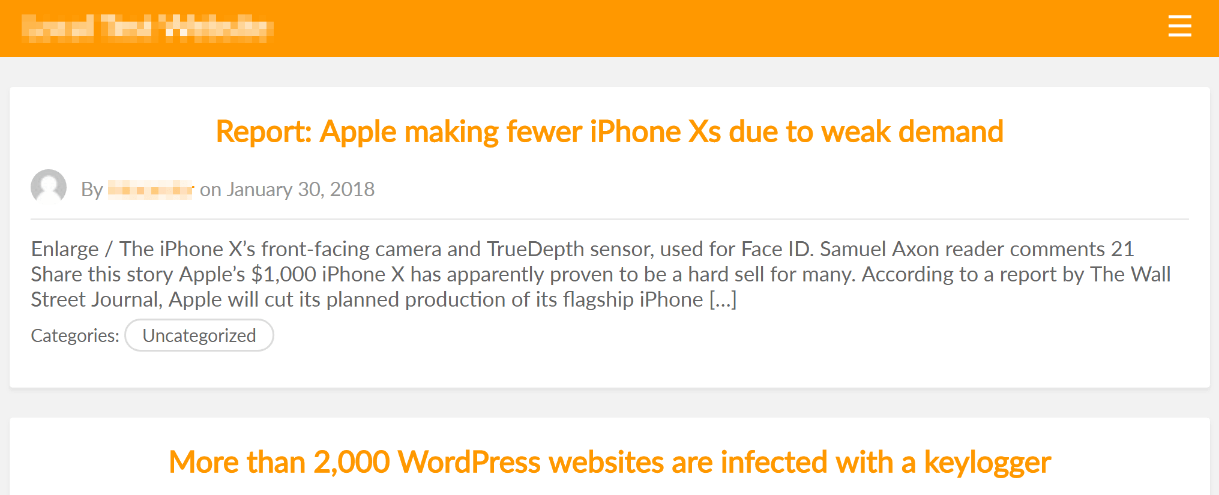
The Google AMP project is all about creating streamlined pages that users can access and navigate more easily. To achieve this, AMP pages use a stripped-down form of HTML that omits specific tags, such as forms. Likewise, the format removes all the JavaScript – except their own library – from your pages, and most of their CSS. The results end up being rather minimalist:
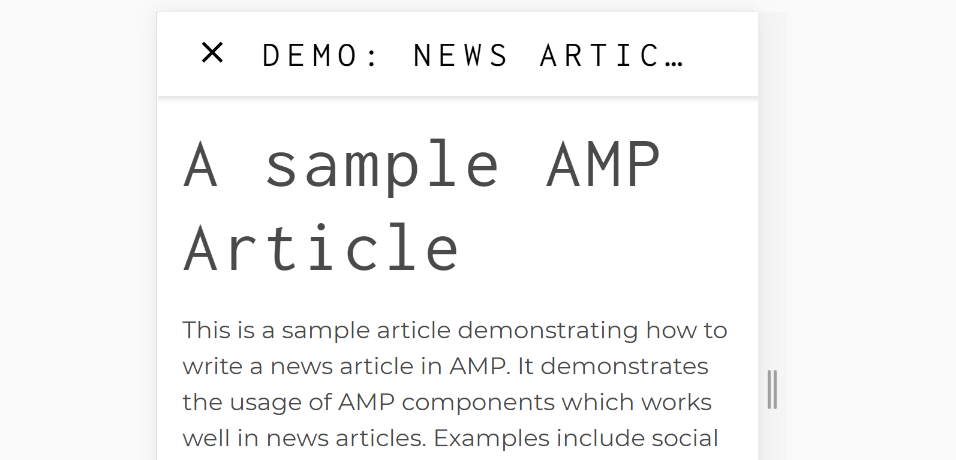
AMP pages may not be stylish, but they tend to be blazingly fast and easier to read. Moreover, in most cases, AMP pages don’t replace their original versions. Instead, you can have both a ‘full’ version of any given page and an AMP alternative. Google will then decide when it makes sense to serve the AMP version to people through their search result pages. In most cases, only mobile users will see AMP-enabled pages in their results, though.
This approach works because mobile users tend to have more irregular experiences while navigating the web. Often, they’ll run into websites unoptimized for smaller screens, and have a hard time navigating them as a result. Given this, adding AMP-compliant pages to your WordPress website comes with several benefits:
- It improves the experience for mobile users. Visitors using small-screen devices should have a much better time making their way through your AMP content.
- AMP-enabled content tends to get better Click Through Rates (CTRs). According to some studies, 90% of websites using AMP content see growth in their CTRs.
Keep in mind – in most cases, you don’t need to adapt your entire website to AMP standards. In fact, the format is better suited to content such as blog posts and news articles. Creating an AMP version of your home page, for example, would take away from your website’s overall experience.
With this in mind, the best approach you might be able to take is to optimize your website for mobile traffic in any way you can. Then you can consider adding WordPress AMP integration to any suitable content.
The Downsides of WordPress AMP Pages
The idea behind AMP pages sounds perfect on paper. However, creating AMP-compliant pages isn’t without its downsides. While it is true that AMP pages enjoy higher CTRs, they generally don’t produce any ad revenue. After all, the standard strips away nearly all the superfluous elements from each page.
Ad revenue will also be an issue for many, although you’re more likely going to rue the impact of adblockers becoming more common than worry about the potential impact on your income. However, this isn’t the only con to adopting the Google AMP project. Another major downside is that analytics tracking on AMP pages is more complicated than usual.
For example, if you’re using Google Analytics to monitor your website’s performance, you’ll need to configure the platform further to work with AMP-enabled pages. It’s not a complicated workaround, but it’s one extra thing you have to do to adjust to the standard.
Finally, it takes work to create AMP-compliant versions of the pages you want. However, as a WordPress user, you have an edge when it comes to the issue. You can use plugins to automate the process of creating WordPress AMP versions of any posts and pages you want, without basically any extra work on your end of things. Let’s talk about how this works.
How to Add AMP for WordPress (In 2 Ways)
As we mentioned earlier, adjusting your WordPress website to AMP standards doesn’t involve replacing the posts and pages you want to update. Instead, the plugins below will enable you to create parallel AMP-friendly versions of your content. Then, Google can choose when it makes sense to serve those versions to any of its users.
1. Using the AMP for WP Plugin
The AMP for WP plugin enables you to make short work of Google AMP standards integration to your website. It provides you with the tools you need to create AMP versions of your posts and pages. Moreover, it includes support for several advanced features that are hard to implement with AMP manually. For example, AMP usually doesn’t support contact forms, but with this plugin, you can add stripped down versions powered by the Contact Form 7 tool to your pages. The same goes for email opt-in forms and several other advanced features you usually don’t see within AMP pages.
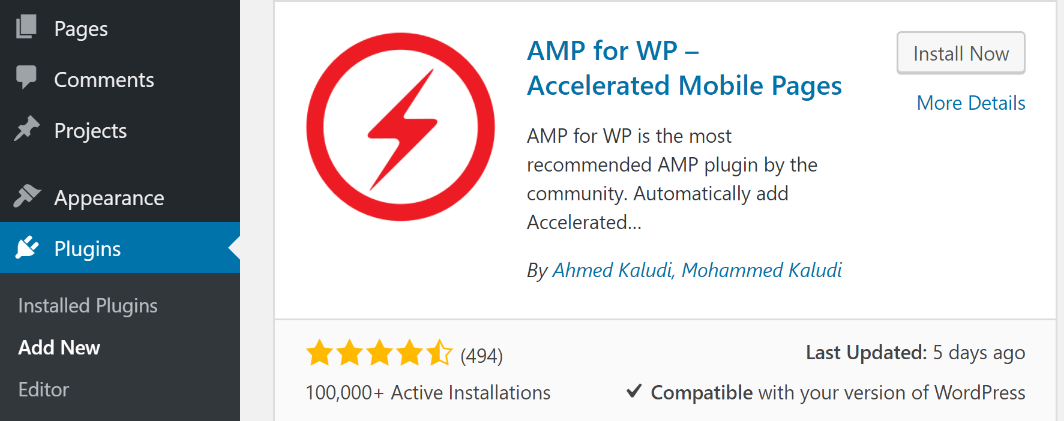
The best part is, getting started with the plugin is very simple. First off, you’ll need to install it as you would any other WordPress tool. Go to your Plugins > Add New page and look for the search bar to the right. There, type the full name of the plugin and it should show up as the first result at the top of the screen. Click on the Install Now button next to its name:
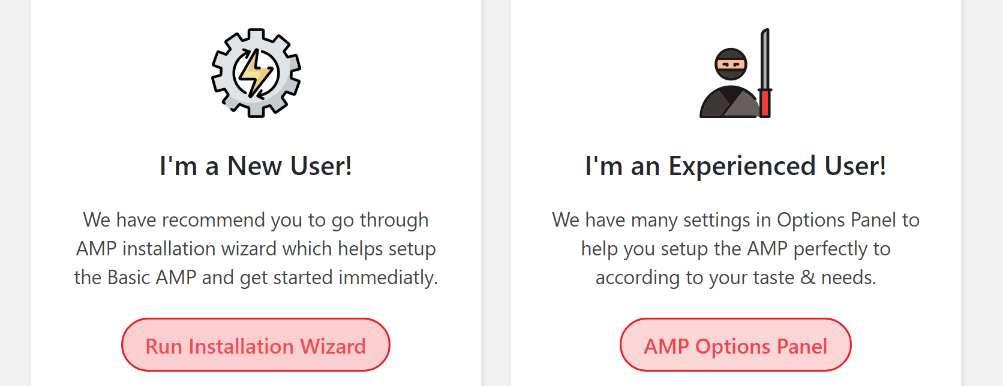
After WordPress installs the plugin, the button will turn into a blue one reading Activate, which you’ll need to click. Once the plugin is activated, it’ll redirect you to its main settings page. Here, you’ll find an option to run a setup wizard, which simplifies the process of configuring it. Click on the Run Installation Wizard button:
On the next screen, you’ll be able to set a logo that identifies your AMP-friendly pages. We recommend using the default since it’s easy to spot:
![]()
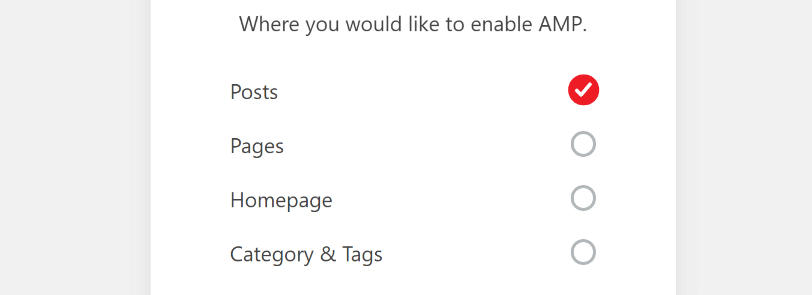
Now, the WordPress AMP plugin will ask you for which pages you want to enable it. Your options are Posts, Pages, Homepage, Category & Tags. We recommend choosing Posts only since they can benefit the most from AMP compatibility:
The next screen will enable you to add Google Analytics support to your AMP pages. As you might recall, this is not a feature that AMP pages support out of the box, so if you use Google Analytics, we recommend taking advantage of it from the get-go:

Finally, you can choose a design for your AMP pages, from one of three templates included by the plugin. All included templates are clean and easy to navigate, so you’re free to choose whichever one you prefer:

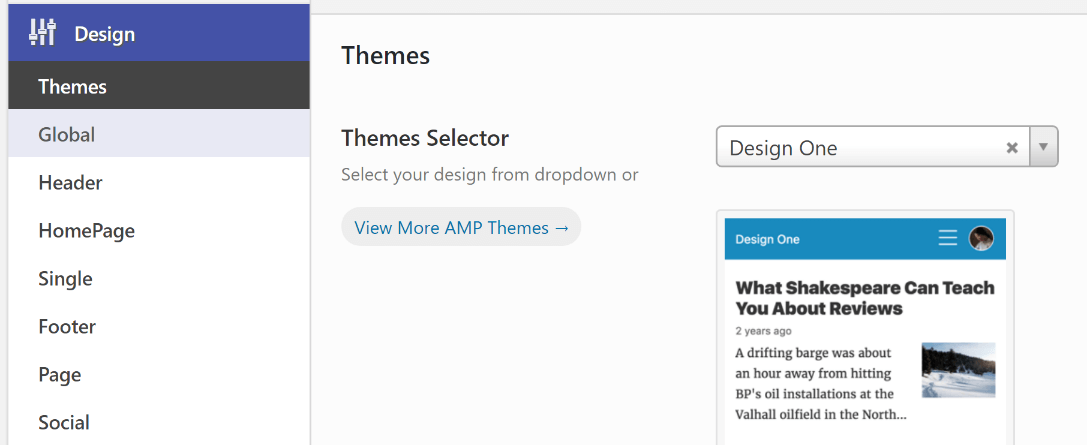
That’s it for the AMP for WP configuration wizard. Now the plugin will send you to its main settings screen, which you can find under AMP > Settings. The plugin packs in a lot of advanced configuration options, but we’ve already taken care of the most important ones. In any case, you can now tweak the design of your AMP pages by going to the AMP > Settings > Design tab. Inside, you can change the default theme for your AMP articles:
You can also change the design of the header for your AMP pages from the Design > Header tab. Inside, you can enable and disable navigation menus, for example, as well as add a search bar for increased usability:

Feel free to make any changes you want to your AMP pages’ style. When you’re ready to see them in action, you can navigate to your posts list and open any of them using the WordPress editor. To the right of the editor, you’ll find a new widget that says Show AMP for Current Page?:
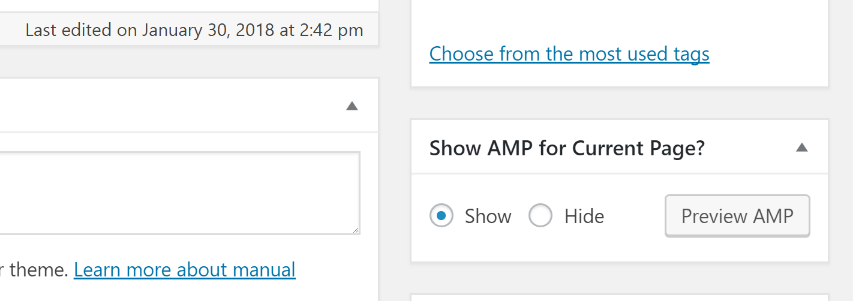
Right now, this option should be set to Show for all your posts and Hide for all other types of content. You can also use the Preview AMP button to check out how your new AMP-friendly pages will look once live:

That’s it! Once your AMP-friendly pages are up and running, all you have to do is wait for Google to index them. Then, you can hopefully start to reap the rewards!
2. Through the WP AMP Plugin
 As you may have noticed, both of the plugins we’ve featured share very similar names, which can be confusing. With that in mind, if you’re having problems finding WP AMP, use the search feature within the Plugin > Add New page and look for the name of its developer: WP AMP Ninja.
That aside, WP AMP shines due to its ease of use. If you’re looking for the absolute easiest way to enable AMP for your website, this is it. Simply activate the plugin, and it’ll automatically create an AMP version of your entire site, without the need for any additional configuration.
To test the plugin, install and activate it. Then try to access your homepage adding the ?amp slug to the end of its URL (i.e. https://yourhomepage.com/?wpamp). If everything’s working as intended, you should see a stripped down version of your home page, including the plugin’s default color scheme:
Accessing any page or post will likewise direct you to its AMP version. The plugin’s main downside is the fact you can’t alter its default style without tweaking files, which is beyond most beginner WordPress users.
However, WP AMP does enable you to integrate its AMP pages with Google Analytics. You can do this by navigating to the WP AMP Ninja tab on your dashboard and entering your Google Analytics ID into the corresponding field for it:
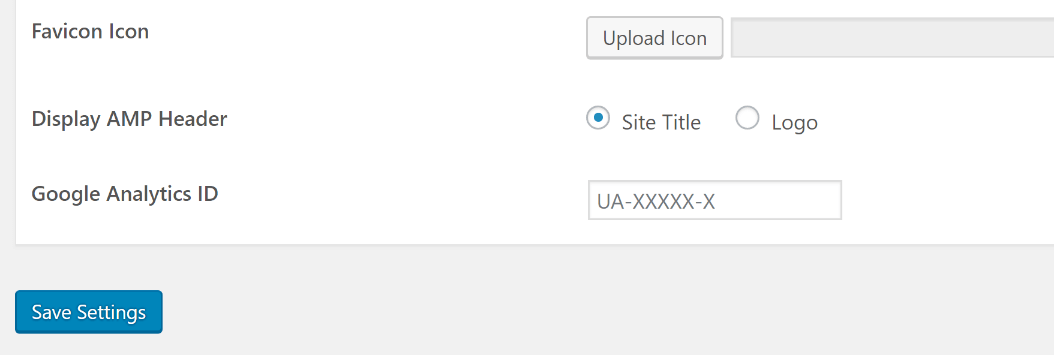
From this page, you can also modify your website’s favicon for AMP pages, as well as choose whether to display its title or logo on those versions. When you’re finished, remember to save your changes and you’re good to go!
How to Test if Your AMP Pages Are Working Correctly
Both of the featured plugins enable you to check if your AMP pages are working correctly. However, since AMP pages are Google’s own project, it’s not a bad idea to use its official validation tool to ensure you’re adhering to their standards. Simply visit the tool’s home page and enter the link to one of your WordPress AMP pages:

Give the tool a few seconds to evaluate your page, and if it adheres to Google’s standards, you’ll see a success message:

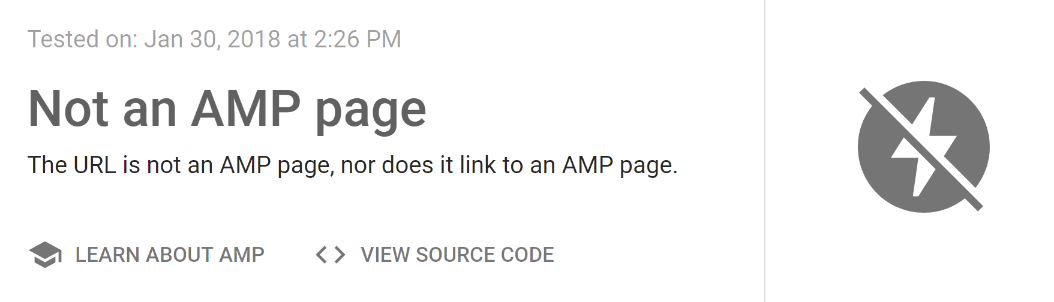
On the other hand, if the page you entered isn’t AMP-friendly, you’ll see a notification much like this one:
More importantly, if the page you entered doesn’t meet all of Google’s AMP standards, the tool will let you know where you dropped the ball so you can fix it. The tool also includes a handy link to Google’s AMP guidelines at the bottom of the screen, in case you want to check them out. In any case, if you’ve used either of the featured plugins in this piece, your WordPress AMP pages should pass any test with flying colors!
Conclusion
The Google AMP project has been around for a while, but most websites haven’t gotten around to adjusting their pages to its standards. The great thing is, as a WordPress user, you don’t have to overhaul your entire website to create AMP-compliant pages. All it takes is the right plugin to set up AMP versions of your content, and you get to enjoy all their benefits without affecting the ‘full’ version of your website.
As far as which WordPress AMP plugin to choose, there are two options we recommend:
- AMP for WP: This plugin provides you with plenty of ways to customize your AMP experience.
- WP AMP: With this tool, you can create an AMP version of your entire website in minutes.
Do you have any questions about how Google AMP pages work? Ask away in the comments section below!