
The term ‘child theme’ is something you’ll see a lot if you hang around WordPress-related pages and communities. However, if you’re a WordPress beginner, it’s likely a subject you’ll have little knowledge of. In this case, you’ll often have three questions: What are WordPress child themes, how do they work, and why should you use them?
Simply put, child themes are a WordPress feature that enables you to customize your website safely. You can set any theme you want as the ‘parent’, and use its child to make any changes you want to it. That way, the original theme remains unchanged, and you can keep better track of the work you do.
In this WordPress child theme tutorial, we’ll talk about what they are and why you should use them. Then we’ll teach you how to create a WordPress child theme manually, or by using a plugin. Let’s get to work!
What a WordPress Child Theme Is (And Why You Should Use One)
Child themes enable you to make customizations to your website with fewer risks.
When you set up a theme in WordPress, the platform creates a unique folder to store all its files. This includes all of WordPress’ core code, any images it needs to use, and any Cascading Stylesheets (CSS) it uses to style your site. Also, child themes inherit all of the base functionality of their parent themes. They have their own folders, so WordPress recognizes them as a different theme, but on the surface they work just the same as their parents.
At this point, you may be thinking Why would I want to create a copy of a theme I already have? There are multiple answers to that question, and we’ll answer them one by one:
- It enables you to customize your theme. If you want to make changes to how your active theme works and looks, creating a child for it makes sense. This way, any changes you make will only affect the child, and you can always return to the original version at any point.
- Theme updates can wipe out any changes you’ve made to them. When you update your theme, you lose any customizations you’ve made to its code or style. However, if you’re using a child theme, you can update its parent safely without affecting the changes you implemented.
- It keeps things organized. Over time, it’s easy to lose track of the changes you’ve made to your theme. Using a WordPress child theme enables you to be more organized since its files should only include the new code you’ve added.
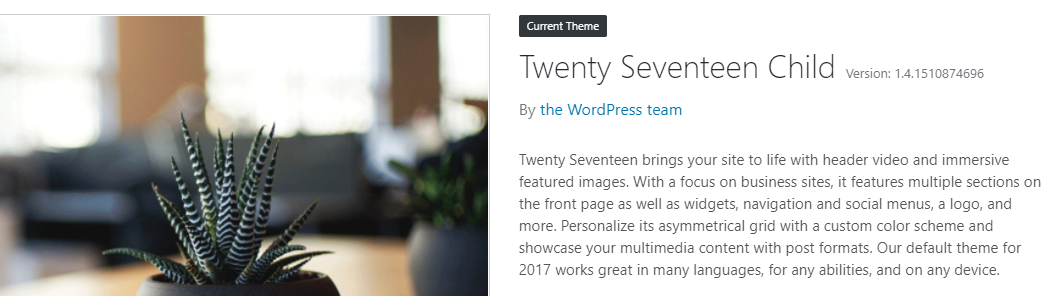
Imagine, for example, that you’re using Twenty Seventeen as your active WordPress theme. At some point, you may find you want to make a slight change to the theme, such as the way its footer section looks. At this stage, you have two choices – you can go ahead and tweak the files you need right away, or you can create a child theme in WordPress beforehand. If you go the first route, you’ll see no initial problems. However, once you update the theme, you’ll lose those changes and have to go through the trouble of implementing them again.
On the other hand, by creating a child theme, your changes will be preserved when the theme is updated. It’s quite a trade-off for something that usually takes about half an hour to do, and that’s only if it’s your first time creating a WordPress child theme.
How to Create a Child Theme in WordPress Manually (In 3 Steps)
Creating a WordPress child theme is a relatively simple process. We’ll need to set up a new folder, then use some code to link the parent theme, and tell WordPress what information it should load. We’ll explain every part of the process as we work our way through it, so don’t be intimidated. Let’s get to it!
Step #1: Create a Directory for Your WordPress Child Theme
Creating a folder is a simple task in most cases – choose where to put it, make a few clicks and it’s good to go. The same applies when you’re creating a new folder on your WordPress back end. However, you’ll need to use something called File Transfer Protocol (FTP) to do it.
FTP is technology that enables you to transfer files to and from any server you have access to. Inside the server should be your WordPress files and folders, which are what enables the platform to work.
First things first – you’ll need two things to access your website via FTP: a client that enables you to connect to it, such as FileZilla and your FTP credentials. Keep in mind – these aren’t the same as those you use to log into your WordPress dashboard. In most cases, your web host will send you an email including your FTP credentials when you sign up, so check your inbox for any 000Webhost emails. Alternatively, you can go to the Settings > General tab in your 000Webhost dashboard. There should be a section called FTP Details right under Website Settings:
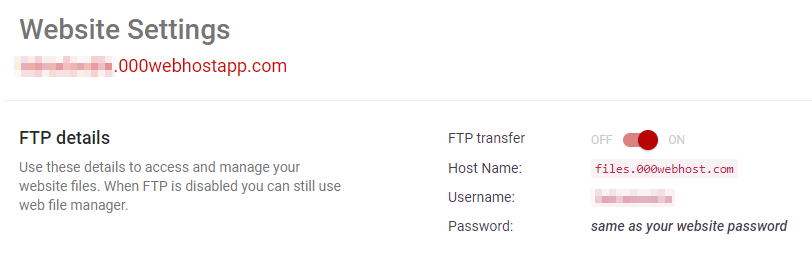
There are three fields we care about in that section – your Host name, Username, and Password. The latter is the same as that of your 000Webhost account, but take note of the other two or keep the tab open for now. Go ahead and install FileZilla if you haven’t done so yet, then open the program. At the top of its screen, you’ll see four empty fields called Host, Username, Password, and Port:

Type your FTP credentials into their respective fields within the program, and ignore the Port settings. When you’re ready, click on the button that says Quickconnect, and you’ll see a succession of messages appear on the tab below.
When your FTP client successfully connects to the server, its files and folders will show up on the lower right side of the window:

The folder called public_html is WordPress’ root directory. Its name comes from the fact that’s where all the WordPress files and folders go. Access it now, then navigate to wp-content > themes:

Inside, you’ll find unique folders for each of the themes installed on your website. However, right click any of the white space here and choose the Create Directory option. A window will pop up now asking you for a name:
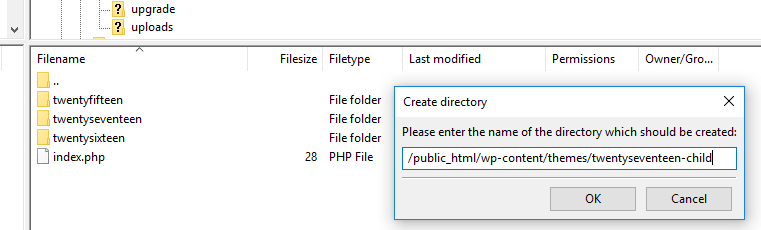
We recommend naming your new folder something such as twentyseventeen-child so you can easily recognize it later. Of course, the name should vary depending on what theme you want to use as the parent. Enter your new folder now, and move on to step number two.
Step #2: Set Up a Stylesheet for Your Child Theme
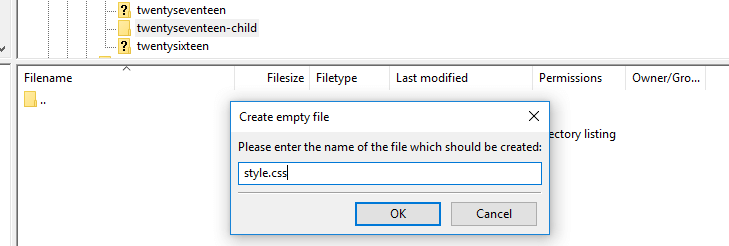
Your new child theme folder should be looking pretty bare now, so let’s fix that by adding a ‘stylesheet’ to it. This is a file containing all of your CSS customizations – essentially code that provides design to your site. After you finish setting up your child theme, you’ll be able to make changes to how your theme looks using this file.
Right-click anywhere in the folder and choose the Create new file option. When FileZilla asks you the name of your new file, type in style.css:
Now, right-click on your style.css file and select View/Edit:
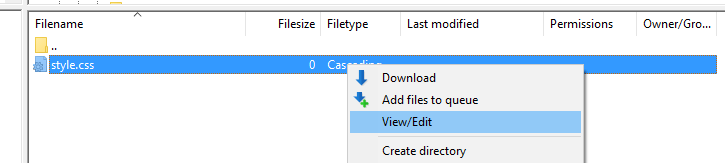
This option will download and open the style.css file locally using your default text editor. When the file opens, it should be blank, and you’ll need to paste the following snippet within:
/*
Theme Name:   Twenty Seventeen Child
Theme URI:    http://yourwebsite.com/twentyseventeen-child/
Description:  Your first child theme!
Author:       John Doe
Author URI:   http://www.wordpress.org
Template:     twentyseventeen
Version:      1.0.0
Tags:         child theme
Text Domain:  twenty-seventeen-child
*/
There’s a lot to unpack up there, so let’s break it down bit by bit. First off, you’ll need to type the full name of your child theme. This name will show up on your WordPress theme selection screen, and it can be anything you want. Of course, it makes sense to identify it as a child theme and mention what its parent is.
Moving on, your theme’s URL, description, author, and author URL can be practically anything you want, hence the placeholder descriptions we set earlier. Next comes the most important part of the entire snippet – the template field. The template you choose tells WordPress what theme it should use as the parent, and in this case, we chose twentyseventeen.
Please note that you don’t need to type out the full name of your parent theme here – just the name of its folder. If you’re not sure what that is, return to public_html > wp-content > themes using your FTP client, and check out the folder name for the theme you want to use as a parent.
Moving on, the version you set doesn’t matter either, and neither do the tags you choose. The last field, however, can be of use if you ever want to translate your theme into another language. For now, just set something you can remember in the Text Domain field.
Afterward, save the changes to your style.css file and close the editor. FileZilla will automatically upload the updated file and overwrite the existing version on your server. Next, access your WordPress dashboard and look for a new option under the Appearance > Theme tab:
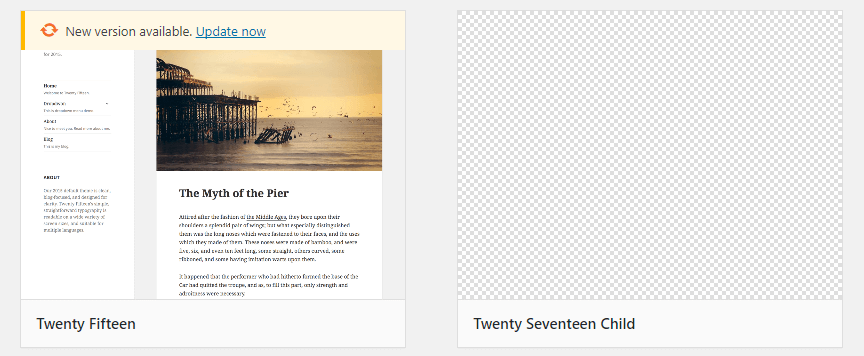
However, your new WordPress child theme isn’t ready for use yet, so don’t activate it. There’s one more step to go before you can use it.
Step #3: Modify Your WordPress Functions File
At this stage, your WordPress child theme should work. However, if you try to activate it, you’ll see it doesn’t look like its parent theme. This is because its stylesheet is bare, so we need to tell WordPress to load the one for its parent theme. We can do that by adding a functions.php file to your child theme’s directory.
Each WordPress setup includes multiple functions.php files. They’re commonly used to add specific features to your entire site (or individual themes, in this case). Return to your child theme’s directory, which is located at public_html > wp-content > themes > twentyseventeen-child (or whatever your child theme’s is called). When you’re inside, create a new file called functions.php following the same steps as we did earlier:

Now use the View/Edit option to open the file using your local text editor and paste the following code within:
<?php
add_action( 'wp_enqueue_scripts', 'my_theme_enqueue_styles' );

function my_theme_enqueue_styles() {
wp_enqueue_style( 'parent-style', get_template_directory_uri() . '/style.css' );
}
?>
That’s a snippet of PHP, which is the language WordPress is built upon. What it does is tell the platform it should load your parent theme’s stylesheet, then yours on top. Essentially, this means your website will look just as it did while you were using the parent theme, at least until you begin tweaking your new style.css file.
Remember to save the changes to your functions.php file, then close it. Now go to the Appearance > Themes tab on your WordPress dashboard, then activate your child theme:

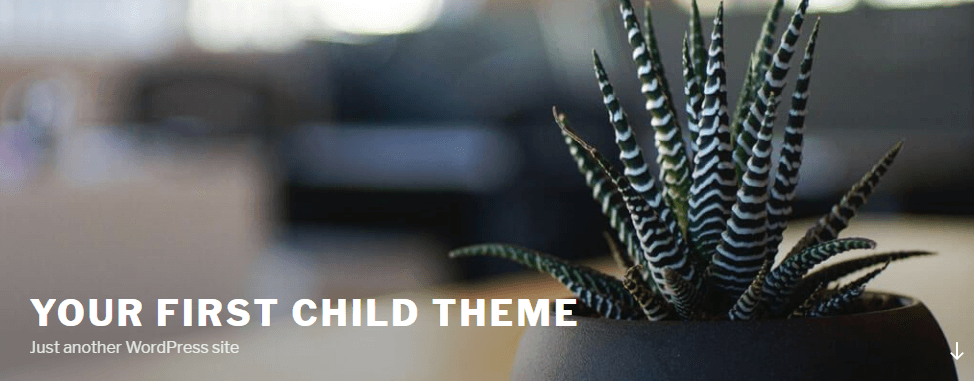
If you open your home page now, you’ll see it looks just as it did before, which means you did everything right:
Now comes the part that requires more work – making your customizations. If you’re not familiar with CSS, you should read up on how it works before you start making changes to your child theme. If something goes wrong, you can always delete it and start from scratch.
How to Create a WordPress Child Theme Using a Plugin
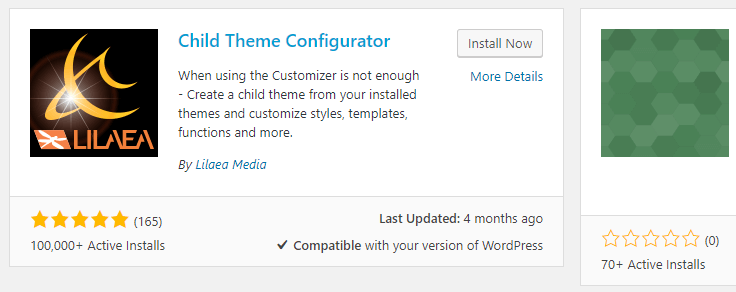
If you don’t feel confident tweaking WordPress’ files (although we recommend the manual approach), you can always use a plugin to help you set up your child theme. One of our favorites is the Child Theme Configurator plugin. It’s the most popular tool to create a WordPress child theme, and it’s straightforward to use too. To install it, go to the Plugins > Add New tab on your dashboard, and use the search bar to find the plugin:
Click on the Install Now button and wait while WordPress sets the plugin up. Once the button changes to blue and says Activate, click on it once more and that’s it – the plugin is good to go. Now, go to the new Tools > Child Themes tab on your dashboard. Inside, you’ll find an option to create a new child theme and a list of options to use as its parent:
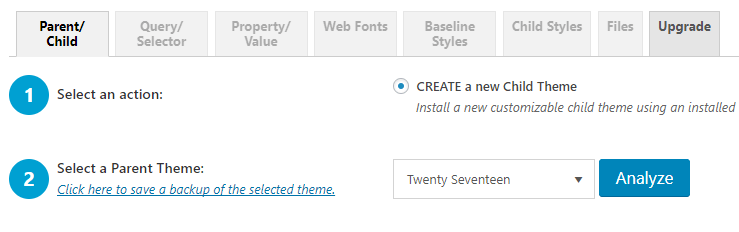
Click on the Analyze button and the plugin will check if the theme you chose can be used as a parent. If so, a new menu will appear below where you can set a name for your new child theme’s directory. The options below should be left to their default values, which will create a child theme just like the one we did in our earlier examples:

Scroll to the bottom of the page now and click on the Create New Child Theme button. It should only take a second before your new child theme is ready. Now go to the Appearance > Themes tab and check if it shows up there:

At this point, you can activate your child theme now as usual and start customizing it.
Conclusion
Using a WordPress child theme is an important step in your journey using the platform. It enables you to take any theme and use it as a foundation to build your customizations upon. Nothing is stopping you from tweaking the parent theme directly, but then you risk losing those changes during updates. A child theme preserves these changes, regardless of the updates made to the parent.
Let’s recap the three steps to creating a WordPress child theme manually:
- Create a directory for your child theme.
- Set up a stylesheet for your child theme.
- Modify your WordPress functions file.
Do you have any questions about how to create a child theme in WordPress? Let’s talk about them in the comments section below!