
Each post you write in WordPress has its own ‘meta data’, which is information about who authored it, when it was published, and more. The meta data fields WordPress includes by default are often enough, but you can go a step further and add even more information to each of your posts if you know how.
WordPress custom fields enable you to add any type of information you want to your posts’ meta data. For example, if you want to assign a rating score to each article, you could do it manually. Or you can create a custom field called Ratings, and use it to store that information.
In this article, we’re going to talk more about what custom fields are, and discuss their uses. Then we’ll teach you how to create advanced custom fields for WordPress, both using a plugin and manually. Let’s get to work!
What WordPress Custom Fields Are (And Why You Might Want to Use Them)
Custom fields enable you to add all kinds of meta data to your WordPress content.
WordPress meta data is a special type of information that accompanies each of your posts and pages. Each piece of that meta data comes from a ‘field’, some of which you can fill out or change while working on your content. Other meta data, such as who wrote each article, is assigned by default.
WordPress is very flexible about enabling you to create custom fields for your posts. Let’s talk about how this process can help you improve your website:
- It keeps your content organized. Custom fields can help you build a better taxonomy, by providing you with more information to categorize your articles.
- You can tailor your custom fields depending on your niche. WordPress fields don’t need to be simple text strings. You can use them to add new functionality to your posts, such as the ratings system we mentioned earlier.
- You can display your custom fields however you want. WordPress collects a lot of meta data for each post, but often doesn’t reveal all of it. If you’re using WordPress custom fields, you can tweak your settings to show specific information to your visitors.
It’s important to note that custom fields aren’t the same as custom WordPress post types. For example, you could create a type of post called Reviews, and assign it a rating using a custom field. However, theoretically, you could also use that same custom field for any other type of post.
To put it another way, custom fields have their own functionality, but they’re intertwined with WordPress’ posts system. If you want another example of WordPress custom fields in action, imagine you set up a personal blog. With custom fields, you could add a dedicated section for each post, displaying what you’re currently reading or how you’re feeling.
Before we move on, keep in mind that other types of content besides posts also have meta data, such as pages, comments, and even your media files. In other words, you can technically add custom fields to those content types as well. To avoid confusion, we’ll refer only to posts throughout the rest of this guide, although many of the instructions can be applied more broadly.
Introducing the Advanced Custom Fields WordPress Plugin
If you’re looking for a simple way to add and tweak custom fields in WordPress, you’re best off finding a dedicated plugin to help you out. We’d recommend starting with the WordPress Advanced Custom Fields plugin, which is simple to use but packs a lot of functionality.
With this plugin, you can add custom fields to your WordPress posts, pages, user profiles, media files, and more. You can choose from among dozens of formats for your fields, including simple text, images, dates, and so on. Just to give you an idea of how many formats are included, you can even add Google Maps as a custom field type. This can come in handy for promoting events.
Adding a custom field with this plugin is as simple as choosing a name and a format for it. Then you can configure whether the field should be required for each post, and what types of content it should appear in. Likewise, you can decide whether the meta data you add will show up when visitors view your posts, or if it should remain private.
Key Features:
- Add WordPress custom fields using a simple menu.
- Create groups to organize your custom fields.
- Choose which format to use for your fields.
- Pick where your fields should appear on the front end.
- Decide which types of content should use your custom fields.
Price: The base Advanced Custom Fields plugin is free, although there’s also a premium version with added functionality. There are also free and paid extensions available to add even more features, such as full galleries or contact forms. In our experience, the plugin’s free version is more than enough for most users, however.
How to Add Custom Fields to Your WordPress Site Using a Plugin (In 4 Steps)
Before we launch into the specifics, go ahead and install the Advanced Custom Fields plugin. The process is simple, and you can follow the same instructions as you would for any plugin. Once the plugin is activated, move on to the first step so we can talk about how to use it.
Step 1: Create a Custom Group for Your Fields
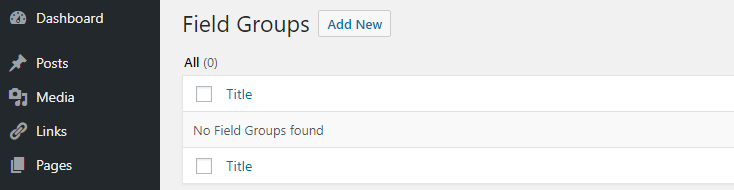
You’ll probably want to create a lot of custom fields right away, to test the plugin out if nothing else. With that in mind, you’re best off setting up a group for them, so you can keep things organized. To do that, go to the new Custom Fields tab in your dashboard, and look for the Add New option right next to where it says Field Groups:
On the next screen, set a title for your group using the field right below the Add New Field Group heading. Ideally, it should be something informative. That way, you can differentiate between your groups:
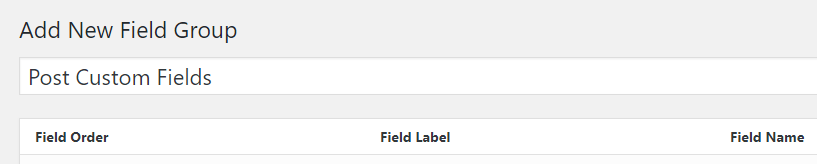
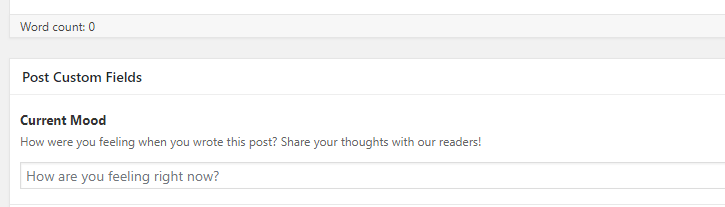
In our example, we’re using the title Post Custom Fields, to group all the custom fields we want to include within our posts. After you set a title, don’t click on the Publish button just yet. You can actually create your first custom field without having to leave this screen.
Step 2: Set Up a New Custom Field
Once you decide on a title for your group, you can add a custom field to it right away. To do that, click on the Add Field button near the top of the screen:

A new menu will appear, offering a lot of options. The first thing you’ll have to do is set a label for your custom field, which is the name that will show up when you edit it using the plugin. We’ll use the label Current Mood, so we can set up a custom field where post authors are able to tell readers how they’re feeling. Setting a label will also create a name for the field automatically:

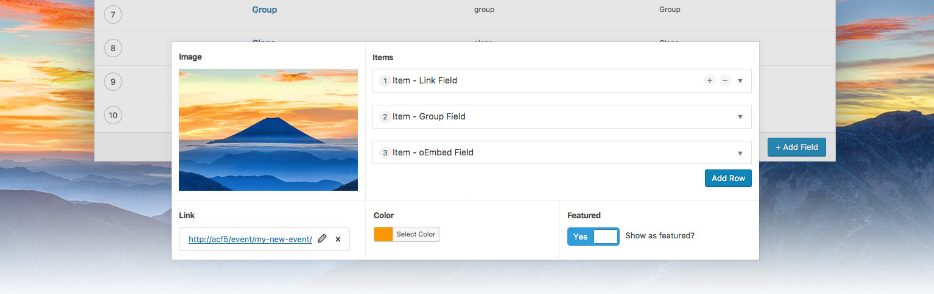
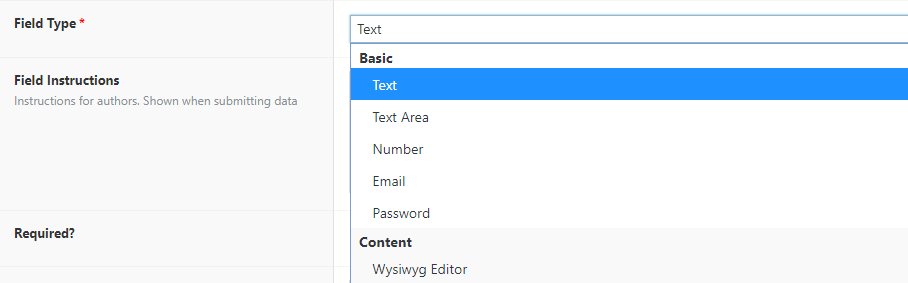
Next up, you need to choose which format to use for your custom field. As we mentioned earlier, there are plenty of options to pick from, including text, images, dates, and more. For the purposes of our example, we chose the Text option:
Below that, you’ll find an option to include instructions for your custom field. This can come in handy if there are multiple people working on your blog, and you want to let them know how to use the field. Here’s an example of a simple description:

Now you need to choose whether the custom field in question should be required for every post. If you choose No, other authors will be able to submit content without entering any value in this field. That won’t affect your posts’ functionality in the slightest, of course. The meta data simply won’t show up on the front end, so the choice is up to you:

Next, look for the field labeled Placeholder Text. Here, you can add the text that will show up in your custom field before you (or anyone else) starts typing. In most cases, people use placeholder text to let you know what type of content you should add:

Finally, scroll down to the Location section and look for the setting that reads Show this field group if:

Clicking on the leftmost drop-down menu will enable you to choose your first display condition. For example, you can set your custom field group to appear only on a certain post type:

In this example, the custom field you added earlier will show up in the editor for every single one of your posts (but not on pages). You have plenty of conditions to choose from, so you can micromanage exactly where your fields will appear.
Step 3: Choose Your Custom Field’s Location and Publish It
Before you publish your field group, scroll further down until you reach the Options section. There, look for the setting called Position. This enables you to choose where to show your new custom field within your editor. Your options are to display it at the bottom of your posts, after the title near the top, or off to the side:
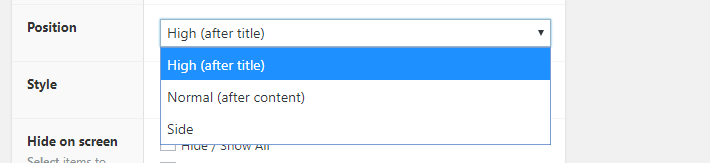
You can choose any position you want. Here’s a quick look at how our example looks after we configured it to appear below the editor itself:
After you make a decision, click on the Publish button to the right side of your screen. You’re finally done configuring everything! Your Custom Fields tab should look something like this now:

Remember that you can add as many custom fields as you want to WordPress, so feel free to play around with the plugin. In any case, there’s still one step to go: configuring your theme to display your new meta data.
Step 4: Configure WordPress to Display Your Custom Fields
If you’ve been following along, you’ve successfully created a new custom field. It should already show up in your posts when you go to edit them. However, any information you type into the field won’t show up on the front end until you customize your theme to include it.
There are two ways to do this. One involves editing the WordPress loop to include your new meta data, which can be a bit complicated if you’re not familiar with how the function works. We’ll talk a little more about this in the next section, but for now let’s go with the simple approach.
The Advanced Custom Fields plugin enables you to call on your new meta data using a simple shortcode:
[acf field="{$field_name}"]
In our example, we created a custom field called current_mood. Here’s what the shortcode would look like for that field:
[acf field="{$current_mood}"]
As you may know, you can add shortcodes anywhere you want within the WordPress editor. In most cases, you’ll want to add your custom field shortcode either at the beginning or the end of your posts, however, depending on its content.
How to Add Custom Fields to WordPress Manually
If you’d rather not use a plugin, WordPress also enables you to add custom fields to your content manually (albeit with less easy flexibility). To do this, open the WordPress editor within any post or page, and look for the Screen Options tab near the top:

Clicking on that tab will display a menu, where you can choose which ‘boxes’ or widgets will show up on your editor screen. You’ll notice there’s a Custom Fields option, so go ahead and enable it.
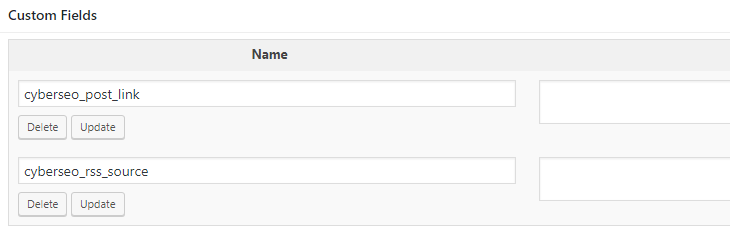
Now, a new Custom Fields widget should appear below the WordPress editor. There’s a drop-down menu you can use to choose from existing custom fields, or you can click on the Enter New option to create a new one:

Simply set a name for your custom field, and enter its value to the right. When that’s done, click on the Add Custom Field button right below, and you’re all set.
Of course, you still need to configure your WordPress theme to display your new meta data on the front end. To do that, you’ll need to edit your WordPress loop, as we mentioned before. If you’re not sure what that is, see this article that will get you started.
Here’s an example of what a loop including a custom field might look like:
<?php
    if ( have_posts() ) :
        while ( have_posts() ) :
        <?php the_field('custom_field'); ?>
        endwhile; // end while
    endif; // end if
?>
This is a simple example, but you can accomplish just about anything with your custom fields by editing the loop. It may take a little practice, but it’s ultimately a more powerful option than using a plugin.
Conclusion
WordPress custom fields are a smart way to organize your content even further than the platform allows out of the box. If you know how to create these fields, you can add all sorts of fun meta data to your posts. Some examples include rating scores, guest author names, and even expiration dates for your content.
You can always add WordPress custom fields manually, but using a plugin such as Advanced Custom Fields is often the easiest option. Here’s how to use it:
- Create a custom group for your fields.
- Set up a new custom field.
- Choose your custom field’s location and publish it.
- Configure WordPress to display your custom fields.
Do you have any questions about how to use WordPress custom fields? Let’s talk about them in the comments section below!