
Running a WordPress website involves a lot of uploading and downloading of files. Tasks such as installing themes, creating local backups, editing files, and more require you to have full access to your website’s back end.
WordPress itself provides you with several ways to access its files, but none are as efficient as using File Transfer Protocol (FTP). With this technology, you’ll save yourself a lot of time finding the files you need and even editing them when necessary.
In this article, we’re going to talk about what FTP is, how it works, and why you should use it. Then we’ll teach you how to use FTP with WordPress. Finally, we’ll introduce you to a couple of helpful WordPress FTP plugins to make your life easier. Let’s get to it!
What FTP Is (And Why You Should Use It)
When you download a file from a website, you do so through a Hypertext Transfer Protocol (HTTP) connection. FTP is a similar technology, but it only enables you to send and receive files, rather than rendering entire websites. Think of HTTP as the main road that everyone uses, and FTP as an auxiliary lane that’s only for cargo transfer. For WordPress users, that cargo is media and text files.
Before we get into the specifics of how you can use FTP, let’s talk a bit more about the benefits it offers and why you should become acquainted with it:
- FTP enables you to upload and download files securely. Using FTP, you can establish a direct connection to your server and use it to download files as backups, upload new ones, and more.
- You can edit your files via FTP. If there’s a specific file you want to edit on your server, you can use FTP to access it, make modifications, and save your changes.
- For troubleshooting purposes. Most of our troubleshooting guides use FTP extensively, since it’s the easiest method for getting access to your website’s files. It stands to reason that learning how to use FTP can save you a lot of headaches in the long run.
To be clear, you don’t need to use FTP to gain access to your website’s files and folders. Many web hosts provide you with file management tools via your control panel. Ours, for example, can be found in the File Manager tab after you log into your 000Webhost account:
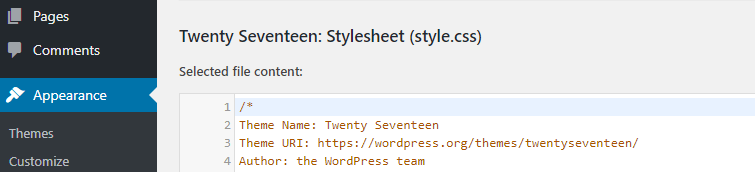
WordPress users can also edit their theme files within the platform by going to the Appearance > Editor tab. However, this approach isn’t as useful because the built-in editor is very sparse:
In summary, the WordPress FTP approach wins handily over control panel file managers and built-in editors, because of the sheer amount of features it offers. Plus, it’s far easier to upload or download large files using an FTP client than through your browser.
Before we move on, it’s important to note that manipulating your server’s files is always a delicate process, regardless of which protocol you use. You should make sure that you know exactly what you’re doing if you use FTP to tweak your files, or follow instructions from reputable sources. Creating regular backups of your website can diminish the risks involved, so it’s a practice you should adopt if you haven’t already!
How to Use FTP With WordPress (In 4 Steps)
Just like how you need a browser to use HTTP, FTP requires its own client. The first thing we’re going to do is help you pick one, and then we’ll teach you how to use it.
Step 1: Choose an FTP Client
FTP clients are applications that enable you to connect to your website’s files directly. In most cases, they’re very easy to use, and they require little information or setup. We’ll talk more about what credentials you’ll need to access your website via FTP in the next section. For now, we’ll focus on choosing the right client for you.
For example, let’s look at FileZilla. What is FileZilla? It’s an open-source client, with a simple interface that’s very easy to use. If you’ve read any of our troubleshooting guides, you know we’re partial to this client because anyone can get started with it in a matter of minutes.

Moving on, Cyberduck is another solid option. If FileZilla is a screwdriver, Cyberduck is the equivalent of a Swiss Army knife. Along with enabling you to access your website via FTP, Cyberduck also supports connections to Amazon S3, Google Cloud Storage, Rackspace, and Backblaze servers. It can even connect to your Google Drive and Dropbox accounts!

If you use any of those services, this client can make your life easier by enabling you to use a single app to manage your files more efficiently. However, if all you’re looking for is a simple FTP client, then you might want to check out our next suggestion first.
The Free FTP client is as simple as applications get. It features a user-friendly interface with large buttons that are easy to recognize, a built-in image viewer, and a text editor:
In most cases, FTP clients enable you to edit your files by downloading a copy of them, using your text editor to make changes, and then re-uploading that updated version. They handle this process for you seamlessly. Still, having a built-in text editor can be nice if you don’t have a favorite one already.
Regardless of which client you choose, the underlying functionality remains the same. All three of these options enable you to access your website, upload and download files, and edit them. With that in mind, we’re going to show you how to use FileZilla throughout the rest of this tutorial, but you can apply the following process using just about any FTP tool.
Step 2: Use FileZilla to Access Your WordPress Website
Once you have a client set up, you’ll need three pieces of information to access your website via FTP: your hostname, username, and password. Hostnames are internal FTP addresses provided by your web host. For example, 000Webhost’s FTP hostname is files.000webhost.com.
As you can see, there’s nothing about that address that identifies one website in particular. That’s where your unique FTP credentials come in, since they enable you to connect to your site. You can find your 000Webhost credentials by logging in to your account and navigating to the Settings > General tab. Inside, look for the FTP Details section:

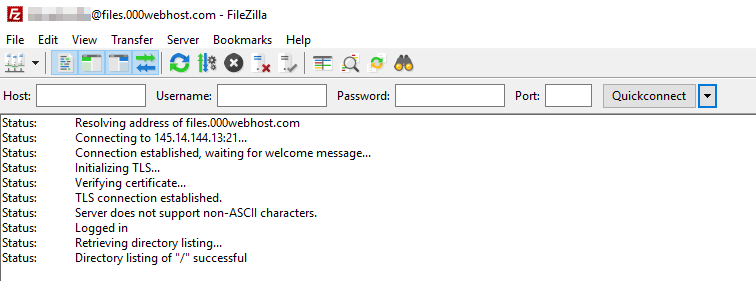
To your right, you’ll see 000Webhost’s hostname (which you’re already familiar with) and your personal FTP username. As for your password, it’s the same one you use to log in to your control panel. Armed with this information, go ahead and run FileZilla.
Once the program opens, you’ll find three empty fields at the top of its screen, labeled Host, Username, and Password:

Enter your 000Webhost credentials into their respective fields. You’ll also notice a field called Port. Your computer routes your connection through specific ports depending on what you’re doing. For example, HTTP uses the 80 and 8080 ports, and FTP usually defaults to the 20-22 range. In any case, you can generally leave this field empty, and FileZilla will use the default port.
With that out of the way, click on the Quickconnect button at the top of the screen, and wait for FileZilla to establish a connection to your server. You should see a lot of messages appearing in the section right below your credentials:
Those messages tell you what your client is doing and whether it succeeds or fails. You can ignore them for the most part, unless an error pops up. When your client successfully establishes a connection, a couple of new folders will display in the lower right quadrant of FileZilla:

The public_html folder is also known as WordPress’ root directory, since it’s where all your website’s files are stored. Depending on which host you use, you may see other folders show up here. However, you can safely ignore them for now.
Before we move on, take another look at the Quickconnect button at the top of your screen. There should be a small tab icon next to it. If you click it, you can see a list of your most recent FTP connections. Clicking on any of them will enable you to connect instantly, without having to type your credentials again:

This shortcut will come in handy the more you use FTP, so take advantage of it!
Step 3: Upload Plugins and Themes Via FTP
WordPress enables you to upload and install themes via its dashboard, and the process is simple. However, you can also accomplish the same goal using FTP. It can be faster to install plugins and themes using this method, and you’re less likely to run into any errors.
Using FileZilla to upload themes and plugins to WordPress is simple, and it works the same for both types of add-ons. For now, we’ll illustrate how the process works for installing a theme. The first thing you’ll need to do is download the theme you want from a reputable source.
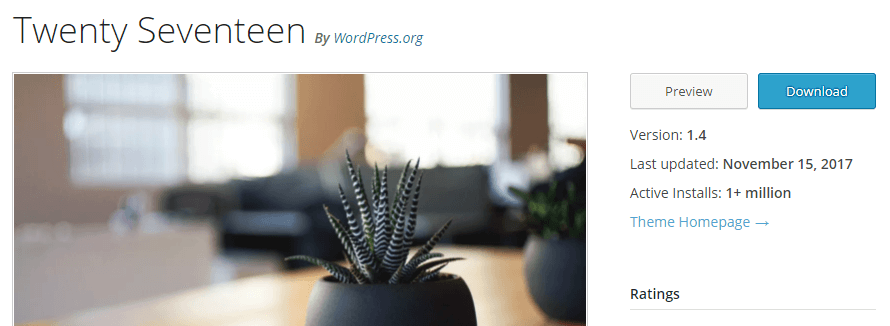
For example, if you want to download the Twenty Seventeen theme, you can go to its official page at WordPress.org and look for the Download button at the top of the screen:
Click on it, and you’ll download a zipped file containing the theme. Your next step is to unzip that file, and save the files inside somewhere secure. In most cases, the themes you download will include only a single folder, which keeps things simple. Some may also come with documentation files, but you don’t need to upload those.
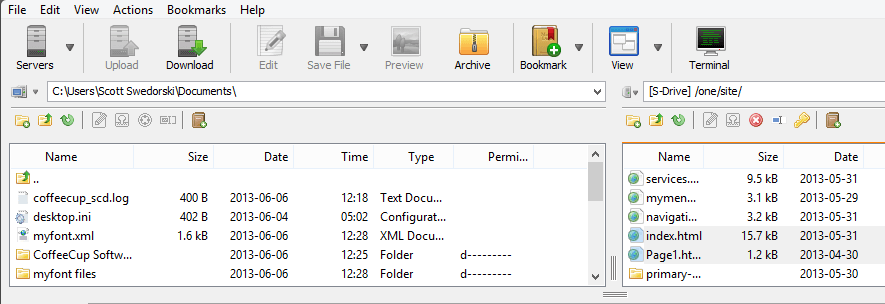
Once you have your theme unzipped, open FileZilla and connect to your 000Webhost server once more. Now, you’ll see two distinct sections with files and folders at the bottom of your screen:

The section to the left represents your local computer and its files. To the right, you’ll see your server directories. Having both side by side enables you to drag and drop files and folders easily between them. That’s exactly what we’re going to do now.
Using our unzipped Twenty Seventeen folder as an example, here’s how to install a theme on your site:
- Access the public_html folder on your website’s server.
- Look for the wp-content directory within, and open it.
- Open the themes subdirectory.
- Locate the twentyseventeen folder in your local files, using FileZilla.
- Drag the twentyseventeen folder over to the themes directory.
As soon as you drop the folder where it needs to go, FileZilla will start transferring all the files to your server:

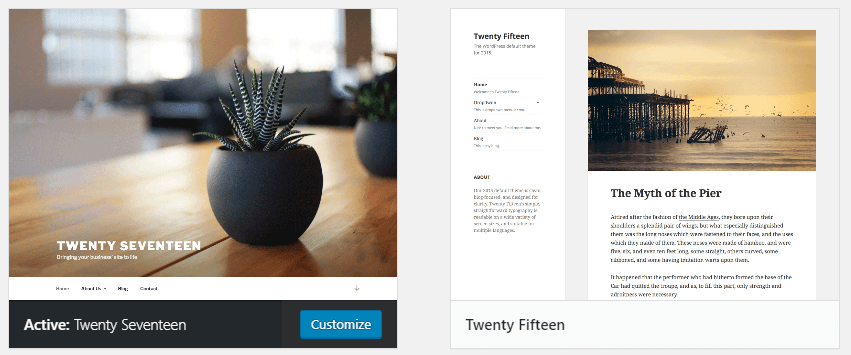
You’ll know the process is complete when you see no more items under the Queued files section at the bottom of the screen. Now, all that’s left to do is go to your WordPress dashboard and activate your new theme via the Appearance > Themes tab:
As we mentioned earlier, the process works exactly the same for uploading plugins. The only difference is that your unzipped plugin folder should be placed in the public_html/wp-content/plugins directory (instead of the themes folder).
Step 4: Edit Your WordPress Files Using FTP
By now, you already know how to upload and download files from your server via FTP. All that’s left to do is figure out how you can edit them, and you’ll know everything you need for using FTP in the future.
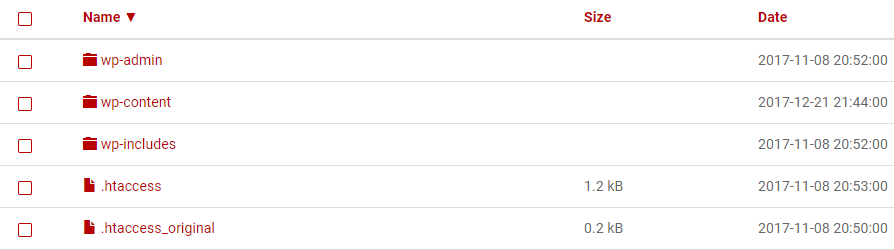
To get started, return to the public_html folder on your server. You should see a lot of folders and files within. Find the one called .htaccess, and right-click on it. This is a crucial WordPress file that you may sometimes need to make changes to, so we’ll be using it as our example:
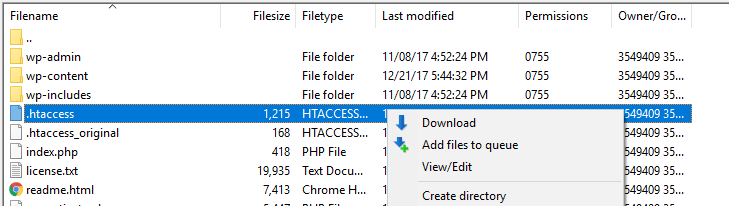
You’ll see a lot of options, including deleting, renaming, and downloading the file. The one we care about right now is called View/Edit, so go ahead and click on that. If this is the first time you’re opening a file through the client, FileZilla will ask if you want to use your default text editor or choose another program. We recommend the former option (any text editor should suffice).
Now, FileZilla will download a copy of the file to your computer, and open it as a text file:
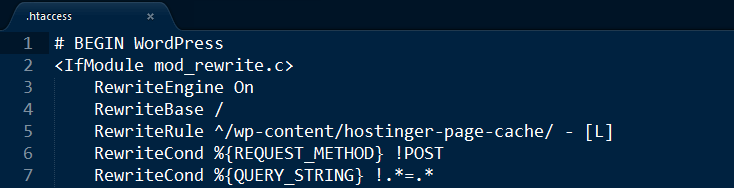
Just so you know, this isn’t quite what a default WordPress .htaccess file looks like. We provide a custom configuration for all our 000Webhost users, to ensure better performance. In any case, you can make your changes to this file and save them. When you close the editor, FileZilla will ask if you want to replace the copy on your server with the file you just edited. If you say yes, the changes will become permanent. That’s it – you just edited a WordPress file using FileZilla!
2 WordPress FTP Plugins to Simplify Your Workflow
The right WordPress FTP plugin can make your life easier, by enhancing what you are able to do using the protocol. By itself, FTP is pretty thorough. However, you can find plugins that offer more options or additional flexibility. Here are two examples you might want to check out.
1. Media from FTP

WordPress enables you to upload media files to your website quite easily. However, it sometimes has difficulty with files that are too large or come in batches. Fortunately, FTP can address that problem. Using Media from FTP, WordPress will be able to recognize any media files you upload via FTP to your website, create thumbnails for them, add author information and creation dates, and more.
Key Features:
- Enable support for media files uploaded via FTP.
- Add metadata for FTP media files.
Price: This plugin is 100% free.
2. All-In-One WP Migration

There are a lot of WordPress migration and backup plugins, but we’re partial to All-In-One WP Migration. In fact, we include this plugin for every single 000Webhost WordPress user. It enables you to create copies of your website, which you can use to migrate it to a new server or store as backups. What does this plugin have to do with FTP? It enables you to save the backups you create directly to your server, which you can then access via FTP to download them easily.
Key Features:
- Create copies of your website for migration purposes.
- Back up your site directly to multiple cloud storage services and FTP.
- Restore your website from a backup with a single click, or by uploading it via the plugin.
Price: This a free, open-source plugin.
Conclusion
Using FTP may seem like a hassle at first, but in time it will become second nature. Most FTP clients are very easy to use, and they’ll enable you to run your website more efficiently. For example, there’s no easier way to upload or download files in bulk than to use FTP, and that’s only one of its advantages.
Before we wrap up, let’s recap the four steps to start using FTP with WordPress:
- Choose an FTP client (such as FileZilla).
- Log into your website using your FTP client of choice and your credentials.
- Learn how to upload plugins and themes to your website via FTP.
- Use FTP to edit files on your back end.
Do you have any questions about what you can do with WordPress FTP? Let’s talk about them in the comments section below!