
Running a website means making a lot of constant changes to the way it looks and works. In addition, you’ll need to update plugins and themes regularly to ensure you’re running the latest versions. Some of these changes are straightforward, but others may require you to temporarily disable your website while you work on them.
Most websites enable a ‘maintenance mode’ in these circumstances. It involves re-routing all traffic to a simple page that tells your visitors you’re making changes or upgrades to your site and they should check back later. WordPress doesn’t include this feature out of the box, but you can implement it without too much fuss.
In this guide, we’re going to talk a bit more about what WordPress maintenance mode is and when to use it. Then we’ll teach you two ways to implement this feature in WordPress. Let’s do this!
What WordPress Maintenance Mode Is (And When You Should Use It)
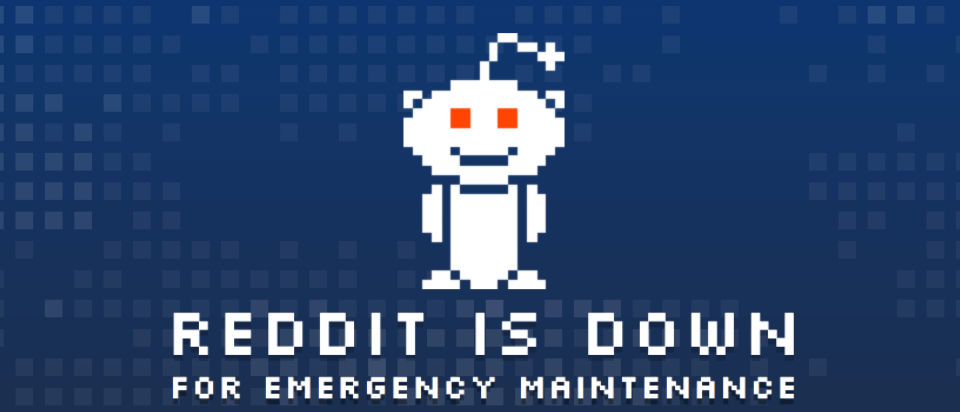
Maintenance mode helps you update your website with confidence while notifying your users to check back later.
A WordPress maintenance mode page has a single purpose – to let you know you should come back later because the website you’re visiting isn’t currently available. In most cases, maintenance mode pages show up when people try to access any part of your site, and they can be as detailed or succinct as you want.
Creating an entire page just to tell people they should stop by later may sound like a waste of time, but it’s actually a brilliant move. If someone visits your website and it simply fails to load, they might think it’s gone – and it’s impossible to know if they’ll try to stop by again later.
On the other hand, if you don’t enable maintenance mode, people might stumble on your website while you’re making changes to it. That means it may not be working properly, which can also scare visitors away. With that in mind, here’s a list of situations in which we recommend using WordPress maintenance mode:
- While updating or switching key plugins and themes. In most cases, it shouldn’t be necessary to disable your website while updating plugins and themes. However, it can be smart to do so if you just updated WordPress to its latest version, to avoid compatibility issues. Likewise, switching active themes is often a big deal, so it doesn’t hurt to be careful.
- When you update WordPress core. Platform updates may lead to compatibility issues or bugs in your website. That’s why a lot of people wait a few days after each new version of WordPress comes up before updating to it. In any case, setting up a maintenance page when you do so is a smart move.
- While making changes to your website’s design. Updating a website’s design often involves a lot of trial and error. It’s usually best if visitors don’t have access while you’re trying new stuff out so they don’t run into any visual bugs.
- During troubleshooting sessions. If they run into a WordPress error, enabling maintenance mode can often be less disconcerting to your visitors. Plus, it lets them know you’re actively working on a fix.
Keep in mind that WordPress maintenance mode isn’t something you should leave on indefinitely. Ideally, your website should be back up and running within a few hours, so visitors don’t have to check back time after time.
A lot of people use maintenance pages as long-term placeholders, while they work on significant changes to their websites. If you think you’ll need more than a few hours to get everything perfect, we recommend using a staging website to implement them. Then, once your website’s new version is ready to see the light of day, you can just push that version online and avoid downtime.
How to Enable WordPress Maintenance Mode (In 2 Ways)
Before you make any critical changes to your website, you should always create a backup. That way, if something goes wrong, you can just return your site to a previous state without any fuss.
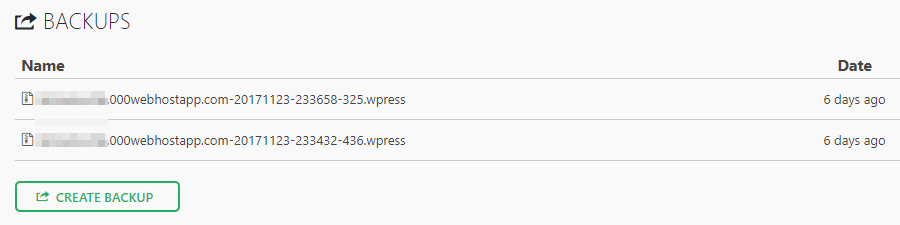
If you’re a 000Webhost user, your WordPress installation already includes a pre-installed backup and migration plugin – All-In-One WP Migration. To use it, just go to your dashboard and navigate to the All-in-One WP Migration > Backups tab. Inside, click on the Create Backup button:
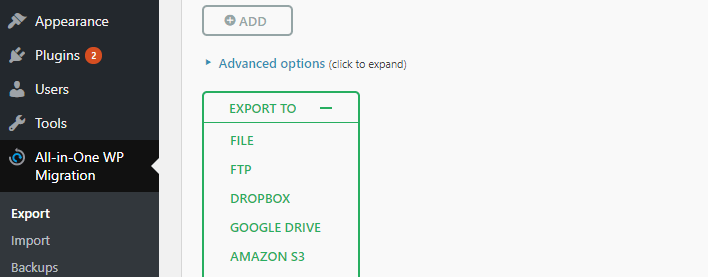
On the next screen, click on the Export to button and choose the File option, which will enable you to download a copy of your website to your computer:
After downloading your backup, you can either upload it via the All-in-One WP Migration > Import tab or restore it with one click from the list in your Backups tab. With that out of the way, let’s get to work!
1. Use a WordPress Maintenance Mode Plugin
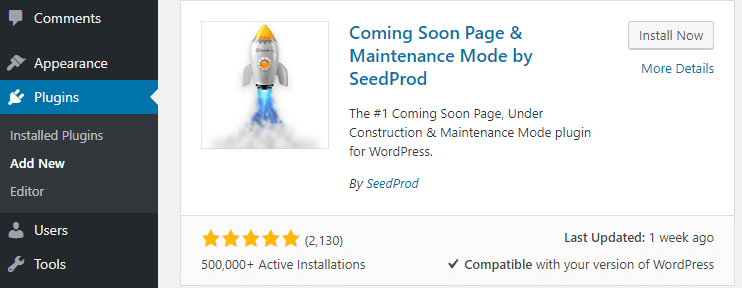
A recurring theme with WordPress is it enables you to implement complex features using simple plugins, and this is no exception. There are plenty of WordPress maintenance mode plugins to choose from, but we’re partial to Coming Soon Page & Maintenance Mode by SeedProd (CSPMM). Despite its mouthful of a name, this plugin is very easy to use, and it packs a wealth of features:

To install the plugin, go to your dashboard and open the Plugins tab. Inside, click on the Add New button at the top of the screen, then type the full name of the plugin in the search bar on the right side of the next screen. The CSPMM plugin should appear as the top result:
Click on the Install Now button and give WordPress a few seconds while it downloads and sets up the plugin. When it’s ready to go, the Install Now button will be replaced with one that says Activate – go ahead and click on it. Afterward, you’ll see a new Coming Soon Page & Maintenance Mode link appear under the Settings tab. Click on it now, and you’ll see this screen:

Right at the top, there’s an option to enable either a ‘coming soon’ or a maintenance mode for your website. Turning on the latter is as easy as selecting the setting that reads Enable Maintenance Mode and clicking on the Save All Changes button. The problem is, you haven’t created a maintenance page yet, so if people visit your website now, they’ll just see a blank screen.
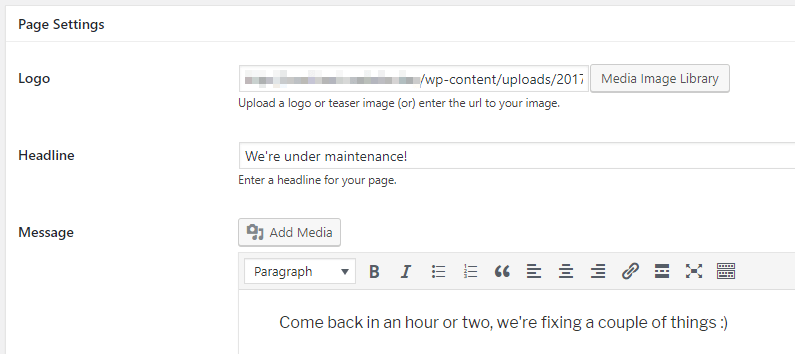
To fix that, scroll a bit further down until you reach the Page Settings section. Here, you can upload a copy of your logo, type a headline, and a message:
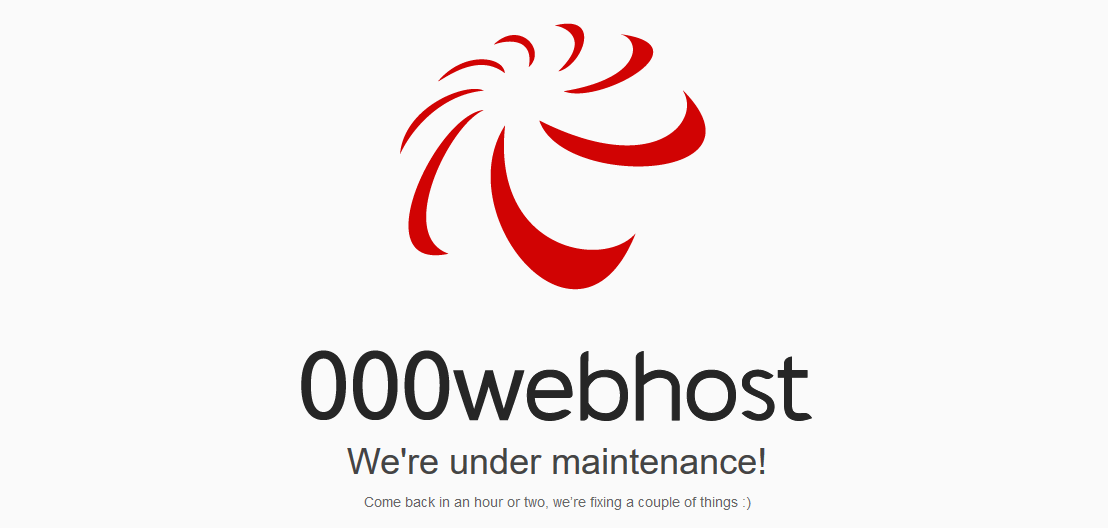
If you fill in those fields and save your changes, your maintenance page should look something like this one:
You can customize your maintenance page’s style even further by jumping over to the Design tab. However, you don’t need to get too fancy – as long as your visitors understand everything’s under control, you’re good to go.
Finally, don’t forget to return to the Coming Soon Page & Maintenance Mode tab to disable WordPress maintenance mode when you’re ready. Just choose the Disabled option at the top of the screen, save your changes, and that’s it.
2. Reroute Traffic Using Your .htaccess File
Your WordPress .htaccess file governs how your website interacts with your server. For example, it can block certain IP addresses from accessing your site, or tell visitors how long their browsers should store your content (commonly called ‘caching’).
In this case, we’re going to use your .htaccess file to re-route anyone that tries to visit your website to a simple maintenance page built by you. To do that, we’re going to use a technology called File Transfer Protocol (FTP), which enables you to send and receive files from your server securely.
First off, log in to your 000Webhost control panel and go to the Settings > General screen. Inside, you’ll find a section called FTP Details near the top of the screen:

Inside that section, there are two fields you need to take note of – Hostname and Username. Remember their values or keep this tab open, because you’ll need them in a minute. Next, you’ll need to download an FTP client which will enable you to connect to your website using that technology – we recommend FileZilla.
When you’re done, open FileZilla and take a look at the top of your screen. You’ll see three fields called Host, Username, and Password. The first two correspond to your 000Webhost Hostname and Username, and your Password is the same one you use for that account as well:

After filling those three fields, click on the Quickconnect button to the right and a list of folders will appear on the lower right side of your screen. Click on the one called public_html:

This is your WordPress root directory, where all your website’s files reside. Find your .htaccess file and follow these instructions:
- Right-click your .htaccess file and click on the Download button.
- After the download is done, right-click on .htaccess again and choose the View/Edit option.
- Erase the contents of your .htaccess file using your text editor and don’t save the changes yet.
What we’re doing right now is replacing the default instructions in your .htaccess file with some of our own. Before we did that, you downloaded a copy of the original file to your computer so that you can re-upload it later. Right now, the .htaccess file should be open using your default text editor, and here’s the code you need to paste inside:
<IfModule mod_rewrite.c>
RewriteEngine on
RewriteCond %{REMOTE_ADDR} !^192\.000\.000\.000
RewriteCond %{REQUEST_URI} !/maintenance.html$ [NC]
RewriteCond %{REQUEST_URI} !\.(jpe?g?|png|gif) [NC]
RewriteRule .* /maintenance.html [R=503,L]
</IfModule>
Now save the changes to your .htaccess file and close it. FileZilla will ask you if you want to overwrite your original file, so say yes. Before moving on, let’s explain what you just did. First off, the REMOTE_ADDR line tells your server the IP address in there should still be able to access the website normally. You should find out what your IP is and replace the code accordingly.
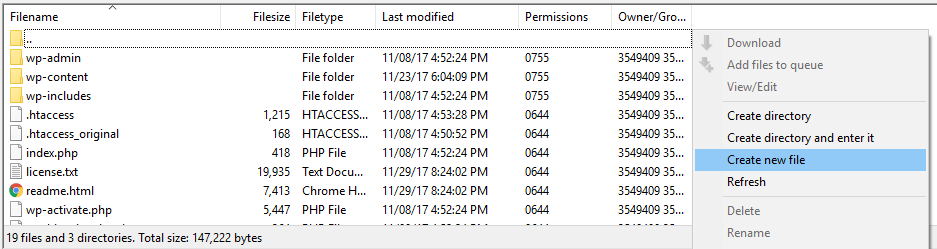
Secondly, you’re telling WordPress to re-route all your traffic to a page called maintenance.html, located in your public_html folder. Since WordPress doesn’t include such a page, you’ll need to create one. To do it, right-click anywhere within the public_html folder and choose the Create New File option, then name that file maintenance.html:
Now open that file using the same process as with .htaccess and paste the following code within it:
<html>
<head>
<meta http-equiv="Content-Type" content="text/html; charset=UTF-8">
<title>Service Temporarily Unavailable</title>
</head>
<body>
<h1>We're under maintenance!</h1>
<p>Come back in an hour or two, we're fixing a couple of things :)<p>
</body>
</html>
That’s a very quick and dirty HTML page with the same message as the example we used during the first method. You can tweak it any way you want. Just remember to save your changes when you’re ready, and that’s it. Anyone trying to access your website will immediately see that page.
Now, when you’re ready to re-enable your website, open FileZilla again and return to the public_html directory. Go inside, delete your current .htaccess file and locate the original copy you saved earlier using your local menu on the left side of the screen:
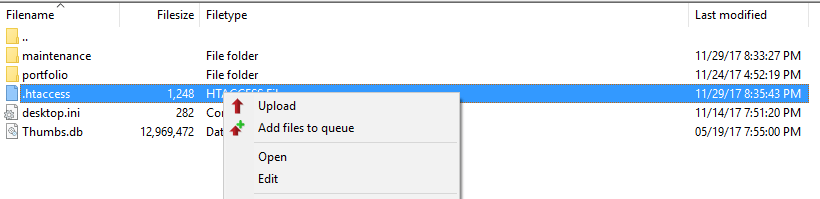
Once you’ve found it, right-click on that file and choose the Upload option. This will create a copy of the file within your .htaccess directory, which will put your site back the way it was.
Conclusion
WordPress maintenance mode is a feature that can come in handy in a lot of different situations. For example, if you run a 502 bad gateway error, you can enable maintenance mode while you work on fixing it. The same also goes if you’re updating one of your pages or making changes to your website’s look.
The bad news is WordPress doesn’t include a maintenance mode feature out of the box. However, you can implement it using one of these two methods:
- Use a WordPress maintenance mode plugin.
- Reroute traffic using your .htaccess file.
Do you have any questions about how to enable maintenance mode in WordPress? Ask away in the comments section below!