
A key part of improving your site’s visibility is ensuring that it appears prominently in search results. However, it is equally important that those results accurately reflect the best content on your site. Most sites include some content you don’t want to show up in searches. So how can you control what Google does and doesn’t display?
This is where a little file known simply as robots.txt comes in. It may not seem like much at first glance, but this one file can have a huge effect on your site’s overall Search Engine Optimization (SEO). It enables you to control which areas of your site are visible to search engines. Plus, it ensures that they will notice updates made to your site quicker.
In this article, we’re going to look at how you can create a WordPress robots.txt file to improve your site’s Google rankings. You’ll learn how to create the file, where to add it to your WordPress site, and what it should include. Finally, we’ll show you how to submit it to the Google Search Console. Let’s get started!
What a Robots.txt File Is (And Why It’s Important)
In the simplest terms, robots.txt is a text file containing simple instructions that inform search engines what they should and should not read on your site. You can think of it as directions you give to sites like Google. It tells them which pages and directories you don’t want to be included in their search results.
Why is this important, and how does it affect your SEO? To answer that question, we need to talk about crawlers. A crawler is a program that search engines use to read websites, in order to index them so they can appear in search results. You may already be familiar with Google’s crawler, which is called Googlebot.
When these programs crawl your website, they will by default check every single page within it. So the more pages your site contains, the longer it will take for the crawler to read everything. In order for crawlers to not affect sites negatively by overworking them, each site is given a ‘crawl budget’. Google explains the crawl budget this way:
“Simply put, this represents the number of simultaneous parallel connections Googlebot may use to crawl the site, as well as the time it has to wait between the fetches.”
In the same article, Google also identifies “having many low-value-add URLs” as an important factor that negatively affects the indexing of a site. In practical terms, this means that if the crawler has to go through low-quality pages, it’s effectively wasting the crawl budget on unimportant content instead of on the content you want it to find. This will also cause your entire site to be crawled less frequently. Plus, updates will take longer to appear in search results.
How to Create a WordPress Robots.txt File and Optimize It for Google (In 4 Steps)
By now, you hopefully understand why adding a robots.txt file to your site is important for optimizing its visibility. It’s time to look at how you can actually create such a file and add it to your WordPress site. In this guide, we’ll take you through each step of the process. We’ll show you how to write the file, where is robots.txt in WordPress, and how to submit it to Google.
Step 1: Create the File in a Text Editor
All you need to create a robots.txt file is a simple text editor, such as TextEdit or Notepad. The file itself is simply a list of one or more directives that crawlers use to determine which parts of your site to read and index. Writing one is therefore all about adding the instructions you want using the required syntax, which we’ll look at now.
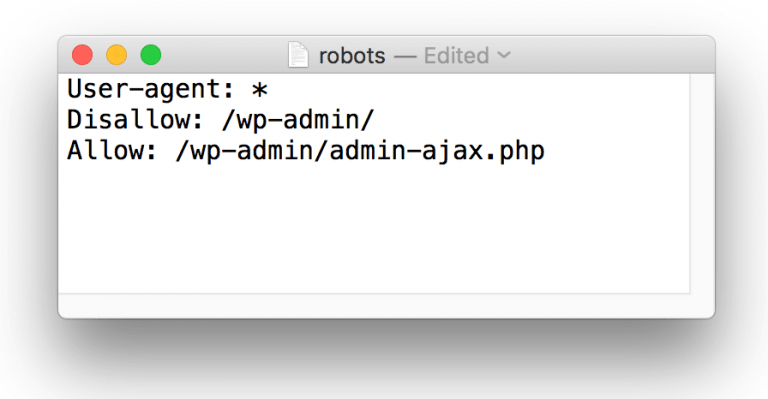
Let’s take a look at a sample robots.txt file with some standard code:
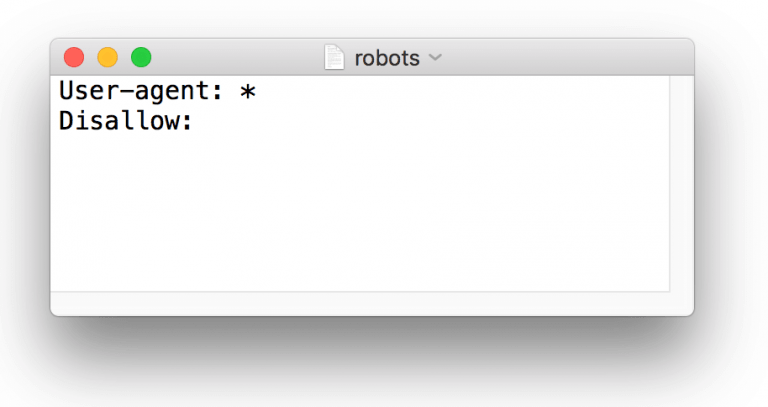
The User-agent line determines which crawlers this particular directive is aimed at. Since this example uses the asterisk (*) wildcard, this directive is aimed at all crawlers. If you only wanted to aim this at a specific crawler, such as Googlebot, it would look like this:

The second line contains the instructions you’re giving the crawler, which in this case is Disallow. This determines which parts of your site you do not want the specified user agent to crawl. This example leaves the line empty, which means that no folders have been disallowed. Therefore, the crawler will read everything on the site.
Let’s say that we want Googlebot to not crawl a folder named /old-photos/. In that scenario, your text file should look like this:
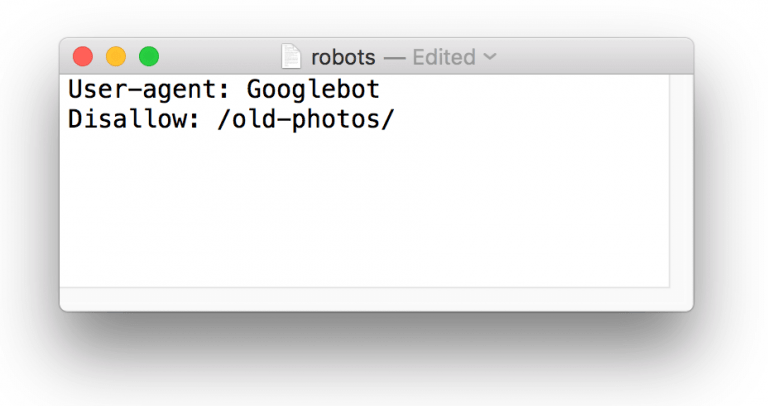
It’s important to note that these values are case sensitive. So if the folder is actually called /Old-Photos/, this instruction would not apply to it.
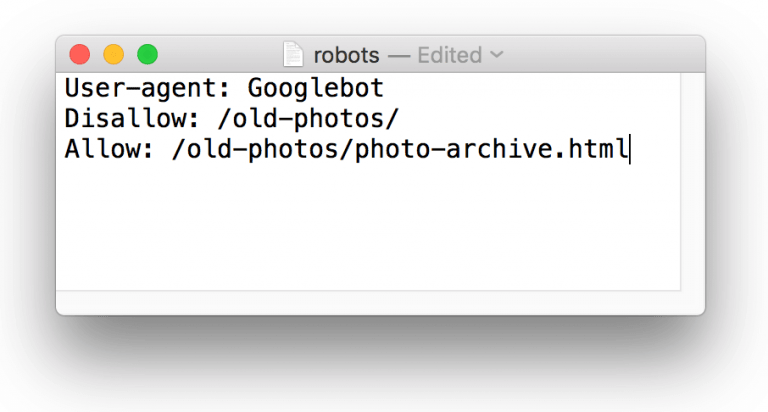
Now, let’s say that there are some files in this folder you do want the crawler to see. You can do this using the Allow directive:
There are also some additional non-standard directives, such as Crawl-delay, Sitemap, and Host, but these are not understood by all crawlers. For example, Googlebot will only accept Sitemap, which points the crawler to your site’s XML sitemap. You generally don’t need to worry about including this, however, as you can submit your sitemap directly through Google Search Console.
Now that you know how to put together a robots.txt file, let’s see what it should include for the best results!
Step 2: Optimize the File for Search Engines
To optimize your robots.txt file, you’ll first need to consider what areas of your site you don’t want crawlers to bother with. This includes, but is certainly not limited to, areas that are not visible to the public or that make no sense outside of a specific context.
Keep in mind that this does not apply to JavaScript or CSS assets, which you should never block. In fact, this is something Google has specifically advised, as it stops their crawlers from fully understanding how your site works and can interfere with your SEO rating:
“Disallowing crawling of Javascript or CSS files in your site’s robots.txt directly harms how well our algorithms render and index your content, and can result in suboptimal rankings.”
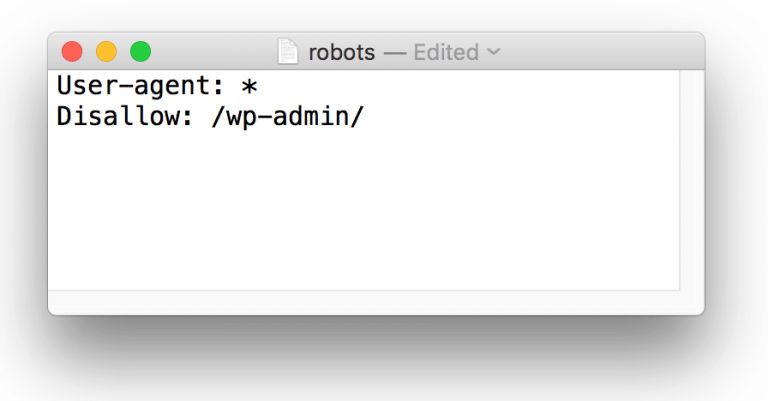
One example of a page you probably would want to disallow is your WordPress admin login page, which you can do as follows:
However, many themes rely on a file located in this directory, called admin-ajax.php. You’ll want to allow this file since it’s a JavaScript element:
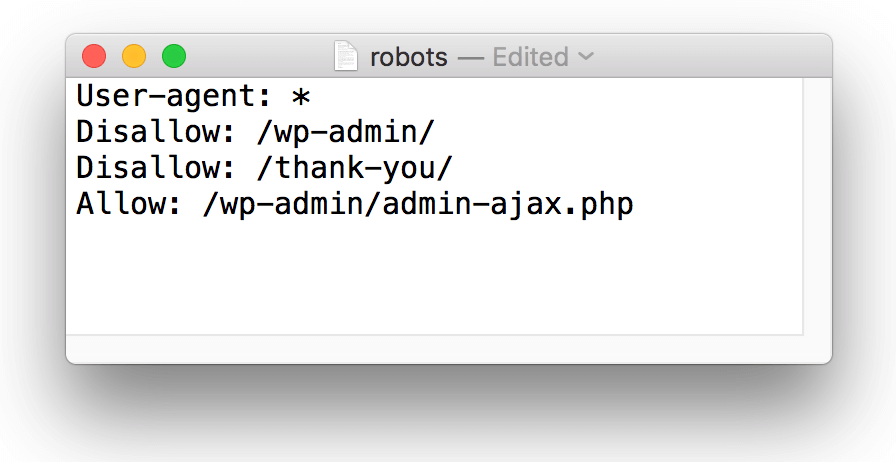
Another example of a type of page to disallow would be “Thank You” pages that visitors only see after they have completed a form. Again, there’s no point in these appearing in search results, so you could disallow both:
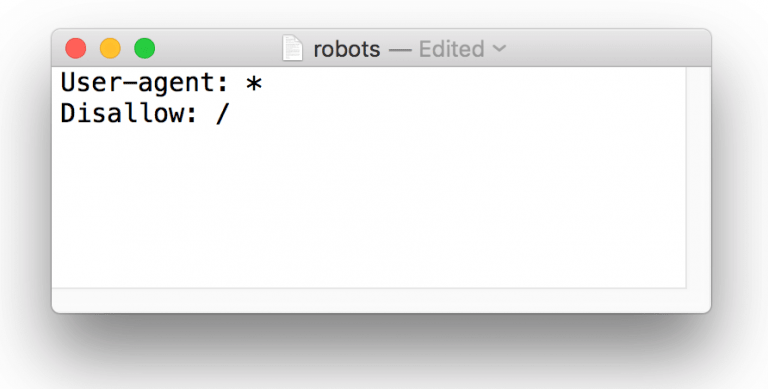
These are only a few examples, and what you should block in your robots.txt file depends on the contents of your particular site. So you will need to use your best judgment, and always consider the effect each Allow or Disallow will have. For example, the following directive would block your entire site from all crawlers, so it’s important to not get careless:
Another key thing to remember is that the directives in a robots.txt file are just that: directives. Just because you tell bots to not crawl a page or folder doesn’t mean they won’t. If a page has enough links to it, it will be indexed even it appears in your robots.txt file. If you want a guarantee that a page never appears in Google search results, you should use the noindex meta-tag instead.
For this reason, robots.txt should never be used for security purposes. If you were to ‘hide’ parts of your site in this way, your robots.txt would simply be pointing malicious bots towards the parts you least want them to look at.
Step 3: Upload the File to Your Site
When you have finished customizing your file, save it as robots.txt. It is vitally important that this is the exact file name, as it’s case sensitive. Crawlers will not find files named Robots.txt or robots.TXT, for example. You can then upload the file to your WordPress site by adding it to your root directory. It’s important that this is your WordPress robots.txt location since that’s where crawlers will look for it. If your website is http://example.com, the URL for your file should be http://example.com/robots.txt.
How you actually upload the file depends on the way your site is set up. You may need to use an FTP solution, although certain WordPress plugins will make the task a lot easier. For example, Yoast SEO features a robots.txt generator that enables you to edit the robots.txt file directly from your admin panel.
Step 4: Submit Your Edited File to Google Search Console
You’ve completed your robots.txt file and added it to your WordPress site. Now, it’s time to tell Google about it. This is done through the Google Search Console, which is the service Google provides for webmasters to check their sites’ indexing status. It also contains numerous tools for optimizing visibility.
By submitting your WordPress robots.txt file, you inform Google that you want Googlebot to crawl your site according to the directives. You should make sure to re-submit the file every time you update it. That way, you can make sure your changes take effect as quickly as possible. If you have not already registered and verified your site with Google Search Console, make sure to do that first.
Start by accessing the robots.txt testing tool. This enables you to view and test your robots.txt file before submitting it:
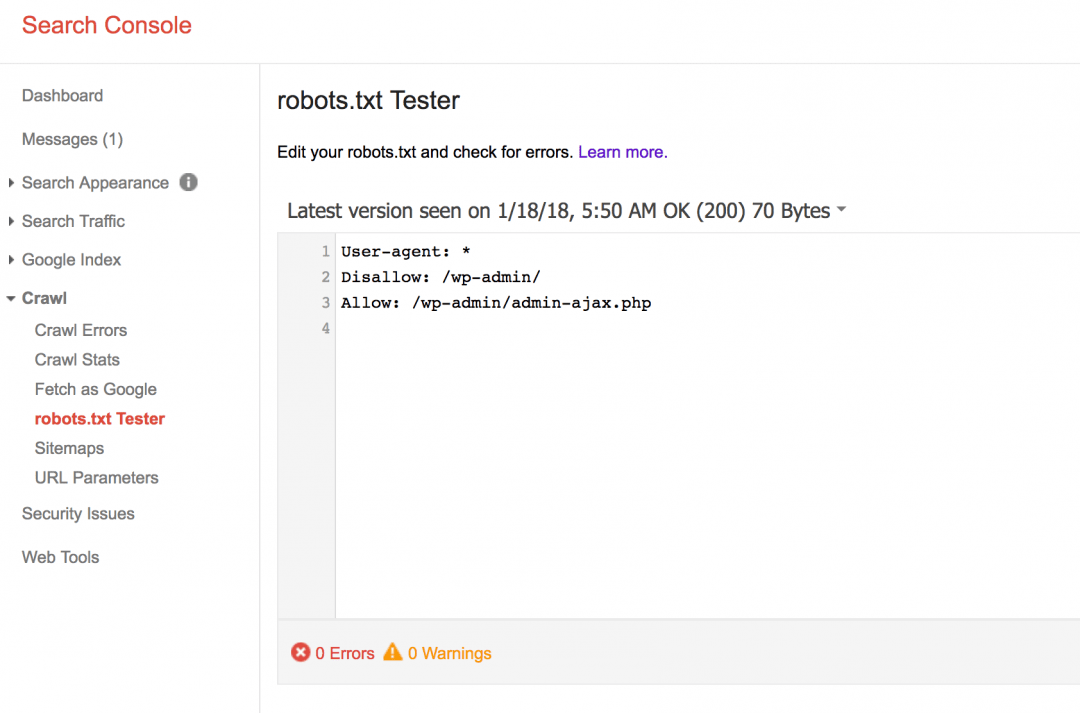
If the site is already connected to Search Console, the text editor will automatically contain your current live robots.txt file’s contents. If it contains any syntax warnings or logic errors they will be highlighted here. Edit the file to correct all issues before moving on:

Underneath the text editor is a field that lets you test whether a certain area of your site is blocked or allowed by specific crawlers:

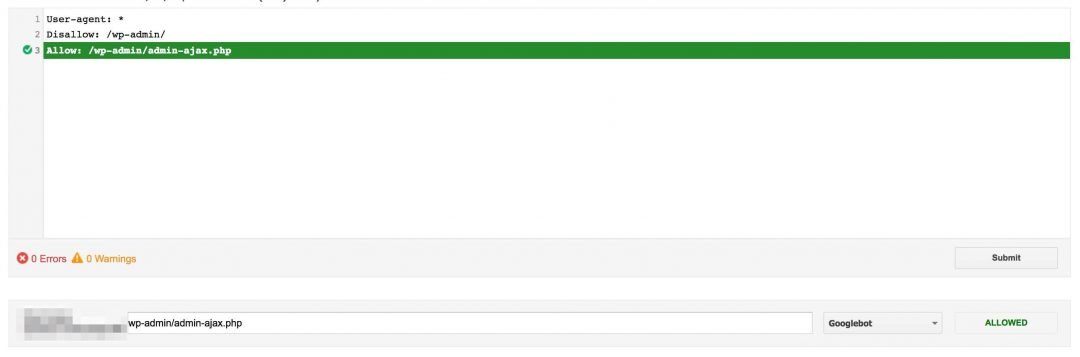
Simply enter a URL, and click Test. If the URL is not allowed, the button will now read Blocked, and the corresponding directive will be highlighted in red inside the editor:

On the other hand, if the URL is not blocked the button will read Allowed. If there is a corresponding Allow directive in the code, it will also be highlighted in green:
If the results of these tests are not what you expected or wanted, make sure to look at your code to see what changes need to be made. It’s worth using this tool to test your pages thoroughly at this stage, rather than risk having unwanted indexing occur down the line, so take your time.
When you are happy that your code contains no issues and conforms to your requirements, you can copy it from the editor and add it to your actual robots.txt file. You can then click Submit, which will open a dialog with three different options:
- Download: This generates and downloads a robots.txt file based on the contents in the tester tool’s text editor.
- View uploaded version: This opens the site’s current live robots.txt file.
- Submit: This submits the site’s robots.txt file to Google.
Click Submit when you want to ask Google to crawl your site and discover the updates. It will take a moment for Google to complete the request, but you can reload the page to see when it shows your updated WordPress robots.txt file.
Conclusion
A well-crafted robots.txt file is a powerful tool you can use to improve your WordPress site’s SEO. It enables you to control what parts of your site appear in search results and ensures that search engine crawlers pick up changes to your site more quickly.
Here’s a brief recap of the steps you’ll need to follow to create a WordPress robots.txt file:
- Create a robots.txt file using a text editing tool.
- Edit the WordPress robots.txt file to disallow all areas of the site that you do not want Googlebot to crawl.
- Upload the customized file to your website’s root directory.
- Test your robots.txt file using Google’s robots.txt testing tool, and then submit it to the Google Search Console.
Do you have any further questions about the robots.txt file? Please let us know in the comments below!