
You can write the most amazing content for your website, but if it doesn’t perform well in search engines, people are unlikely to find it. However, even if your content is properly indexed, search engines might not show all the information you want them to.
That’s where schema markup comes in. Using the right schema, you can tell search engines what information you want them to display to searchers. This can come in particularly handy if you want to use a specific format for your meta descriptions (for example, if you’re creating reviews or recipes).
In this article, we’re going to talk about what schema markup is and why it’s important. Then we’ll teach you how to check your WordPress schema markup, and discuss how to tweak it using two methods. Let’s get to work!
What Schema Markup Is (And Why It’s Important)

Schema markup enables you to customize the way your meta descriptions look.
Schema is a set of tags you can add to your web page’s description. This information helps search engines better understand the page’s content and how to display it. It has a lot of applications, but perhaps the most important is the Schema.org project. This is a collaboration between Google, Bing, Yandex, and Yahoo!, to come up with a markup language that enables you to enrich your meta descriptions.
When we talk about schema markup, therefore, we’re referring to the collection of tags cataloged by the Schema.org project. There are hundreds of them available, and learning how to use them can pay off because:
- Schema markup helps search engines make sense of your content. The more clearly search engines understand your content, the better they’ll be able to categorize it.
- You can customize your meta descriptions. Usually, meta descriptions just include plain text. With schema markup, you can include elements such as ratings and event dates, using unique formats.
Imagine, for example, that you set up a website dedicated to reviewing blenders. Your odd passion for blenders aside, it might be difficult to tempt visitors to click on your search engine results without compelling meta descriptions. One quick way to make yours stand out would be to use product schema tags to add information such as each item’s rating and number of reviews.
Here’s how that might look in action:

If you were looking for your next blender and stumbled upon a snippet like this in your search results, you’d be more compelled to click on it than if the meta description merely displayed text. What’s more, this application of schema markup makes your search result look much more professional.
There are plenty of ways to use schema markup on your website, depending on your content and goals. In fact, there are almost 600 types of schema, each with their own individual tags. That’s too many to get to know right away, of course, so let’s talk about some of the most useful types.
3 Popular Types of Markup Schema
Before we proceed, it’s important to know that there are several ways you can add schema markup to your content. We’re not talking about whether you use a plugin or go the manual route (which we’ll discuss in a moment). Instead, we’re referring to the language you’ll use to add the markup in the first place.
In most cases, people use microdata, which is a type of semantic markup designed for HTML. However, you can also add schema markup to your content using Resource Description Framework in Attributes (RDFa) or JavaScript Object Notation for Linked Data (JSON-LD). You can achieve the same results with any of these approaches. However, JSON-LD requires less code to get there, so it’s a smart choice for beginners.
For the rest of this tutorial, we’re going to use JSON-LD for our examples, as well as code taken from the Schema.org database. However, you can find RDFa and microdata examples of schema markup for any content type on Schema.org, if you’d rather use those languages.
1. Event Schemas

Event schemas are one of the most easily-recognizable when you see them on a Search Engine Results Page (SERP). They usually include event dates (in big, bold letters), a featured image, specific times, and even information about the venue.
To use this format yourself, you can use a code snippet like this:
<script type="application/ld+json">
{
  "@context": "http://schema.org",
  "@type": "Event",
  "location": {
    "@type": "Place",
    "address": {
      "@type": "PostalAddress",
      "addressLocality": "Denver",
      "addressRegion": "CO",
      "postalCode": "80209",
      "streetAddress": "7 S. Broadway"
    },
    "name": "The Hi-Dive"
  },
  "name": "Typhoon with Radiation City",
    },
  "startDate": "2013-09-14T21:30"
}
</script>
This code may seem a bit long, but it’s actually rather simple. What it does is format your page’s meta description to display an event date, set a title for it, and show information about the venue. If you look closely, you’ll realize that most of the tag names are self-explanatory, such as event-date and event-title. This is a recurring theme for schema markup types, which makes them downright simple to customize even if you’re not used to working with code.
2. Local Business Schema

If you run a website for a local business, you’ll want to make sure people can easily find information about where it’s located, when it’s open, and how to contact you. You can display all those details at a glance if you add schema markup to your WordPress home page.
Let’s take a look at what the JSON-LD code for a local business page might look like:
<script type="application/ld+json">
{
  "@context": "http://schema.org",
  "@type": "Store",
  "image": [
    "https://example.com/photos/1x1/photo.jpg",
    "https://example.com/photos/4x3/photo.jpg",
    "https://example.com/photos/16x9/photo.jpg"
   ],
  "@id": "http://davessteakhouse.example.com",
  "name": "Dave's Blender Emporium",
  "address": {
    "@type": "PostalAddress",
    "streetAddress": "148 W 51st St",
    "addressLocality": "New York",
    "addressRegion": "NY",
    "postalCode": "10019",
    "addressCountry": "US"
  },
  "geo": {
    "@type": "GeoCoordinates",
    "latitude": 40.761293,
    "longitude": -73.982294
  },
  "url": "http://www.example.com/restaurant-locations/manhattan",
  "telephone": "+12122459600",
  "openingHoursSpecification": [
    {
      "@type": "OpeningHoursSpecification",
      "dayOfWeek": [
        "Monday",
        "Tuesday",
        "Wednesday",
        "Thursday",
        "Friday"
      ],
      "opens": "11:30",
      "closes": "22:00"
    },
  ]
</script>
Using this code, our search engine results would show people that Dave’s Blender Emporium is open from Monday to Friday, between 11:30 AM and 10 PM. It also shows the business’ phone number and address, and even includes a few images of the location. The best part is that the local business schema type doesn’t only work for stores. It also includes specific tags for other places, such as restaurants.
3. Product Schema

We already talked about product schema markup and some of the things you can do with it. However, there are a lot more markup tags you can use to customize your product meta descriptions even further. For example, you can include brand information, show people if the product is in stock, or tell users how long prices will be valid for.
Here’s a quick JSON-LD example of the markup for a single product page:
<script type="application/ld+json">
{
  "@context": "http://schema.org/",
  "@type": "Product",
  "name": "Acme Blender 200X",
  "image": [
    "https://example.com/photos/1x1/photo.jpg",
    "https://example.com/photos/4x3/photo.jpg",
    "https://example.com/photos/16x9/photo.jpg"
   ],
  "description": "Sleeker than ACME's Classic Blender, the 200X model is perfect for blending afficionados and fitness nuts.",
  "mpn": "925872",
  "brand": {
    "@type": "Thing",
    "name": "ACME"
  },
  "aggregateRating": {
    "@type": "AggregateRating",
    "ratingValue": "4.4",
    "reviewCount": "89"
  },
  "offers": {
    "@type": "Offer",
    "priceCurrency": "USD",
    "price": "119.99",
    "priceValidUntil": "2020-11-05",
    "itemCondition": "http://schema.org/UsedCondition",
    "availability": "http://schema.org/InStock",
    "seller": {
      "@type": "Organization",
      "name": "Executive Objects"
    }
  }
}
</script>
In this example, we included the product’s name, a few images, a description, the brand, and pricing information. That’s just about everything a prospective buyer needs to know before making a purchase, which will hopefully entice them to click on your page.
How to Add Schema Markup to Your WordPress Website (2 Methods)
Now that you have some idea of what you can accomplish using schema markup, let’s discuss how to include it on your website. As is often the case when you want to add a new feature to WordPress, you can either use a plugin or do the job manually. We’ll go over the plugin approach first.
1. Use the Schema Plugin

The Schema plugin enables you to add schema markup to your WordPress pages and posts, without having to deal with a single line of code. It does this by enabling you to configure the tags you want to add to your schema types. Then you can choose which type to assign to your posts and pages, and the plugin automatically takes care of the rest when you publish new content.
To use the plugin, you’ll need to go to the Plugins tab in your dashboard and click on Add New. On the next screen, type Schema in the search bar to the right. The Schema plugin should show up as the first result, and you can go ahead and click on the Install Now button next to its name:

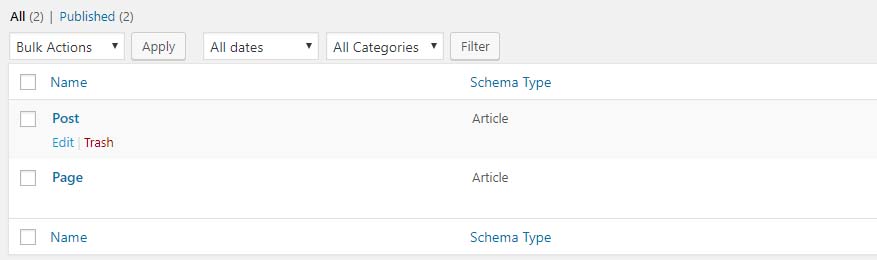
When the plugin finishes installing, click on the Activate button to start it running. Right out of the box, the plugin will assign the Article schema type to your posts and pages, which is perfect if you’re running a blog. To choose which tags the plugin will display within your meta descriptions, navigate to the new Schema > Types tab, and click on the Edit button under either Posts or Pages:
On the next screen, enable the option labeled Post meta, which will give let you customize which tags to display. Without it, the plugin will just use its default tags.
Once you enable this option, a new Post Meta section will show up right below. Inside, you’ll see a section labeled Fields, which shows what each schema type includes. For example, the BlogPosting type will include an author tag to start with:

If you want to add more tags, just click on the plus sign underneath the existing tags:
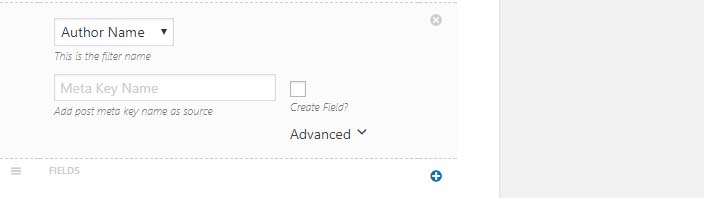
Your choices of tags for the BlogPosting type are rather limited, since this content tends to be straightforward. Other types may have more options. Either way, when you’ve chosen the fields you want to add, click the Save button.
Keep in mind that while the Schema plugin is rather easy to use, it doesn’t include all the types available on Schema.org. If you want more options, the manual approach may be the more logical option.
2. Add Schema Markup Using a Custom WordPress Field
Each page you visit has a compendium of meta data, which is information search engines use to understand what the content is about. For example, a WordPress post’s meta data might include its author, a description, and so on.
You can add specific meta data to your WordPress posts and pages using custom fields. Plus, you can use them to include schema markup for your pages and posts. The main difference between this and the previous method is that you’ll need to include the full markup code you intend to use for each page. This involves a bit more work than using a plugin that adds tags for you. However, it also provides you with far more control over the content in your meta descriptions.
Furthermore, by using custom fields you can add any of Schema.org’s nearly 600 content types to your markup. To get started, just open the WordPress editor for whichever post or page you want to add schema markup to. Then, look for the Screen Options tab at the top of the screen:

Clicking on that tab lets you choose which widgets will appear in your editor. Enable the Custom Fields option now, and a corresponding widget should show up right below the editor:
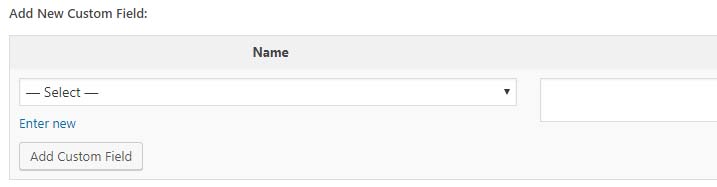
To the left, you’ll see a drop-down menu including all your existing custom field options. These should be empty right now. If you want to add schema markup to your post, click on the Enter New link below the drop-down menu, and give it a name such as SchemaMarkup:
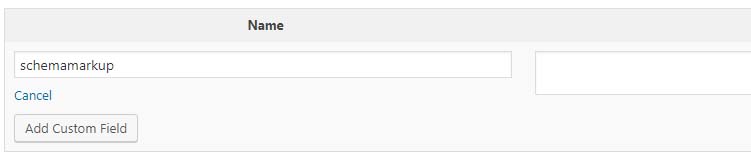
The name itself doesn’t matter. However, it should be something you can reuse later on, so you don’t end up creating dozens of unnecessary custom fields. In any case, it’s now time to add your JSON-LD code in the field to the right. For example, if you’re working with a simple blog post, here’s an example of what its markup could look like:
<script type="application/ld+json">
{
  "@context": "http://schema.org",
  "@type": "BlogPosting",
  "mainEntityOfPage": {
    "@type": "WebPage",
    "@id": "https://google.com/article"
  },
  "headline": "Article headline",
  "image": [
    "https://example.com/photos/1x1/photo.jpg",
    "https://example.com/photos/4x3/photo.jpg"
   ],
  "datePublished": "2015-02-05T08:00:00+08:00",
  "dateModified": "2015-02-05T09:20:00+08:00",
  "author": {
    "@type": "Person",
    "name": "John Doe"
  },
   "publisher": {
    "@type": "Organization",
    "name": "Google",
    "logo": {
      "@type": "ImageObject",
      "url": "https://google.com/logo.jpg"
    }
  },
  "description": "Find the perfect blender for your needs!"
}
</script>
This markup shows the name of the author, the article’s title, a couple of featured images, publication dates, and so on. Once you’ve pasted in your code, you can click on the Add Custom Field button to the left, and your schema markup will be ready to go
However, you still have to tell your theme to load the markup. To do that, you’ll need to connect to your website via an FTP client such as FileZilla, using your 000Webhost credentials. Once you’re in, navigate to the public_html/wp-content/themes folder, and look for your active theme’s directory:
Inside, there should be a file called header.php. You need to right-click on it, and select the View/Edit option. This will open the file using your local text editor. Once you’re in, paste the following script within the <head> tags at the top of the document:
<?php
$schemamarkup = get_post_meta(get_the_ID(), 'schemamarkup', true);
if(!empty($schemamarkup)) {
  echo $schemamarkup;
}
?>
What that snippet does is tell your theme to load the schemamarkup custom field you created, whenever it’s available. Do remember to replace that value if you used another name for your custom field, however.
If you choose to use this manual approach, you’ll need to add similar code to all the posts and pages you want to use schema markup on. This can be a bit of work, but in most cases, you should be able to re-use the same code and just replace a few values here and there.
How to Check Your WordPress Schema Markup
If you want to preview what your schema markup will look like once you’ve created it, the easiest way to do so is by using a service like Google’s Structured Data Testing Tool:
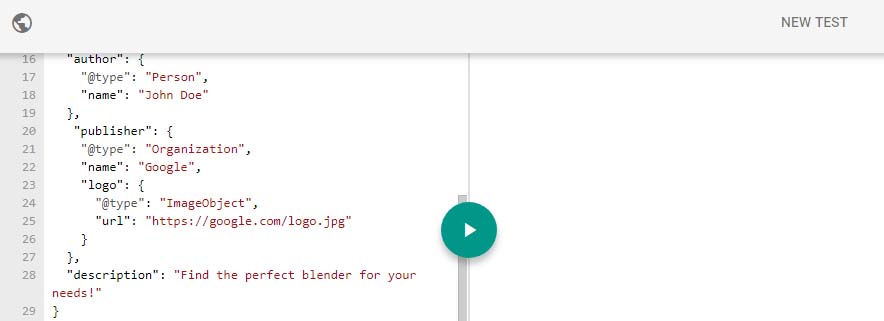
This tool fulfills two functions. It enables you to preview what your markup will look like in action, and to check and see if there are any errors in your code. In the example below, we pasted our code within the editor to the left. Then we clicked on the play button in the middle of the screen:
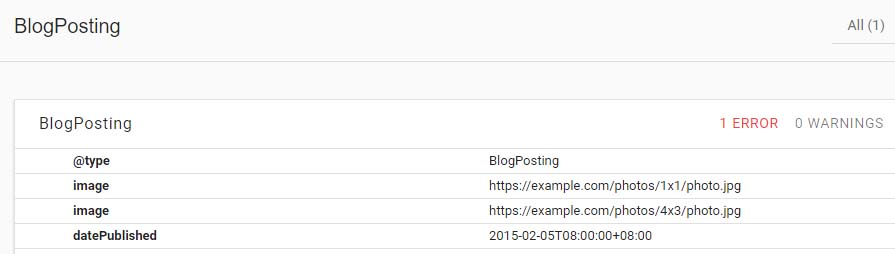
As you can see, Google’s Structured Data Testing Tool found zero errors. Now, let’s try removing a key value from our markup, such as the article’s headline. The tool will return an error now, and the preview option won’t be available:
In most cases, the smart thing to do is to test your schema markup using Google’s Structured Data Testing Tool before you use it in your content. This way, you’ll catch any errors that might render your schema markup unable to display on SERPs.
Conclusion
When it comes to growing your website, organic traffic is the most reliable way to scale your audience. Proper Search Engine Optimization (SEO) takes work, but it pays off in the long run. Plus, adding schema markup to your WordPress posts and pages is a great way to gain full control over the appearance of your meta descriptions.
Fortunately, WordPress provides you with two effective ways to add schema markup to your pages:
- Use the Schema plugin.
- Add WordPress schema through custom fields.
Do you have any questions about how to add schema markup to your WordPress pages? Ask away in the comments section below!