
WordPress plugins and themes provide you with a nearly endless array of options to customize your website. However, sometimes you’ll need – or want – to add functions and style customizations to your site manually instead of other methods such as plugins. When this happens, you’ll need to know the proper way to do it.
Adding customizations to your website manually rather than using plugins gives you a lot more control over the way things look and work. Plus, you can link those changes to your active theme so they all load together, and preserve them regardless of the other changes you make to your site.
In this article, we’re going to talk about some of the situations in which you might need to add JavaScript and styles to WordPress. Then we’ll teach you what the wp_enqueue_script function is, and how you can use it to customize your website through your theme. Let’s get to work!
Why You Might Need to Add JavaScript and Styles to WordPress
WordPress is built on the PHP programming language. However, many themes and plugins use the JavaScript language to add more functionality to your website. The same goes for Cascading Style Sheets (CSS) which is the de facto language for styling a website.
As you may know, every page has its own HTML file containing the code that makes it work, as well as its content. Most modern websites combine HTML with JavaScript and CSS to create stylish pages with plenty of functionality.
Usually, you’d link to the JavaScript and CSS files you need to load from within your page’s <head> tags:
<!DOCTYPE html>
<head>
<script type='text/javascript' src='example.js'> </script>
<link rel='stylesheet' type='text/css' href='styles.css'>
</head>
However, this approach only works when you’re dealing with a limited number of pages and customizations. WordPress websites tend to be a bit more complex, thanks to all the moving parts that go into making the platform work. If you try to load the JavaScript and CSS you need for each page using head tags, you’ll end up with a mess of things. Fortunately, there’s a cleaner way to do things, so to speak – through the wp_enqueue_script function.
What wp_enqueue_script Is (And Why You Should Use It)
The WordPress wp_enqueue_script function enables you to tell the platform which scripts and styles to load, and WordPress will work out the order it should load the files you need to avoid conflicts. This way, you won’t need to touch your pages’ header tags.
In most cases, we recommend using the WordPress wp_enqueue_script through your active theme. This way, you’ll link all of the customizations you make to it, and you can disable them if necessary by switching active themes temporarily.
There are other ways to add code to your theme manually, such as by using the wp_head and wp_footer functions. However, this approach is considered deprecated, since it can lead to similar conflicts as adding the code manually to your head tags. Here’s an example of how a wp_head snippet might look like:
<?php
add_action('wp_head', 'wp_script');
function wp_script() {
echo 'Your text goes here';
}
?>
Functionally, it works the same. However, wp_head would add the script to every single page on your website. wp_enqueue_script, on the other hand, only loads it when necessary, which can lead to better performance. With this in mind, let’s talk about how to use it.
How to Add JavaScript and Styles to WordPress Using wp_enqueue_script (In 4 Steps)
In the next sections, we’re going to teach you how to make some significant changes to your website’s functionality and style. Before you start customizing things, you should backup your website just in case. If you’re not sure how to do it, check out the section below before you jump into the rest of the tutorial.
Step #1: Back Up Your WordPress Website
If you’re a 000Webhost user, you already have access to a backup tool within your WordPress dashboard. It’s a plugin called All-In-One WP Migration, which comes pre-installed on all of our sites, and can be used to move a website to a new host or to create backups.
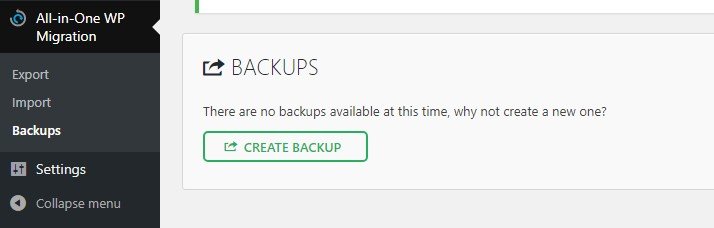
To set up a backup, go to All-In-One WP Migration > Backups within WordPress. Inside, you’ll find an option that reads Create New:
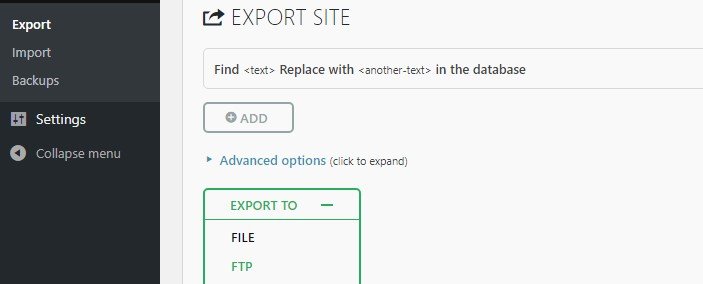
If you click on it, the plugin will ask you to choose where it should store your backup. For example, you can link the plugin to several cloud storage services, which provides you with an added layer of security. Those platforms, after all, usually enable you to recover files you’ve deleted by mistake, which means you’ll never lose a backup.
For now, choose the option that says File, which will enable you to download a copy of your backup. Then wait a minute or two while the plugin saves all of your data:
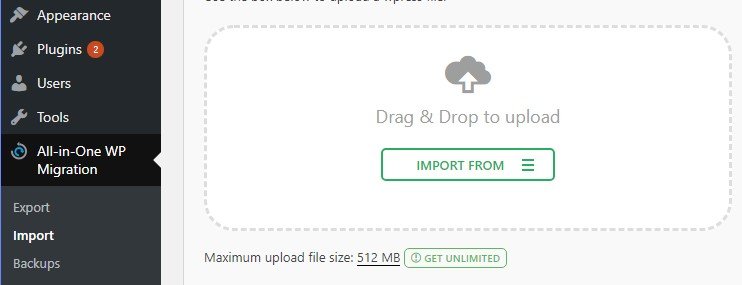
When it’s done, you’ll see a link to download your backup file. If you ever need to restore it, you can go to the All-In-One WP Migration > Import tab, where you’ll find an option to upload your backup:
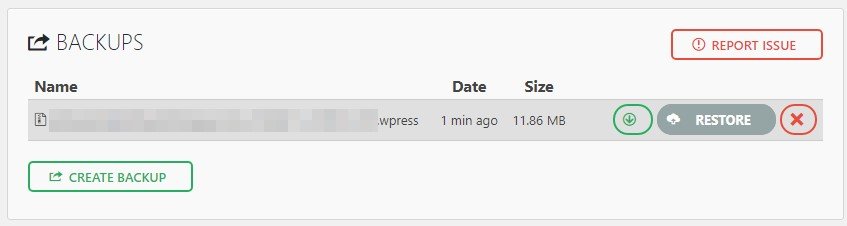
All-In-One WP Migration also keeps a database of past backups, which you can access from All-In-One WP Migration > Backups. Next to each one, you’ll find options to re-download the file, delete it, or restore your website to its previous state.
Usually, we recommend you backup your website at least once a week, just to be on the safe side. However, if you publish new content multiple times per week or run a very popular site, you’ll probably want to create backups more often.
Step #2: Locate Your Theme’s functions.php File
As we mentioned earlier, the safest way to enqueue scripts on your website is through your theme’s functions.php file. In case you’re not familiar with it, this file enables you to add new functionality to your theme using PHP. Every theme and plugin on your website has their own functions.php file, but in this case, we’re going to edit the one that’s linked to your active theme. This way, your custom scripts and styles will load by default unless you switch to a different option.
To find the file, you’ll need to use File Transfer Protocol (FTP), which is a technology that enables you to connect to your website via a client and use it to transfer data back and forth securely. We recommend you use FileZilla as your client since it’s open-source and it offers everything you’ll need to get started.
However, before you can connect to your website via FTP, you’ll need a unique set of credentials. You can find yours by logging into your 000Webhost dashboard and going to the Settings > General tab. Inside, look for the section that says FTP Details – the credentials you need are here:
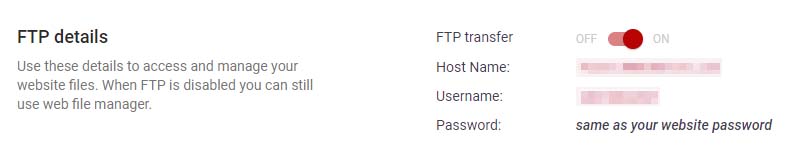
Keep this tab open while you install and run FileZilla. When you launch the client, you’ll notice several empty fields at the top of the screen, corresponding to your FTP credentials. Type in your Host Name, Username, and 000Webhost Password, then click on the Quickconnect button to the right:

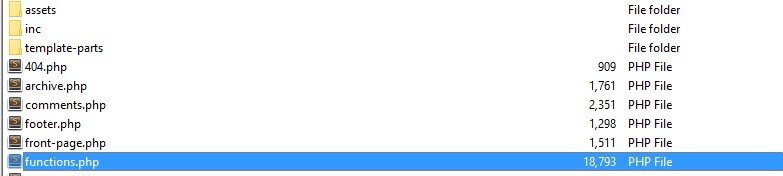
FileZilla will connect to your website, and its folders will show up on the lower-right side of the screen. One of those folders is called public_html and it contains all your WordPress files and directories. Open this, then navigate to wp-content/themes, which contains individual folders for each of your WordPress themes. Look for the one that corresponds to your active theme and enter it – the functions.php file should be easy to spot:
In the next step, we’re going to talk about how to add JavaScript to functions.php. Then, step number three will deal with CSS styles, to avoid confusion between the two types of customizations you can add via wp_enqueue_script. Let’s get to it!
Step #3: Add the Scripts You Want to functions.php
Editing your functions.php file is simple. Simply right-click it and choose the option that says View/Edit. This will download a copy of the file to your computer and open it using your local text editor. There should be a lot of code within your file, which will vary depending on the theme you’re using. Ignore all of it for now and scroll down until you find the line reading /* That’s all, stop editing! Happy blogging. */, which marks the end of the file.
You can add new code to your functions.php file anywhere you want, but the best approach is to do it right before that line to avoid messing with other snippets. Let’s break down an example of how to use the wp_enqueue_script to add JavaScript to the file:
<?php
function wpb_adding_scripts() {
wp_register_script('my_custom_script',  get_template_directory_uri('custom_script.js', __FILE__), array('jquery'),'1.1', true);
wp_enqueue_script('my_custom_script');
}
add_action( 'wp_enqueue_scripts', 'wpb_adding_scripts' );
?>
The first thing this code does is register the script you want to add using the name you set. In this case, we went with my_custom_script, then linked it with a .js file containing the script itself (custom_script.js). Keep in mind – the get_template_directory_uri function only works if you’re using wp_enqueue_script through a plugin. That code will change to one of the options below depending on where you use the function:
- Use plugins_url if you add the code through a plugin’s functions.php file.
- Use get_stylesheet_directory_uri if you add the code through a child theme.
In any case, once you register the script, you use wp_enqueue_script to tell WordPress to load it when it’s necessary. When you’re ready, save the changes to your functions.php file and close it. FileZilla will ask you if you want to update the version of the file in your server, to which you should say “Yes”.
Step #4: Use wp_enqueue_script to Add Styles to Your Theme
The process for adding styles to your theme’s functions.php file works just the same as with scripts. However, the code you need to use varies a little, hence why we’re covering it in a separate step. If you’re not there, return to your active theme’s folder and open your functions.php file again using your local text editor. Here’s an example of the code you’d need to use to enqueue a CSS file using wp_enqueue_script:
<?php
function wpb_adding_styles() {
wp_register_style('my_stylesheet', get_template_directory_uri('my-stylesheet.css', __FILE__));
wp_enqueue_style('my_stylesheet');
}
add_action( 'wp_enqueue_scripts', 'wpb_adding_styles' );
?>
You’ll notice there’s a new function thrown in the mix here, called wp_enqueue_style. We use that function to enqueue the CSS file you registered a second ago, called my-stylesheet.css. However, we return to the default wp_enqueue_scripts function at the end to tell WordPress to load those styles into your queue.
There are a couple of semantic differences, but the underlying process remains the same. You register the style or script you want to load and then tell WordPress to enqueue it. Just as you did earlier, remember to save the changes to functions.php, and tell FileZilla to update the version of the file on your server.
Conclusion
Adding code to your website can be scary if you’re used to dealing only with plugins and themes. However, there’s nothing to be afraid of if you add your customizations in the correct way. Using the WordPress wp_enqueue_script function is the best approach when it comes to JavaScript and CSS styles, since it limits them to your active theme. This way, you can turn those customizations off at a moment’s notice if necessary.
If you’re not sure how to add scripts and styles to your theme, here’s a quick rundown of the steps involved:
- Backup your site first.
- Locate your theme’s functions.php file.
- Add the scripts you want to functions.php.
- Use wp_enqueue_script to add styles to your theme.
Do you have any questions about how to use the WordPress wp_enqueue_script function? Let’s talk about them in the comments section below!