So you’ve setup your website and your custom domain, but you want more; you want subdomains. Luckily, creating subdomains with 000webhost isn’t that difficult — if you haven’t already used your second free 000webhost website, it’s actually very easy.
First though, you’ll need to setup your custom domain using Cloudflare. If you haven’t already, what are you waiting for? Follow the tutorial below to get Cloudflare setup, then come back here for your subdomain setup!
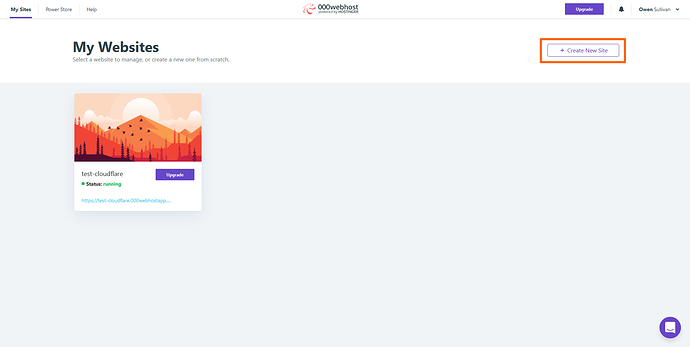
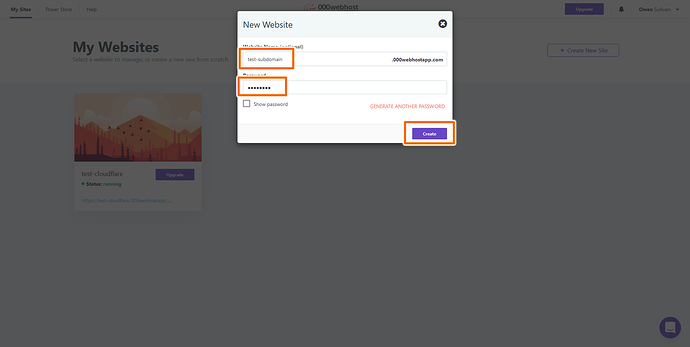
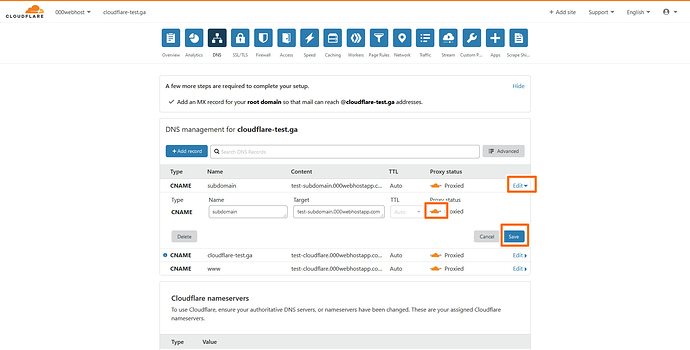
Once you’ve setup your domain using Cloudflare, adding subdomains is simple. Let’s say your domain is mydomain.com, and you want your subdomain to be newsite.mydomain.com. All you need to do is add a new DNS record in Cloudflare, just like you did before, and create a new site with 000webhost.
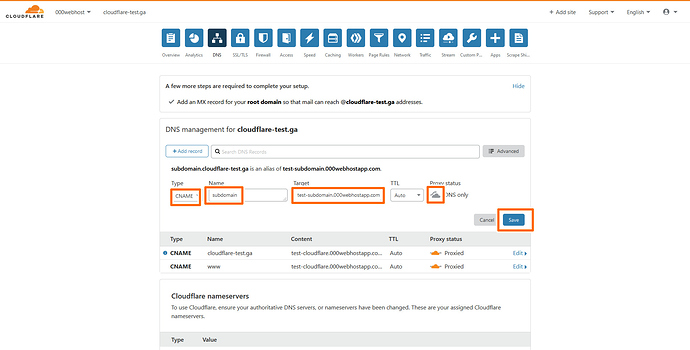
The record should be CNAME, the “Name” field is whatever you want your subdomain to be, the “Target” field is the full address of your newly created site, and the orange cloud should be flipped to gray.
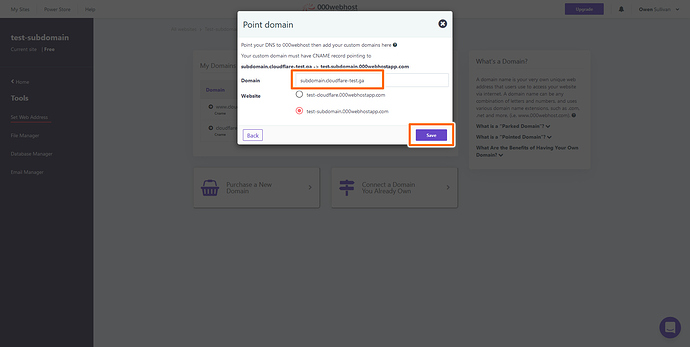
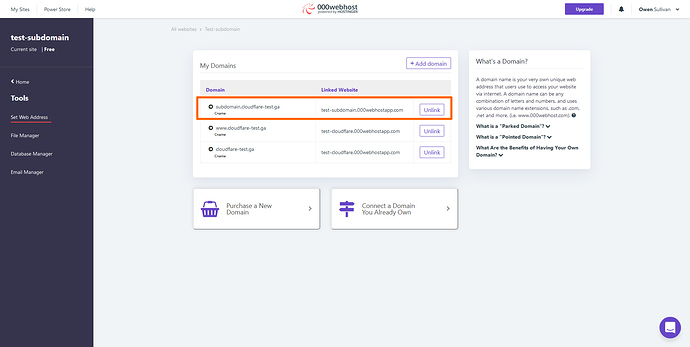
Once the record is saved, go to your new site’s Tools > Set Web Address page and click “Add Domain”. You’ll notice that your previously added domain will appear under that button.
Follow the steps to add the subdomain using the same steps as you followed for the main domain. Use the “Point” method, select the right site (the one you just created), and enter your subdomain address in the box. Then hit “Save”.
And you’re almost done! You’ll notice the subdomain has been added in the “Set Web Address” page, so just flip the new DNS record’s cloud to orange in your Cloudflare DNS page and you’re done!
Hope this tutorial helped you add a subdomain to your site. Remember, if you need unlimited subdomains with one-click configuration, check out a premium plan at Hostinger.
