
Your choice of font is critical to your website’s design. You may think no one cares which font you use – as long as it’s not Comic Sans – but this couldn’t be further from the truth. Fonts can impact usability, readability, and style. Plus, using the same default WordPress fonts as everyone else impacts your ability to stand out.
Learning how to change fonts in WordPress is easy. The platform can use any font you want as long as you set it up the right way. Once you pick the perfect typeface and set it up, you’ll be surprised at how different your content looks and how easy it is on the eyes.
In this article, we’re going to talk a bit more about why you should consider using custom fonts in WordPress. Then we’ll teach you three ways to add new fonts to your website. Let’s get to work!
Why You Should Consider Using Custom Fonts in WordPress

There are thousands of free fonts you can find online and chances are one of them will go perfectly with your design.
In most cases, WordPress websites default to using ‘web-safe’ fonts to avoid any issues. These are typefaces most systems include by default. This way, you can ensure your website’s content looks much the same regardless of which operating system or browser your visitors use.
However, it’s also easy enough to set custom WordPress fonts, which are compatible with most browsers and setups. Here’s why it makes sense to use custom WordPress fonts over more traditional options:
- To make your site stand out. Using custom fonts for your headings and subheadings can make a strong impression if the typefaces you choose are unique. What’s more, using a unique custom font or two can separate your site from the rest of the pack.
- To increase your content’s readability. Some fonts are easier on the eyes when it comes to reading long stretches of content. A font with poor readability could frustrate visitors and drive them away.
Perhaps more importantly, there are very few downsides to using custom WordPress fonts on your website. The only issue you might run into is if you decide to use a font that looks unprofessional – but unfortunately, we can’t improve your inner taste indicators!
How to Add Custom WordPress Fonts the Correct Way (3 Methods)
When it comes to adding custom fonts to WordPress there are three approaches you can take. You can either use a plugin, or go down the manual route. If you decide to go manual, you can add them through your theme’s header.php file or via Cascading Style Sheets (CSS). In this section, we’re going to showcase all three methods using different fonts, so you can choose which one you prefer.
1. Add Google Fonts to WordPress Using a Plugin

On top of its many other services, Google also offers a broad collection of fonts you can use throughout your web designs. Their catalog includes over 800 open-source fonts and it’s one of the most popular repositories available online.
If you want to use a font locally, you need to install a ‘font file’ so your computer can recognize and use it. When it comes to websites, the same principle applies. You have to load the font so browsers can view it. As we mentioned earlier, there are several approaches you can take to achieve this – the easiest one involves using plugins.
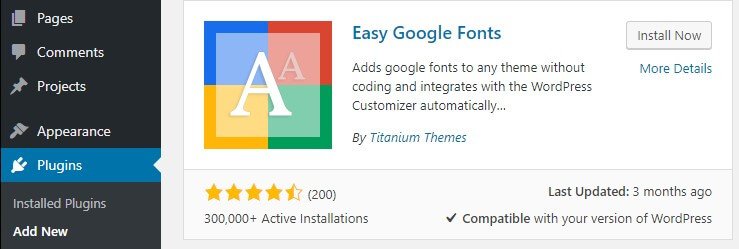
When it comes to adding Google Fonts to WordPress, we recommend using the Easy Google Fonts plugin. This tool loads Google’s library of fonts for you, then use the default WordPress editor to switch between them:

To install the plugin, head into the Plugins > Add New tab within WordPress. Now type Easy Google Fonts into the search bar to the right of the screen and wait for the plugin to show up among the results:
Click on the Install Now button and WordPress will take care of setting up the plugin. When it’s ready to use, an Activate button will show up next to the plugin’s name. Click on it and we can get to work.
Changing your font settings is rather simple once the plugin is active. Just jump to the Appearance > Customize tab and look for the Typography tab on the left-hand menu:
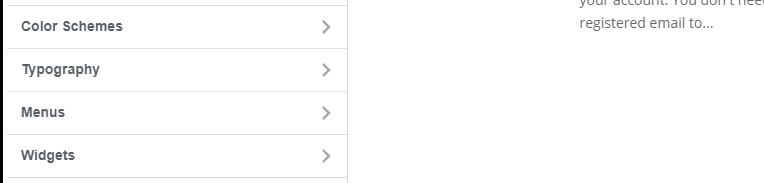
Once you open this tab, you’ll see an option called Default Typography. Inside this section, you can change the fonts WordPress uses for each section of your website:

With the plugin active, you’ll be able to choose from the entire collection of Google Fonts. Simply pick the fonts you want to use and preview them using the Customizer. Play around with your new set of WordPress Google Fonts until you land on your final picks and hit the Publish button. Now your website should be sporting a brand new look!
2. Set Up Adobe Typekit Fonts Through Your Theme’s header.php File
If you want a little more variety than Google Fonts can offer, you can always check out Adobe Typekit’s repository. Unlike Google Fonts, Adobe Typekit features both free and premium fonts and there are a lot more options to choose from.
However, implementing Adobe Typekit fonts is also a bit more complex. To use them, you’ll need to create a kit and load it into your website. Kits can have multiple fonts, so you don’t need to add much code to integrate them, but they take some time to set up at first.
First off, you’ll need to sign up for an Adobe Account to use the service. Once you’re logged in, look through the Typekit catalog until you find a font you like, and click on the Web Use: Add to Kit button:
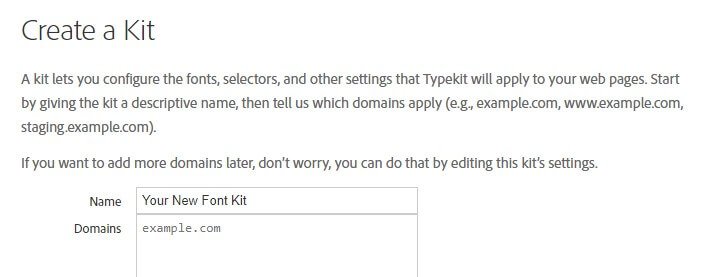
Now the platform will ask you to set a name for your kit and indicate the domains that will use it, as in the example below:
Afterward, Adobe Typekit will provide you with a JavaScript snippet that you’ll need to add to your website, which brings us to the second part of this step. To add that code, you’ll need to access your website’s back end, and we’re going to use File Transfer Protocol (FTP) to get there. FTP is a technology that enables you to connect to your website, send files back and forth, and edit them. To use FTP, you need a client and in most cases, we recommend using FileZilla since it’s a powerful open-source application.
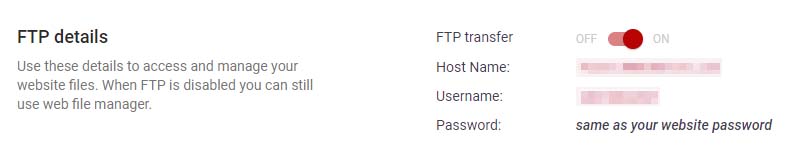
Installing FileZilla works just like any other computer application. When you run it, the client will ask you for a set of FTP credentials to connect to your website, including a Host, Username, and Password:
 These credentials are not the same as those for your WordPress admin account. Depending on your host, you may have received them via email at the initial signup stage. Otherwise, you should be able to find them within your hosting panel. For example, if you’re a 000Webhost user, you can get your FTP credentials by going into Settings > General within your dashboard. There’s a section called FTP Details right at the top of the screen, including the information you need:
Once you type the information into FileZilla, you can click on the Quickconnect button to the right. The client will establish a connection to your website, and show a couple of folders on the lower-right side of your screen:

One of those two folders is called public_html and it includes all your WordPress files. Within here, navigate to the wp-content/themes directory. Inside, you’ll find individual folders, one for each theme installed on your website:
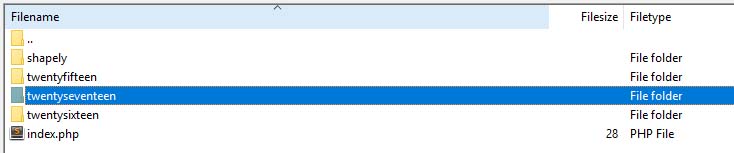
Now, look for the folder that corresponds to your active theme. Inside, there should be a file called header.php:
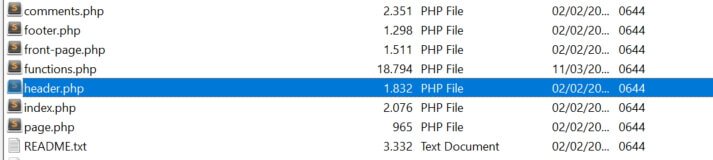
It’s important that you find the header.php corresponding to your active theme. Otherwise, the fonts you add to it won’t load unless you switch themes. In any case, right-click your header.php file and choose the option reading View/Edit:

This will open the file using your default local text editor, enabling you to make changes to it. In this case, we’re going to add the JavaScript code you got from Typekit earlier, between your file’s <head> tags.
Save your changes and close the file. Unlike using plugins, you also need to configure your theme to use your new fonts when you want it to. To do it, you’ll need to edit its style.css file, which we’ll explore how to do in the next step.
3. Add Custom Fonts to WordPress Using CSS
If you want to use a custom font that’s not part of the Google Fonts or Adobe Typekit family, WordPress enables you to do so using CSS. Unlike the methods we’ve explored so far, this approach requires you to upload a font file to your server. To do so, you’ll need to use FTP as in the previous example.
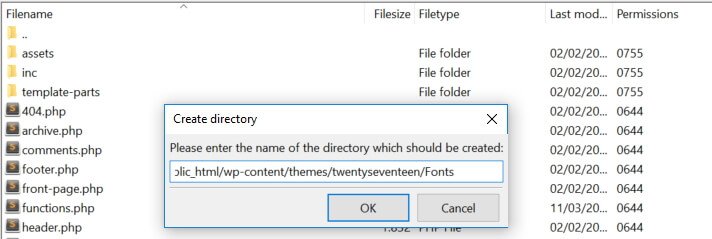
To get started, return to your active theme’s folder, located within the public_html/wp-content/themes directory. Once you’re in, right-click anywhere within the folder and choose the Create Directory option. FileZilla will ask you to set a name for your new folder, where you’ll store the fonts you want to use. In our case, we went with the name Fonts:
Enter your new folder and take a look to the left of your FileZilla window. The client also enables you to browse your local files and folders, so you can upload any of them to your server. Locate the font file you want to upload and when you find it, drag-and-drop it within the Fonts folder to the right,
FileZilla will take care of uploading the file and when it’s ready, we can move onto the CSS part of this section. If you return to your active theme’s main folder, you’ll find a style.css within:

This file contains your theme’s main CSS stylings and we need to edit it so it loads your new WordPress fonts. We’ll also use CSS to tell the platform where to use it. Go ahead and open the style.css file now by right-clicking on it and choosing the View/Edit option. The contents of your style.css file will depend on the theme you’re using, but just in case, don’t make any changes unless you’re sure what you’re doing. For now, all we have to do is add a single snippet of code:
@font-face {
    font-family: Font Name;
    src: url(http://www.yourdomain.com/wp-content/themes/your-active-theme/fonts/font-name.ttf);
    font-weight: normal;
}
As you may notice, the snippet contains two placeholders. The first one is the name of your font (Font Name) and the second is the URL. You’ll need to replace both and in the case of your URL, remember to specify the name of your active theme’s folder, the font you’re trying to load, and add the .ttf suffix to it. With the code in place, WordPress will know it has to load your new font. However, you still need to tell the platform how to use it, which we can do without leaving the style.css file. Here’s an example of how to put your new font to work:
.h1 site-title {
font-family: "Font Name", Arial, sans-serif;
}
In this case, we’re telling WordPress to use your new font for H1 headings. However, you’re free to use it for practically any other purpose. If you’re not sure what kinds of elements you can edit using CSS or how to do so in the first place, this tutorial is a good place to get started.
Conclusion
Depending on your theme, WordPress enables you to use dozens of fonts. You may be able to find a decent fit for your site’s style among them, but there’s no reason to limit yourself when you have thousands of options to choose from. Whatever type of font you want, you can find it if you look in the right place, such as Google Fonts or Adobe Typekit.
When you’ve found the font(s) you want to add to WordPress, here’s how to proceed depending on where they’re from:
- Add Google Fonts to WordPress using the Easy Google Fonts plugin.
- Set up Adobe Typekit fonts through your theme’s header.php file.
- Add custom fonts to WordPress using CSS.
Do you have any questions about how to change fonts in WordPress? Let’s talk about them in the comments section below!