
Many users expect the majority – if not all – of the websites they visit to be fast as secure. The former is fairly straightforward if you know what you’re doing. However, protecting your site and your user’s data can be more complicated.
Fortunately, any website can implement a Secure Sockets Layer (SSL) certificate for very little outlay, quickly. This protects the information flowing back and forth from your website, and setting one up is relatively easy.
In this article, we’re going to talk about what SSL certificates and HTTPS are and how they work. Then we’ll teach you how to force WordPress SSL connections to keep your user’s data safe, using three different methods. Let’s get to it!
An Introduction to Secure Socket Layers (SSL)

You can easily spot websites with SSL certificates thanks to the green padlock symbol and its variants.
In a nutshell, Secure Sockets Layer (SSL) makes it possible to encrypt communications between two devices. To use the protocol, your website needs to obtain an SSL certificate, which basically tells people it can be trusted to keep information secure. These certificates are given out by ‘authorities’, and the process is very simple overall.
As you may have noticed, websites include either the Hypertext Transfer Protocol (HTTP) prefix within their URLs, or use HTTPS. The latter is (in short) a version of HTTP that works over an SSL connection to keep your information safe.
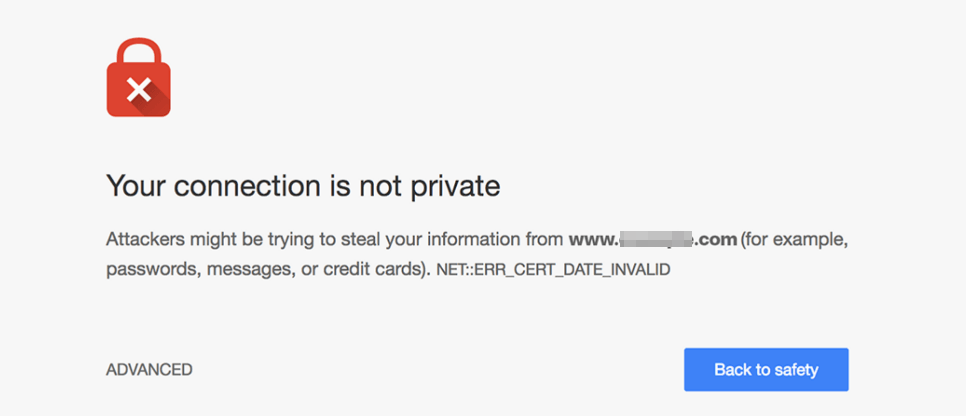
To sum up, you need an SSL certificate if you want to load your website over HTTPS, and even then, you still need to configure it. Technically, you can try to force an HTTPS connection to a site without a certificate, but most modern browsers will present a warning, which can scare visitors away:
Moreover, SSL certificates aren’t unique to WordPress websites. In fact, every site that stores user information in one way or another should look to set up a certificate and enable HTTPS. On top of the security benefits, WordPress SSL certificates can also be a boon to you in other ways:
- They can help to increase visitor trust. Chances are most of the websites you visit on a daily basis use SSL and HTTPS. Sites that don’t use HTTPS by default can stand out like sore thumbs.
- Certificates tell people you’re the real deal. Most online banking pages, for example, tell you to watch out for the green padlock on your navigation bar, which tells you it’s not a phishing website.
- They can impact your Search Engine Optimization (SEO). Google has signaled that it takes the use of HTTPS into account when it comes to ranking your website. Content is still king, of course, but every little edge helps when it comes to SEO.
There are also multiple types of SSL certificates you can opt for. Some of them have more stringent requirements than others depending on the type of site you’re running. For example, online stores and services such as banking require more thorough certificates, which can be costly.
If you’re running a regular website, such as a blog, a landing page, or something of the sort, you don’t need a paid certificate. Moreover, some web hosts will take care of setting one up for you, so you have the option of enabling HTTPS whenever you want to. As it so happens, we set up SSL certificates and enforce HTTPS for all of our WordPress customers. This means if you use 000Webhost, you can skip the steps below since the process is already taken care of (you’re welcome!).
How to Force SSL on WordPress Websites (Using 3 Methods)
When we talk about forcing SSL, we refer to making sure your site loads over HTTPS by default. This way, you increase safety across the board, even if they don’t type HTTPS specifically as part of your URL.
For this section, we’ll assume you already have an SSL certificate set up for your website. If you don’t, most browsers will show users a warning message when they try to access your site over HTTPS. This is something you want to avoid at all costs since it’s an excellent way to scare people away.
Method #1: Use a WordPress SSL Plugin
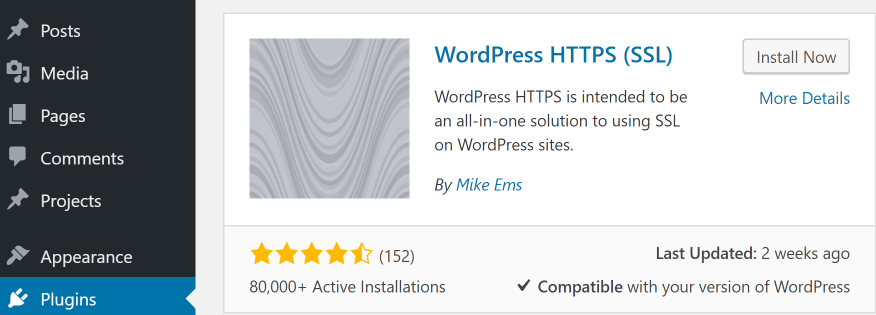
As is almost always the case, the easiest way to implement the feature we want to WordPress is through a plugin. There are plenty of tools you can use for the job, but our favorite WordPress SSL plugin is WordPress HTTP (SSL):
This plugin stands out because it enables you to force HTTPS for all your pages and your WordPress admin screens. What’s more, you can pick and choose which pages you want to force HTTPS on. For example, it may not be necessary for your blog posts to load over HTTPS, but it can be critical if you also sell items online.
To get started, access your WordPress dashboard, go to the Plugins tab, and click on the Add New button. On the next page, type WordPress HTTPS (SSL) in the search bar to the right and wait for the plugin to show up as the first result:
Click on the Install Now button, wait until it reads Activate, then click on it again. Now the plugin is ready to use, and you can configure it by going to the HTTPS tab on your dashboard. There are a lot of options here, but for now, you should only care about two of them:
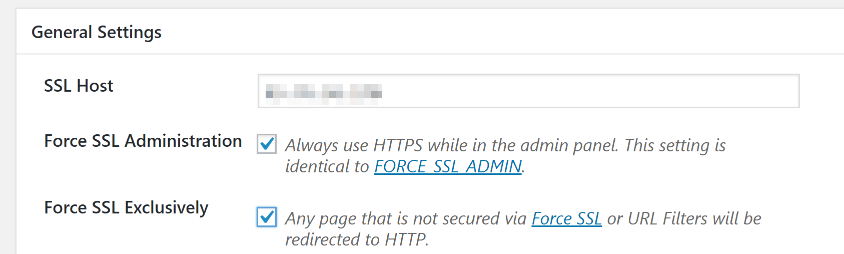
Enabling the Force SSL Administration setting will cause WordPress to load your dashboard over SSL. Just as with your users, it’s the more secure option, so it makes sense to take advantage of it. Likewise, you’ll also need to enable the Force SSL Exclusively option underneath. This setting will make it so all the pages you’ve configured will load over HTTPS exclusively. Click on the Save Changes button at the bottom of the section after enabling both settings.
Now, you’ll need to work your way through your website, loading the editor for all the pages you want to load over HTTPS. If you scroll down, you’ll find a new HTTPS widget to the right of your editor. You can use this widget to force the specific page or post to load over HTTPS by enabling the Secure post option:
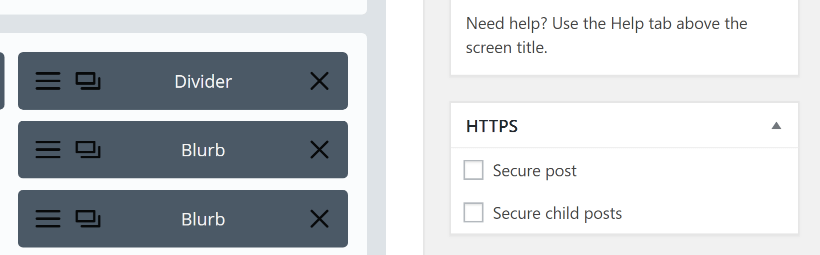
Likewise, you can also force HTTPS for all child pages from the parent, by enabling the Secure child posts option. When you’re done, save the changes to your page and that’s it. If you try to load the page or your admin panel using HTTP as part of their URLs, WordPress will instead force them to load over HTTPS.
Method #2: Edit Your .htaccess File
The .htaccess file is one of your WordPress core files, which is a fancy way of saying your website can’t function without it. This particular file governs the way your website interacts with its server. Here’s what it looks like:
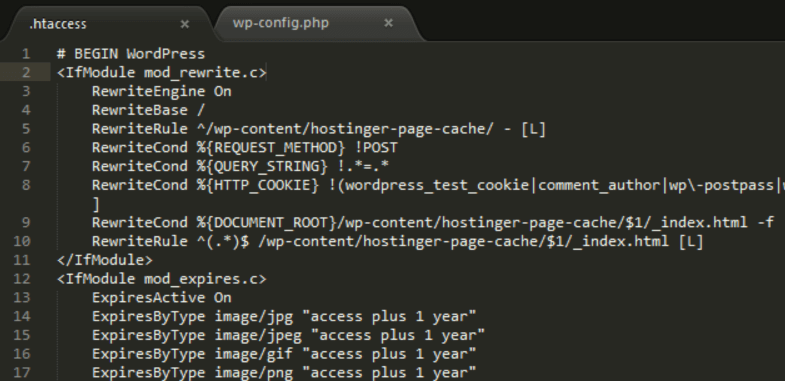
In a moment, we’ll teach you how to access your .htaccess file and edit it to force your website to load over HTTPS. For now, you should know that if you’re a 000Webhost user, your .htaccess file already has a few custom additions of its own, including a few lines to force HTTPS usage throughout the website. We tweak the settings for every WordPress site on our servers to ensure the best possible performance. Your .htaccess file enables us to do that by implementing advanced caching rules, for example.
Even so, let’s break down how to force HTTPS if you’re using another web host. First off, you’ll need to use File Transfer Protocol (FTP) to access your website’s files. To connect to your site via FTP, you’ll need a client such as FileZilla, and a set of credentials separate from those of your WordPress website. To find your FTP credentials, log into your 000Webhost control panel and go to the Settings > General screen. Inside, look for the FTP details section at the top of the screen:
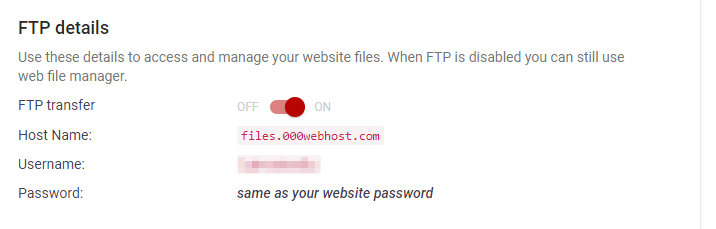
FTP transfer should be turned off by default. The credentials you’ll need are Host Name, Username, and Password (the latter is the same as your main 000Webhost account). Take note of all three and run FileZilla. You’ll see three empty fields at the top of the screen called Host, Username, and Password. Fill them out with the credentials you saved earlier, and click on the Quickconnect button:

Now two folders will show up in the lower right corner of your FileZilla screen. One of them is called public_html, which is also known as your WordPress root folder:

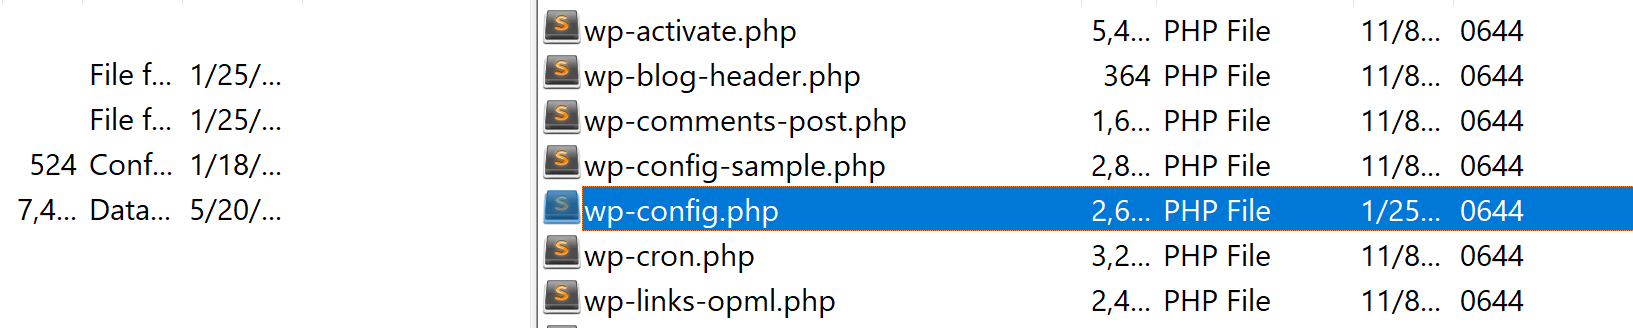
Open it and look for your .htaccess file right within. It should show up right near the top of the list of files and folders:

Right-click on .htaccess and choose the View/Edit option. This will open the file using your local default text editor, enabling you to make changes to it, then save them to your server.
Before you make any changes to the file, go ahead and read our primer on how to interact with .htaccess. It’s a sensitive file, so you want to make sure you don’t make any changes to it without knowing how to do so safely. Here’s the code you need to add to your .htaccess file to force WordPress to load over HTTPS:
RewriteCond %{HTTPS} off
RewriteRule ^(.*)$ https://%{HTTP_HOST}%{REQUEST_URI} [L,R=301]
This snippet should go before the line reading # END WordPress. Go ahead, paste it, save the changes to your file, and close it. Remember, if you’re a 000Webhost user, we already took the liberty of adding those lines to your .htaccess file for you, so you’re good to go.
Method #3: Tweak Your wp-config.php File to Force SSL in WordPress
This last method is perfect if you just want to tell WordPress to force SSL use within your admin pages. In this case, you also need to tweak WordPress core file. This one contains a lot of your critical WordPress configuration settings, and it enables your website to connect to its database.
To update your wp-config.php file, return to your WordPress public_html or root folder. When you locate the file within the directory, right-click on it and choose the View/Edit option once more:
Once the file opens, scroll down until you find the /* That’s all, stop editing! Happy blogging. */ line. This marks the end of the file, and you need to paste the following snippet right above it:
define('FORCE_SSL_ADMIN', true);
define('FORCE_SSL_LOGIN', true);
The first line tells WordPress always to load your dashboard over HTTPS and the second does the same for your login screen. You can use either command independently, but if you’re going to enforce HTTPS, it makes sense to target all of your critical pages.
Keep in mind – you can achieve the same results using the plugin we introduced during method number one. The only difference between the two methods lies in whether you feel comfortable tweaking WordPress core files or not.
Conclusion
Securing a website doesn’t require you to be a network administrator. You can go a long way just by setting up solutions such as SSL certificates and forcing your site to load over HTTPS whenever possible. That way, your user’s information will always be encrypted, and you may even get a decent SEO boost for your efforts.
If you’re using a WordPress SSL certificate, here are three ways to force your website to load over HTTPS:
- Use a WordPress SSL plugin, such as WordPress HTTPS (SSL).
- Edit your .htaccess file.
- Tweak your wp-config.php file to force SSL in WordPress.
Do you have any questions about how to set up a WordPress SSL certificate or force HTTPS? Ask away in the comments section below!